# Welcome

This documentation will guide you through all there is to know about the Chatlayer platform.

**Welcome to the Chatlayer documentation! Using our easy-to-follow tutorials and visual guides, you'll be able to build a voice or chatbot and have personalized conversations with your customers.**

## Build conversations that your customers love

Not sure where to start? We've got you covered with the basics of Conversation design and bot tutorials. Looking for a concrete example? Have a look at our templates.

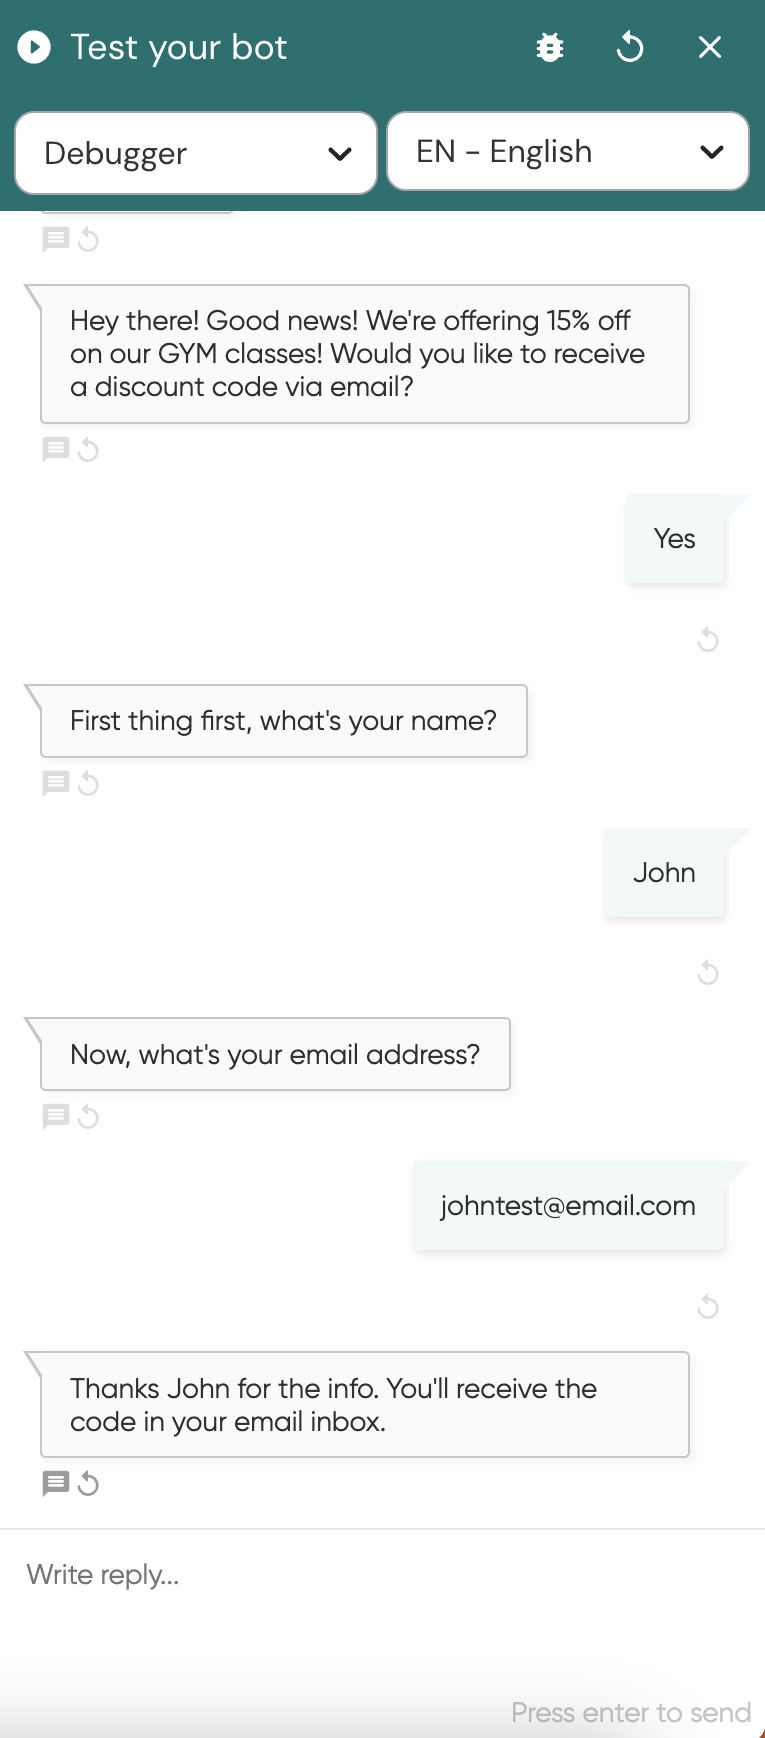
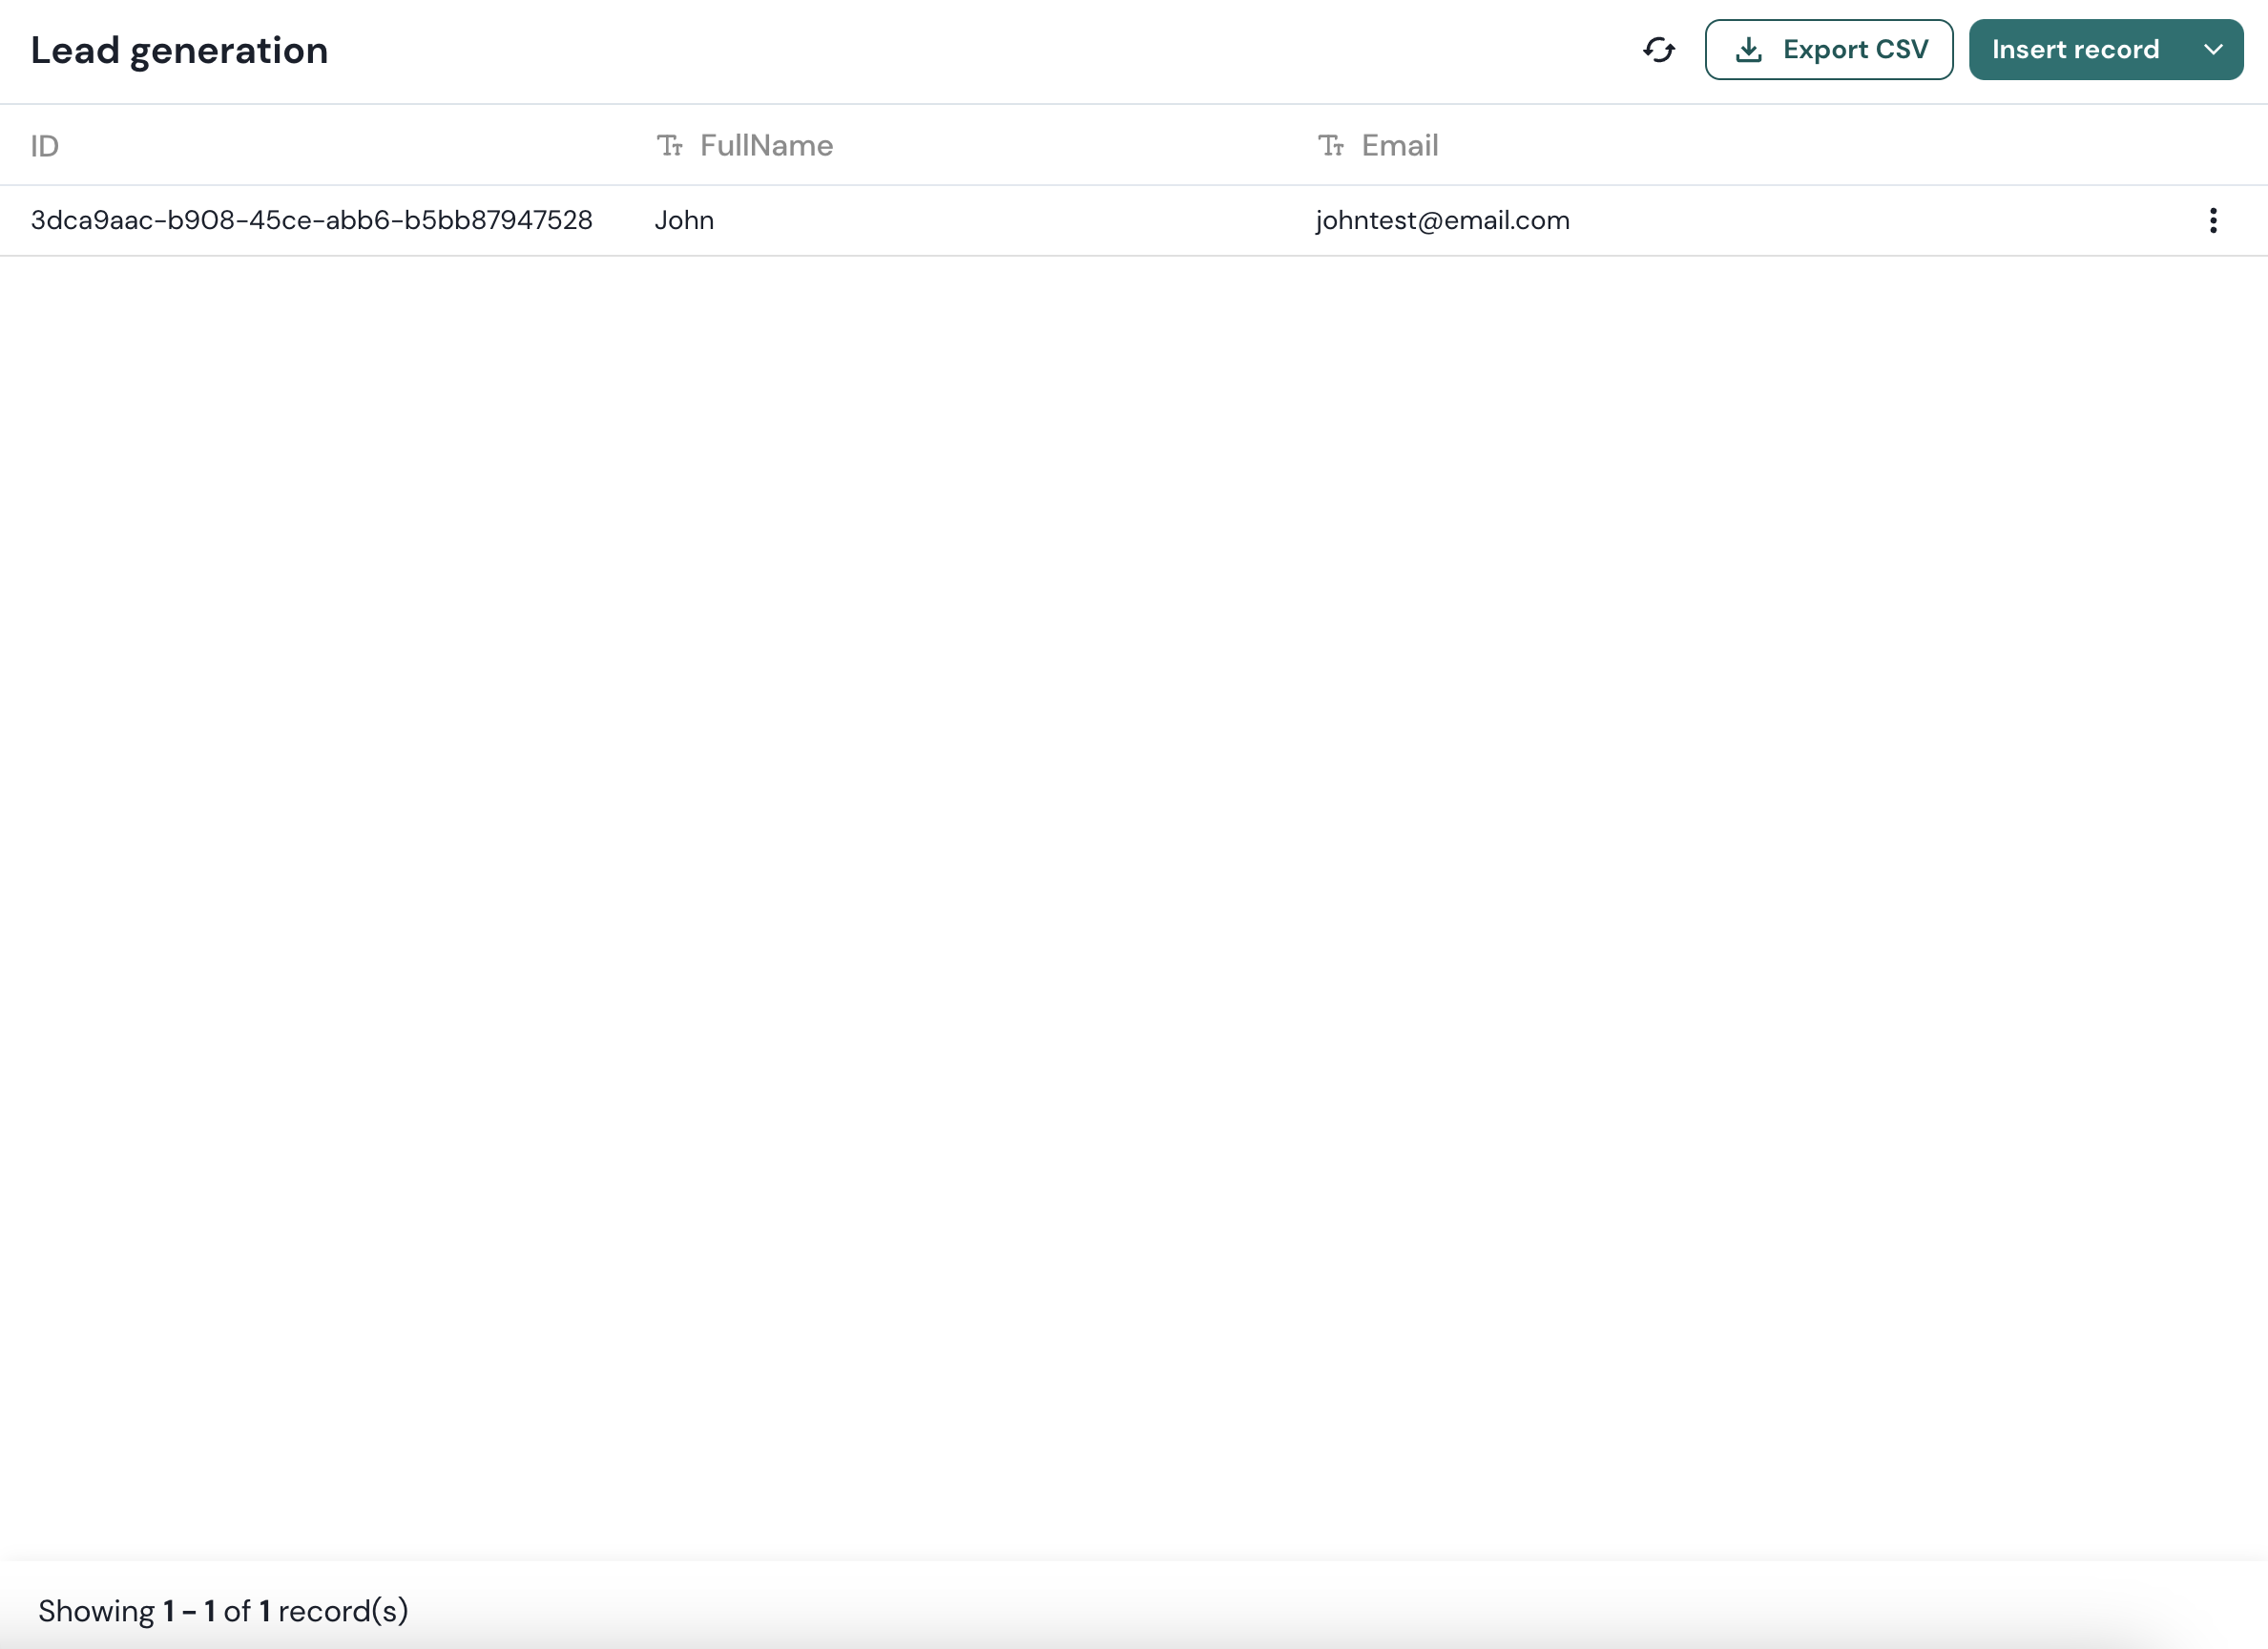
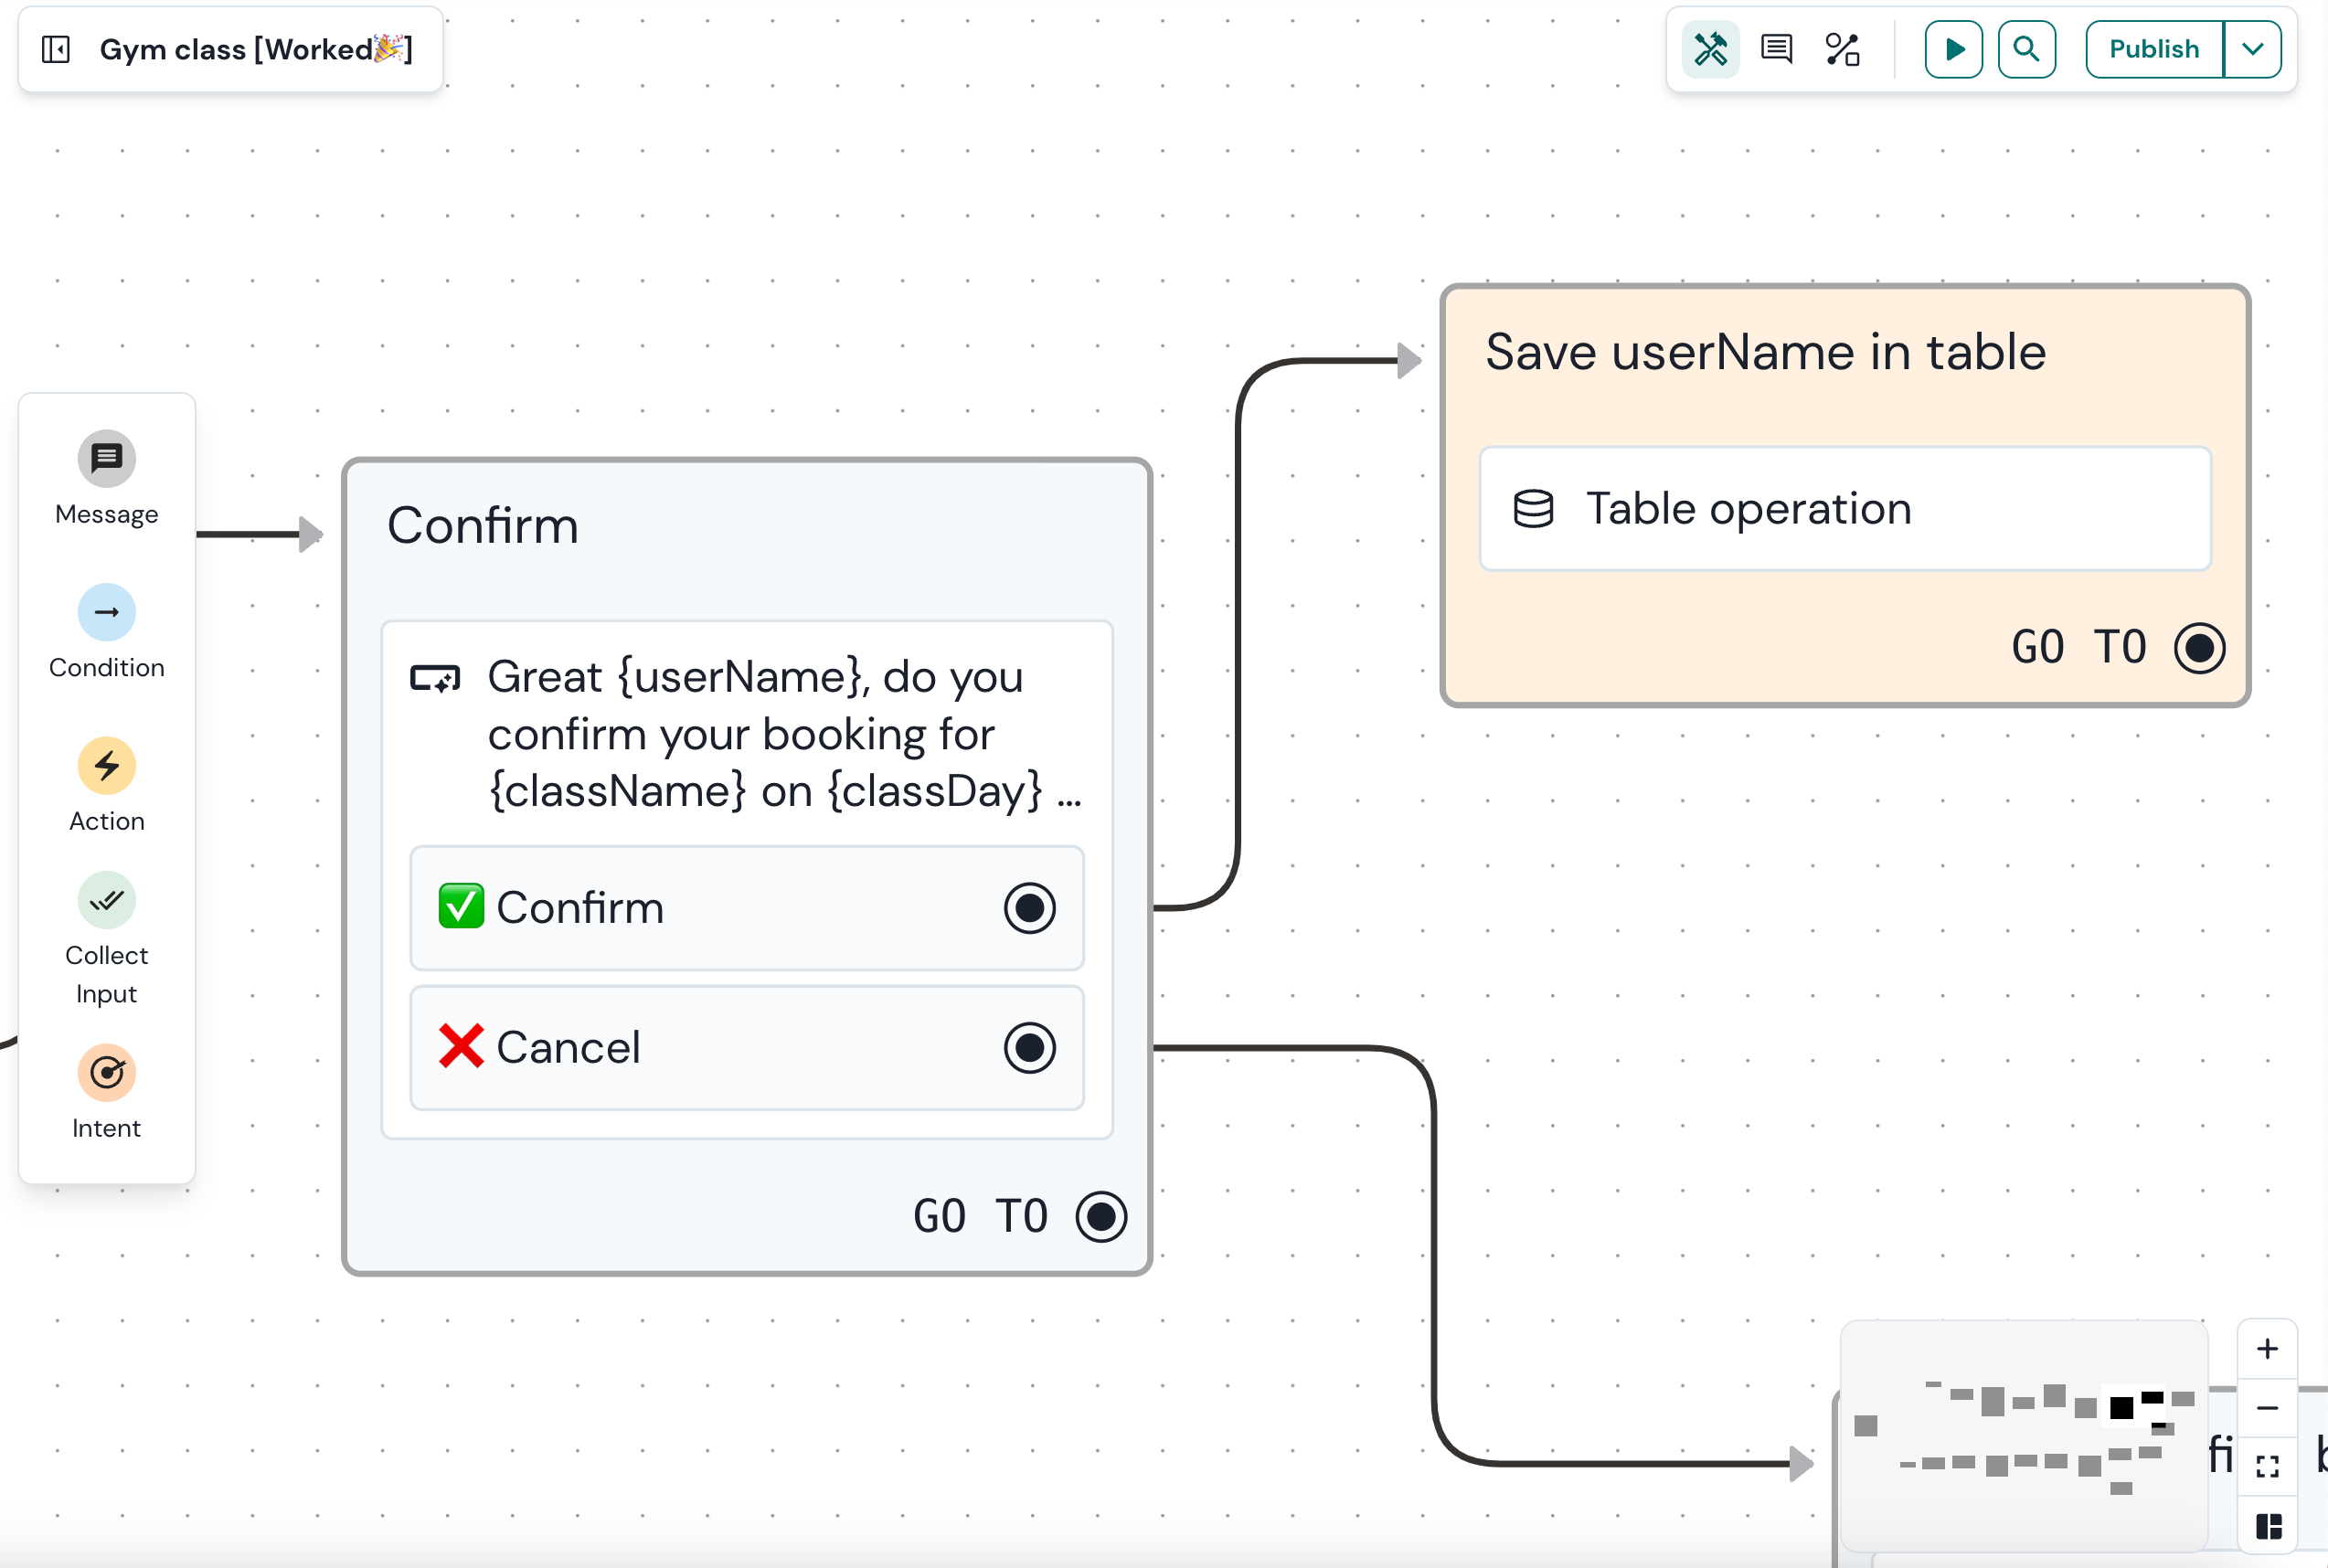
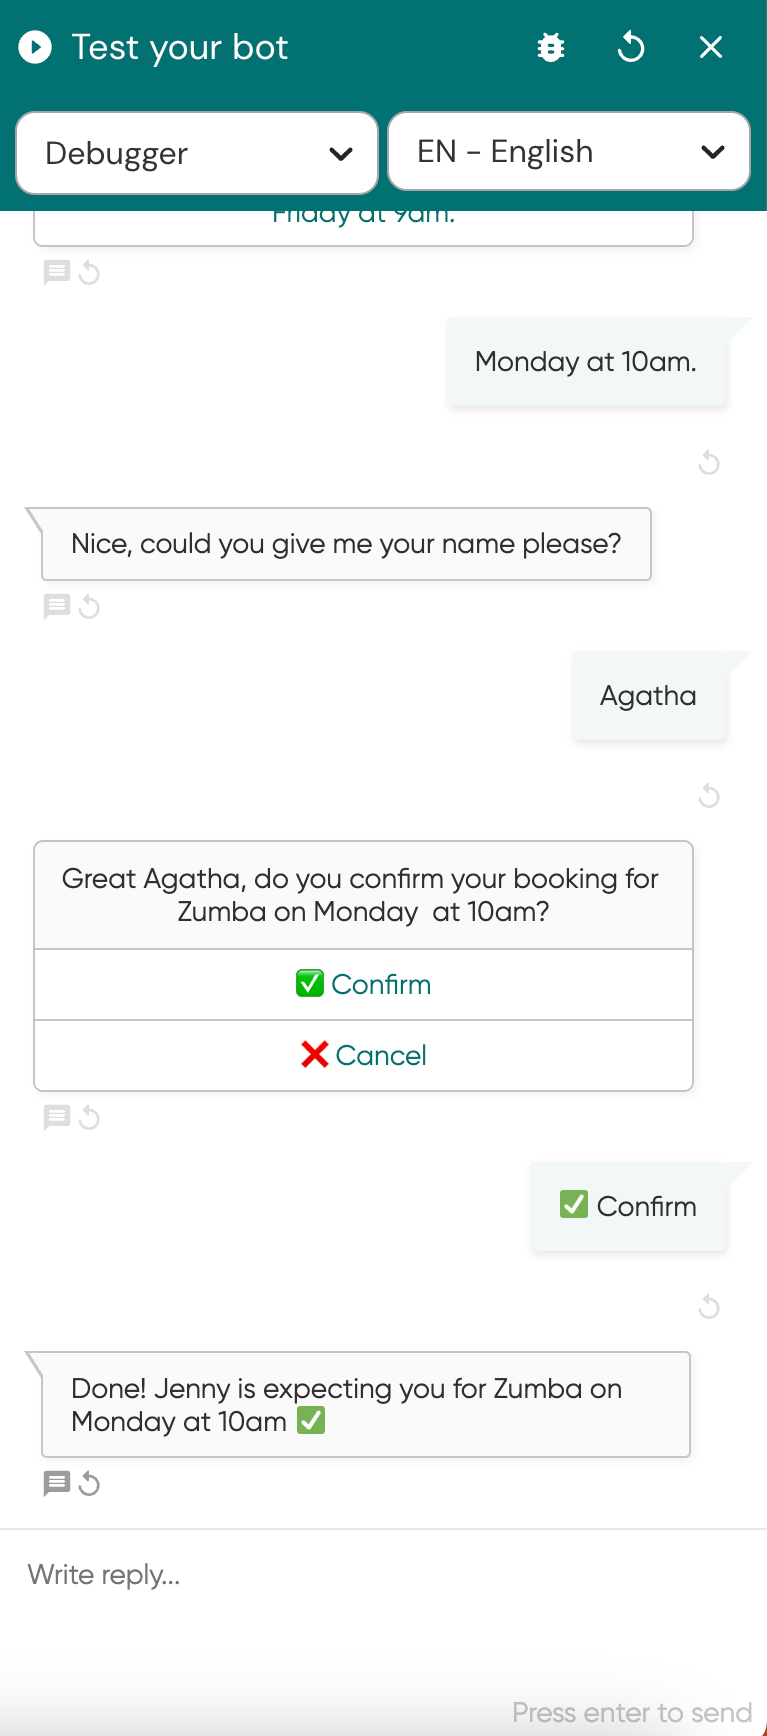
<table data-view="cards"><thead><tr><th></th><th></th><th></th><th data-hidden data-card-cover data-type="files"></th><th data-hidden data-card-target data-type="content-ref"></th></tr></thead><tbody><tr><td>🎨 <strong>Conversation design</strong></td><td>The basics to design a bot that your customers love.</td><td></td><td><a href="https://2786867680-files.gitbook.io/~/files/v0/b/gitbook-x-prod.appspot.com/o/spaces%2F-LLTwFwbOqJj4dDhg8Ju%2Fuploads%2FplpevVlnwZNTe22Uy7ag%2FScreenshot%202024-08-14%20at%2017.35.20.png?alt=media&amp;token=b11ef58e-749b-4eee-abdb-1c367b368034">Screenshot 2024-08-14 at 17.35.20.png</a></td><td><a href="/buildabot/conversation-design">Conversation design</a></td></tr><tr><td>🤓 <strong>Leadzy tutorial</strong></td><td>Your beginner's Chatlayer tutorial.</td><td></td><td><a href="https://2786867680-files.gitbook.io/~/files/v0/b/gitbook-x-prod.appspot.com/o/spaces%2F-LLTwFwbOqJj4dDhg8Ju%2Fuploads%2FPXZFTwPMsuEO81BkgM0l%2FScreenshot%202024-08-16%20at%2018.03.13.png?alt=media&amp;token=d663efb7-68ca-4ca1-b6e2-47c64984348e">Screenshot 2024-08-16 at 18.03.13.png</a></td><td><a href="/start-quickly/leadzy-tutorial">Leadzy tutorial</a></td></tr><tr><td>🌟 <strong>Bot templates</strong></td><td>Resources to look at concrete bot examples and get inspired.</td><td></td><td><a href="https://2786867680-files.gitbook.io/~/files/v0/b/gitbook-x-prod.appspot.com/o/spaces%2F-LLTwFwbOqJj4dDhg8Ju%2Fuploads%2FUfPpkVpX1MCC9s4urnZZ%2FScreenshot%202024-08-16%20at%2018.05.58.png?alt=media&amp;token=e3aabdb2-704b-4137-84a0-5113a53e5c53">Screenshot 2024-08-16 at 18.05.58.png</a></td><td><a href="/start-quickly/bot-templates">Templates</a></td></tr></tbody></table>

#### ISO 27001 certified

<figure><img src="https://2786867680-files.gitbook.io/~/files/v0/b/gitbook-x-prod.appspot.com/o/spaces%2F-LLTwFwbOqJj4dDhg8Ju%2Fuploads%2FZzzmC11UbtWyKxlJ7vch%2F00214_IAS_right%401x.jpg?alt=media&amp;token=a493427b-2f89-4651-92ad-db04ae1e7f52" alt=""><figcaption></figcaption></figure>


# What's new

The latest features and functionalities on Chatlayer.

#### January

* [**Conversations insights \[Beta\]:**](/navigation/natural-language-processing-nlp/conversation-insights-beta) get intent and expressions suggestions based on user expressions so that your bot truely understands your users.


# Send feedback

Having a brilliant idea or seeing someting that's missing? We'd love to hear from you!

To send feedback:

1. Open Chatlayer.ai
2. Go to the bottom left corner of your screen.
3. Click on **Send feedback**.

<figure><img src="https://2786867680-files.gitbook.io/~/files/v0/b/gitbook-x-prod.appspot.com/o/spaces%2F-LLTwFwbOqJj4dDhg8Ju%2Fuploads%2FHlediLennCxmCb3lrfjR%2FScreenshot%202024-11-07%20at%2016.10.14.png?alt=media&amp;token=e061a6e4-38a0-45ab-8c54-fe086306841d" alt="" width="232"><figcaption><p>Send feedback</p></figcaption></figure>

4. Tell us what you think.

<figure><img src="https://2786867680-files.gitbook.io/~/files/v0/b/gitbook-x-prod.appspot.com/o/spaces%2F-LLTwFwbOqJj4dDhg8Ju%2Fuploads%2F6Nswzd60WJChupnV2Qks%2FScreenshot%202024-11-07%20at%2016.11.42.png?alt=media&amp;token=12f96620-6b51-40f9-92c6-0805833bd6ac" alt="" width="375"><figcaption><p>Send us feedback.</p></figcaption></figure>

4. Click **Send**.


# Leadzy tutorial

A Chatlayer beginner's tutorial to create a bot from scratch, to live.

Welcome to your first bot tutorial! Together, we'll build a fictive chatbot named Leadzy which will gather leads for an e-commerce brand.

{% hint style="warning" %}
This tutorial is targeted for very beginners with Chatlayer. More advanced tutorials are cooking, stay tuned!
{% endhint %}

## What to expect

By doing this tutorial, you can expect:

* [ ] Learning how to create a bot from scratch to publishing it to your channel
* [ ] Getting familiar with each Chatlayer block type (Message, Collect input, Condition, Intent, Action)
* [ ] Getting to know the canvas and its flow navigation
* [ ] Understanding some NLP notions

{% hint style="warning" %}
A video tutorial will complement this one. Stay tuned!
{% endhint %}

***

## Table of contents

Ready? Let's dive in!

{% hint style="info" %}
The first crucial step in making a chatbot is to plan it. For the sake of this tutorial, we planned the bot for you. Learn more on how to plan your bot [here](https://docs.chatlayer.ai/tutorials/getting-started).
{% endhint %}

{% content-ref url="/pages/P9kOiSIRpEowX0eToNZv" %}
[0. Introduction](/start-quickly/leadzy-tutorial/0.-introduction)
{% endcontent-ref %}

{% content-ref url="/pages/2Xvy5pCyNtOe71iZ8cp8" %}
[1. New bot, new block](/start-quickly/leadzy-tutorial/1.-new-bot-new-block)
{% endcontent-ref %}

{% content-ref url="/pages/YIP6GGuk8sMfqU7HCrm9" %}
[2. Understand your users](/start-quickly/leadzy-tutorial/2.-understand-your-users)
{% endcontent-ref %}

{% content-ref url="/pages/XHdVTAwIAyBzUninnyAQ" %}
[3. Collect and display user input](/start-quickly/leadzy-tutorial/3.-collect-and-display-user-input)
{% endcontent-ref %}

{% content-ref url="/pages/lVw1aeY3gFbPeToSDqH3" %}
[4. Steer the conversation with Conditions](/start-quickly/leadzy-tutorial/4.-steer-the-conversation-with-conditions)
{% endcontent-ref %}

{% content-ref url="/pages/hejRQvvKlH9sxWwhYqF6" %}
[5. Empower your bot with Actions](/start-quickly/leadzy-tutorial/5.-empower-your-bot-with-actions)
{% endcontent-ref %}

{% content-ref url="/pages/Dz2hLNQAcWigTPFA2ltD" %}
[6. Set up a channel and publish your bot](/start-quickly/leadzy-tutorial/6.-set-up-a-channel-and-publish-your-bot)
{% endcontent-ref %}

## 💬 Feedback

{% hint style="warning" %}
Your feedback on the tutorial means the world to us! Please, let us know what you think through [this short form.](https://forms.office.com/Pages/ResponsePage.aspx?id=ropROyGJe0qEl2GddWziDlEYn6XpsIRDjnCtdRk8L21UMFZMMlAzN0tHOTI4UjMxVTgzTVAwTE5aOCQlQCN0PWcu)
{% endhint %}


# 0. Introduction

Let's contextualize what the Leadzy bot project is all about.

Our fictive chatbot project will serve an e-commerce clothing brand called AllBees.

<figure><img src="https://2786867680-files.gitbook.io/~/files/v0/b/gitbook-x-prod.appspot.com/o/spaces%2F-LLTwFwbOqJj4dDhg8Ju%2Fuploads%2FFMZc1cXSlSWCaSK21EcW%2FScreenshot%202024-02-01%20at%2011.13.26%20(1).png?alt=media&amp;token=8a726a06-ece2-4ba0-9b29-0f4169eb0dc0" alt=""><figcaption><p>The fictive AllBees brand website.</p></figcaption></figure>

## Business goal

The business goal for AllBees is to increase lead generation from its website, addressing the issue of visitors leaving too quickly.

Implementing a chatbot offers a promising solution by engaging visitors immediately upon arrival with personalized interactions, thus capturing their attention and encouraging them to stay longer. This strategy, coupled with the chatbot's ease of setup, aims to enhance user engagement and convert more website visitors into leads.

## Material

For this bot project, we came up with the following material after [planning the bot](https://docs.chatlayer.ai/tutorials/conversation-design/getting-started):

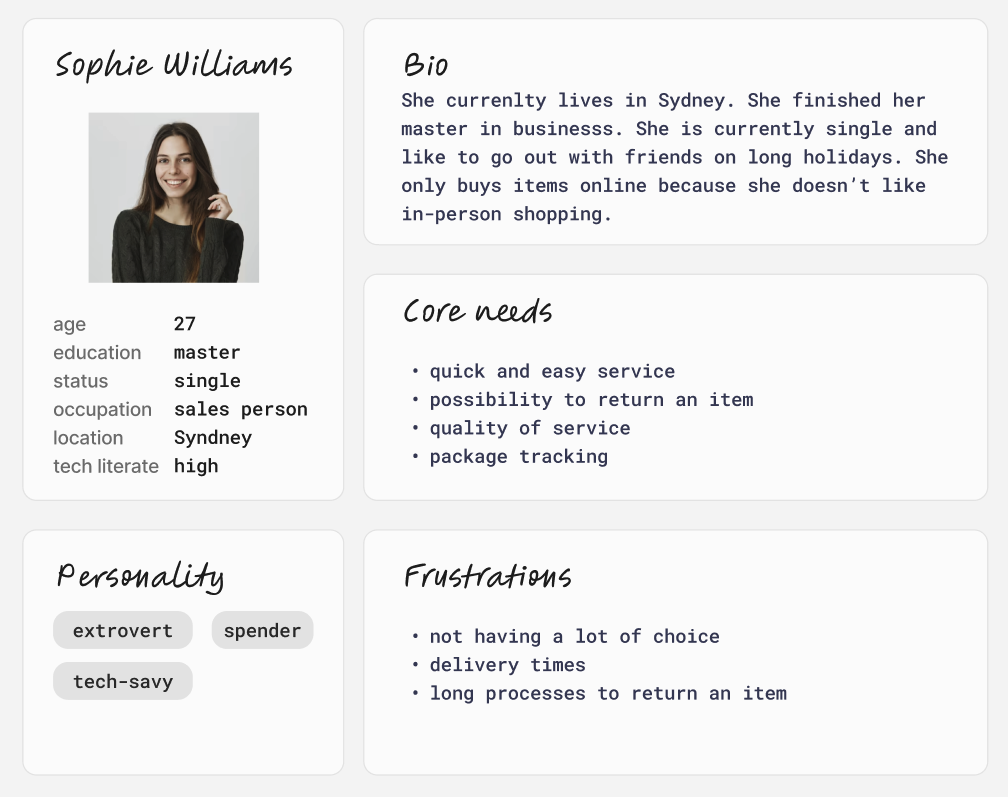
### User persona

A user persona that represents your prototypical user.

<figure><img src="https://2786867680-files.gitbook.io/~/files/v0/b/gitbook-x-prod.appspot.com/o/spaces%2F-LLTwFwbOqJj4dDhg8Ju%2Fuploads%2Fzvf3bwO6pcGmuxDd1mHD%2FScreenshot%202024-02-01%20at%2010.05.28%20(1).png?alt=media&amp;token=6351000c-086d-45bd-bfc4-f035f4e59c32" alt="" width="563"><figcaption><p>A fictive user persona for AllBees.</p></figcaption></figure>

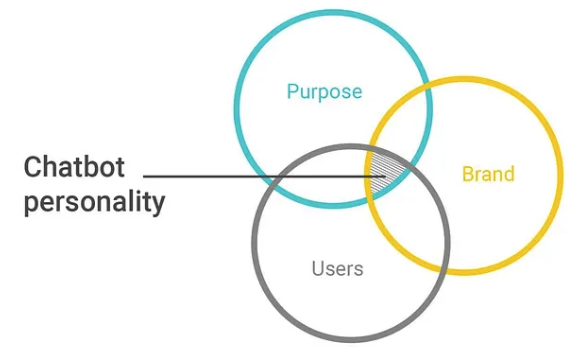
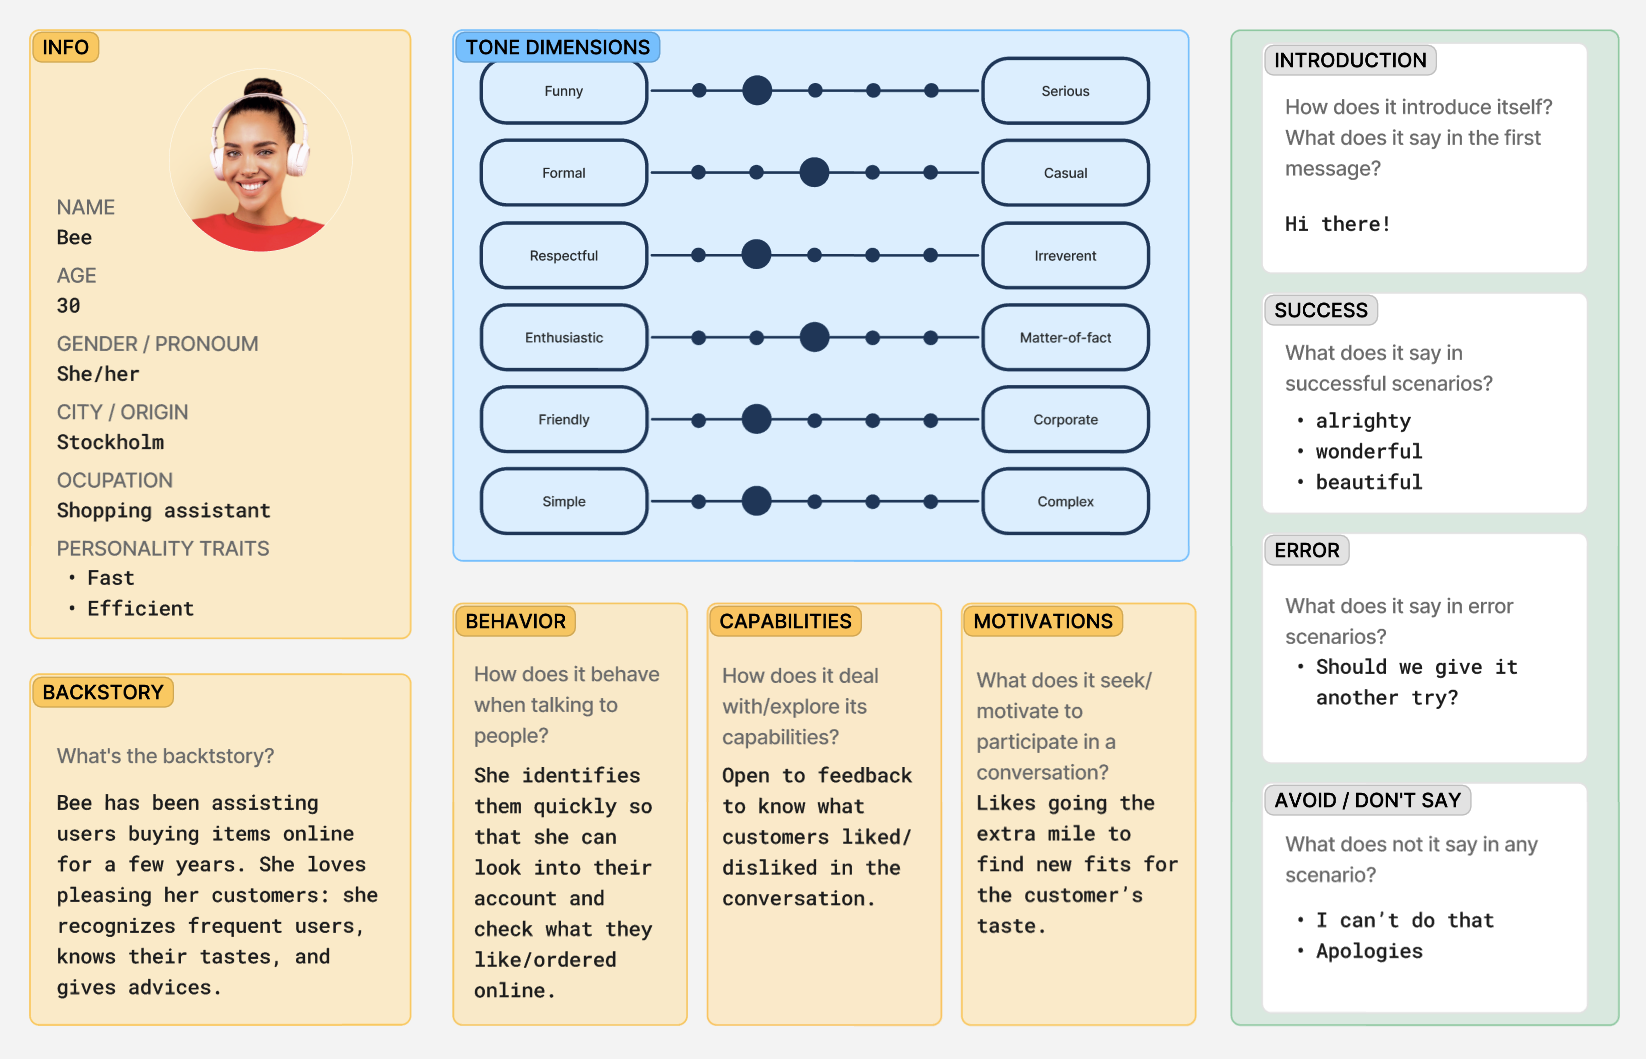
### Bot persona

A bot persona which is based on your user personas, business goals, and brand.

<figure><img src="https://2786867680-files.gitbook.io/~/files/v0/b/gitbook-x-prod.appspot.com/o/spaces%2F-LLTwFwbOqJj4dDhg8Ju%2Fuploads%2F0WYo03QUIUba4SW2dPqD%2FChooChoo%20tutorial%20rework%20(2)%20(1).jpg?alt=media&amp;token=0ddc07ea-af41-4118-86ac-eb1fdde2596d" alt=""><figcaption><p>A fictive bot persona for Leadzy.</p></figcaption></figure>

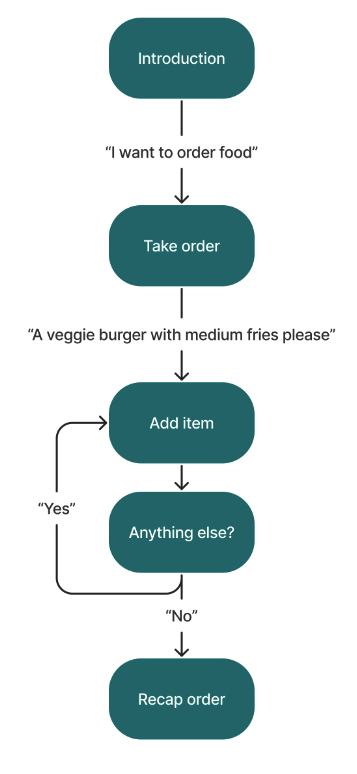
### Flowchart

A flowchart built on an external tool, which is a visualisation of what your conversation logic should be like. When building the bot on Chatlayer, it will be based on this flowchart.

<figure><img src="https://2786867680-files.gitbook.io/~/files/v0/b/gitbook-x-prod.appspot.com/o/spaces%2F-LLTwFwbOqJj4dDhg8Ju%2Fuploads%2FZ4H3P1Vpmz2yUC3JisUy%2FChooChoo%20tutorial%20rework%20(3)%20(1).jpg?alt=media&amp;token=3e7b5e56-049f-4ef1-8638-f82b729fa27b" alt=""><figcaption><p>A flowchart that we will follow to build the Leadzy bot.</p></figcaption></figure>

So, are you ready to dive in? Let’s go!

## 💬 Feedback

{% hint style="warning" %}
Your feedback on the tutorial means the world to us! Please, let us know what you think through [this short form.](https://forms.office.com/Pages/ResponsePage.aspx?id=ropROyGJe0qEl2GddWziDlEYn6XpsIRDjnCtdRk8L21UMFZMMlAzN0tHOTI4UjMxVTgzTVAwTE5aOCQlQCN0PWcu)
{% endhint %}


# 1. New bot, new block

Now that we have planned the Leadzy bot, we know what we want to build. It’s time to open Chatlayer and get our hands dirty!

{% hint style="warning" %}
To get started, you need a Chatlayer account. **Don't have an account yet?** [Create a trial account here](https://chatlayer.ai/try-now/). You're having a problem with your account? Contact our support team at <support@chatlayer.ai>.
{% endhint %}

In this chapter we will build the very start of the conversation.

<figure><img src="https://2786867680-files.gitbook.io/~/files/v0/b/gitbook-x-prod.appspot.com/o/spaces%2F-LLTwFwbOqJj4dDhg8Ju%2Fuploads%2FjyNOzc74oowF4Ess5Mvd%2FChooChoo%20tutorial%20rework%20(4)%20(1).jpg?alt=media&amp;token=2f73298a-4bc4-4612-ab6c-f38e573cf084" alt="" width="375"><figcaption><p>What we will build in Leadzy Lesson 1.</p></figcaption></figure>

## Step 1: Create a new bot

To create a new bot:

1. Go to [app.chatlayer.ai](http://app.chatlayer.ai) and log in using your credentials.
2. On the upper right corner of the screen, click on the **New bot** button.
3. Enter *Leadzy* as a name, so that you can easily find it again.
4. Select **English** as your primary language.

{% hint style="success" %}
The [primary language](https://docs.chatlayer.ai/understanding-users/multilanguage-bots#primary-language-vs.-secondary-languages) is the language that your bot will use. If you’d like your bot to be multilingual, you’ll be able to change that later.
{% endhint %}

<figure><img src="https://2786867680-files.gitbook.io/~/files/v0/b/gitbook-x-prod.appspot.com/o/spaces%2F-LLTwFwbOqJj4dDhg8Ju%2Fuploads%2FLRjb0eDCdLvoKDT2DElV%2FScreenshot%202024-03-19%20at%2016.20.06.png?alt=media&amp;token=5b05d0f6-5f7d-4be3-bdec-57116307c3f2" alt=""><figcaption><p>Create a new bot and call it Leadzy.</p></figcaption></figure>

5. Click on **Create**.

Your bot opens up, showing:

* Your bot [canvas](https://docs.chatlayer.ai/bot-answers/bot-canvas) in the middle of the screen, which is a visual representation of your chatbot architecture. A bunch of [default blocks of conversation](https://docs.chatlayer.ai/bot-answers/dialog-state#default-blocks) appear on this canvas, but let’s not worry about that now.
* The [**Flows**](https://docs.chatlayer.ai/bot-answers/bot-canvas/how-to-organize-your-flows) of conversation on the left.
* The general menu of your chatbot on the very left.

<figure><img src="https://2786867680-files.gitbook.io/~/files/v0/b/gitbook-x-prod.appspot.com/o/spaces%2F-LLTwFwbOqJj4dDhg8Ju%2Fuploads%2F1CyrofALcafzo6LLsAiR%2FScreenshot%202024-03-19%20at%2016.21.56.png?alt=media&amp;token=79503f1b-29e4-424f-ad34-a79ed6eb0381" alt=""><figcaption><p>The canvas view when you open your chatbot.</p></figcaption></figure>

{% hint style="info" %}
To navigate the screen, you can zoom in or out by using the scrolling wheel, or with your trackpad. You can also click and drag to move through the blocks tree.
{% endhint %}

{% hint style="success" %}
**Flows** are a way to group blocks that are about the same topic or use case. Learn more about them [here](https://docs.chatlayer.ai/bot-answers/bot-canvas/how-to-organize-your-flows).
{% endhint %}

Your chatbot has been successfully created!

## Step 2: Edit a Message block

Now, it’s time to make your chatbot say something.

{% hint style="success" %}
A **Message** **block** is a type of message where your bot will prompt something to the user. Learn more about blocks [here](https://docs.chatlayer.ai/bot-answers/dialog-state).
{% endhint %}

### Edit the Introduction block

To begin, let’s modify your introduction block.

{% hint style="success" %}
The **Introduction** block is a default block that serves as the first message that your users will see. It is where your bot introduces itself and explains its functionalities. Introductions are crucial for setting appropriate expectations for the bot.
{% endhint %}

To edit the **Introduction** block:

1. From your canvas, click on the **Introduction** block.

<figure><img src="https://2786867680-files.gitbook.io/~/files/v0/b/gitbook-x-prod.appspot.com/o/spaces%2F-LLTwFwbOqJj4dDhg8Ju%2Fuploads%2FmqSyA3hKFWfAxbLb8uP0%2FScreenshot%202024-02-01%20at%2015.16.12.png?alt=media&amp;token=9737b18c-0ce3-4c74-a9a7-50ae00c5ce3b" alt=""><figcaption><p>Your Introduction block is where the conversation starts. It's filled with a default message.</p></figcaption></figure>

2. The block opens up on the right-hand side of the screen. Under **Text message**, delete the default message and replace it with:

*Hi there! Lucky you, today we have 15% off the whole selection! Are you interested to receive a discount code by email?*

<figure><img src="https://2786867680-files.gitbook.io/~/files/v0/b/gitbook-x-prod.appspot.com/o/spaces%2F-LLTwFwbOqJj4dDhg8Ju%2Fuploads%2FgRnJvEVRWVq2xDcRtgpM%2FScreenshot%202024-02-01%20at%2015.22.09.png?alt=media&amp;token=68bd1380-2e53-4737-9f74-399ade4a1cbc" alt=""><figcaption><p>Edit the message inside your Introduction block.</p></figcaption></figure>

3. Click **Save**.

Your Introduction block is now modified and you can see it from your canvas.

<figure><img src="https://2786867680-files.gitbook.io/~/files/v0/b/gitbook-x-prod.appspot.com/o/spaces%2F-LLTwFwbOqJj4dDhg8Ju%2Fuploads%2FqnSpT02GqbSto00FztEZ%2FScreenshot%202024-03-06%20at%2015.01.29.png?alt=media&amp;token=156ba6d6-71b1-4686-9196-3307ba77ca7f" alt=""><figcaption><p>Your Introduction block after modification.</p></figcaption></figure>

### Add alternative messages

To make the conversation natural, we would like to have different ways of conveying the same introduction message.

{% hint style="success" %}
An alternative message is a text message that will be randomly alternated with another one so that the conversation feels more human-like.
{% endhint %}

To add alternative messages to a bot message:

1. Open your Introduction block by clicking on it.
2. Under **Text message**, click on **+** **Add alternative message**, and paste the following message:

   *Hey there! Good news! We're currently offering a 15% discount on our entire selection! Would you like to receive a code via email?*
3. Do the same for another alternative message:

   *Exciting news! We currently have a special offer of 15% off on our entire selection! Would you be interested in receiving a discount code via email?*

<figure><img src="https://2786867680-files.gitbook.io/~/files/v0/b/gitbook-x-prod.appspot.com/o/spaces%2F-LLTwFwbOqJj4dDhg8Ju%2Fuploads%2FBRfbxyDBCCuLAYdtZHoj%2FScreenshot%202024-02-01%20at%2015.24.35.png?alt=media&amp;token=46dbc617-d8b9-4e93-83c8-eba650ad41e1" alt=""><figcaption><p>Add alternative messages.</p></figcaption></figure>

4. Click **Save**.

Let’s now see how we can test that the bot behaves as expected.

## Step 3: Test your bot

Chatlayer offers a simple way to test your bot every time you make a modification.

### Run tests in the Emulator

To test your bot:

1. Click on the play button at the top right corner of your bot canvas.

<figure><img src="https://2786867680-files.gitbook.io/~/files/v0/b/gitbook-x-prod.appspot.com/o/spaces%2F-LLTwFwbOqJj4dDhg8Ju%2Fuploads%2F7A62dqAzCOS7jWm6Jkzw%2FScreenshot%202024-02-02%20at%2009.23.59.png?alt=media&amp;token=61d787b3-a4a2-4209-8880-04e1d2abc04d" alt="" width="225"><figcaption><p>Test your bot.</p></figcaption></figure>

2. A **Test your bot** window pops up on the right-hand side. It automatically starts the conversation, which means that the bot will prompt its **Introduction** block. From there, type something as a response, for instance ‘*Yes I’d love to have a discount code*’.
3. Press Enter on your keyboard to send your message.

<figure><img src="https://2786867680-files.gitbook.io/~/files/v0/b/gitbook-x-prod.appspot.com/o/spaces%2F-LLTwFwbOqJj4dDhg8Ju%2Fuploads%2FIl6R9JpKFLhWSI52aJ5E%2FScreenshot%202024-02-02%20at%2009.27.03.png?alt=media&amp;token=330f849b-0565-4fc1-8c9c-d6504c4d6b1a" alt="" width="285"><figcaption><p>Test your bot with this sentence. This is the expected result.</p></figcaption></figure>

4. The bot didn’t understand you — and that’s absolutely normal! For now, all we taught our bot is to say a greeting.
5. Click on the Restart conversation button at the top-right corner of the test window.

<figure><img src="https://2786867680-files.gitbook.io/~/files/v0/b/gitbook-x-prod.appspot.com/o/spaces%2F-LLTwFwbOqJj4dDhg8Ju%2Fuploads%2F1lkN443NWBUWu1vohjGK%2FScreenshot%202024-02-02%20at%2009.28.33.png?alt=media&amp;token=2bd3bacd-e0ff-4cda-a332-56e6d74faa23" alt="" width="291"><figcaption><p>Restart the conversation to run a new test.</p></figcaption></figure>

6. Notice that the Introduction message displayed is now different. This is because added alternative messages to it, and those are displayed in a random way.

<figure><img src="https://2786867680-files.gitbook.io/~/files/v0/b/gitbook-x-prod.appspot.com/o/spaces%2F-LLTwFwbOqJj4dDhg8Ju%2Fuploads%2Fa2eGAcXashURDq4eKnmo%2FScreenshot%202024-03-06%20at%2015.07.43.png?alt=media&amp;token=f553ed2a-90c4-49dd-a5de-b731a23f3101" alt="" width="355"><figcaption><p>By running several tests, you'll notice that messages alternate because you added alternative messages.</p></figcaption></figure>

You just ran a successful test: your bot has the expected behavior!

### Run tests in the WhatsApp sandbox

Given the high demand for WhatsApp among our customers, Chatlayer provides an easy method to test your conversations directly on the platform.

{% hint style="info" %}
Why running tests in a WhatsApp sandbox? Each channel has its [limitations](https://docs.chatlayer.ai/channels/multi-channel#channel-comparison), therefore you want to make sure that your tests run smoothly in the channels that you’re choosing.
{% endhint %}

To run tests within the WhatsApp sandbox:

1. Open your **Test your bot** window.
2. At the top-left corner of the Test window, select **WhatsApp sandbox**.

<figure><img src="https://2786867680-files.gitbook.io/~/files/v0/b/gitbook-x-prod.appspot.com/o/spaces%2F-LLTwFwbOqJj4dDhg8Ju%2Fuploads%2FiM2fYgfqAxvIEfyCSFb3%2FScreenshot%202024-02-02%20at%2009.44.19.png?alt=media&amp;token=fee387d4-d3eb-4a82-b76f-52144fdb126b" alt=""><figcaption><p>Test your bot in WhatsApp using the WhatsApp sandbox.</p></figcaption></figure>

3. A QR code is displayed on the screen, with a link underneath. Either:
   * Scan the QR code with your phone, so that your WhatsApp phone app opens.
   * Click on the link below the QR code, so that you can open the WhatsApp web app.
4. Whatever you choose, click on **Continue** to chat.
5. Send the message starting with ‘join’ that is pre-filled in the text field.
6. You’ll get a confirmation that you’re all set in the sandbox. Say something to the bot to start the conversation as you designed it.

<figure><img src="https://2786867680-files.gitbook.io/~/files/v0/b/gitbook-x-prod.appspot.com/o/spaces%2F-LLTwFwbOqJj4dDhg8Ju%2Fuploads%2FXyDJD1hXMx2lErDUBSpa%2FScreenshot%202024-02-02%20at%2009.47.26.png?alt=media&amp;token=962421b9-7d72-45d6-ab98-30b77f5a55ee" alt=""><figcaption><p>Follow these steps to start a conversation in the WhatsApp sandbox.</p></figcaption></figure>

Our bot is also working on WhatsApp, hurray!

## Lesson 1 recap

Congratulations, you just made your first steps! In this lesson, you’ve learned how to:

* [ ] Create a new bot from the Chatlayer landing page.
* [ ] Edit a Message block, and add alternative messages to it so that it feels natural. To do this, we took for example the default Introduction block.
* [ ] Test your changes in the Test window.
* [ ] Run tests on WhatsApp using the WhatsApp sandbox.

## Coming next

Next, we will teach your bot how to understand user responses.

{% content-ref url="/pages/YIP6GGuk8sMfqU7HCrm9" %}
[2. Understand your users](/start-quickly/leadzy-tutorial/2.-understand-your-users)
{% endcontent-ref %}

## 💬 Feedback

{% hint style="warning" %}
Your feedback on the tutorial means the world to us! Please, let us know what you think through [this short form.](https://forms.office.com/Pages/ResponsePage.aspx?id=ropROyGJe0qEl2GddWziDlEYn6XpsIRDjnCtdRk8L21UMFZMMlAzN0tHOTI4UjMxVTgzTVAwTE5aOCQlQCN0PWcu)
{% endhint %}


# 2. Understand your users

In the previous lesson, we created a new bot and edited its Introduction block. Now it's time to make your bot able to understand its users by powering it with our Natural language processing engine.

<figure><img src="https://2786867680-files.gitbook.io/~/files/v0/b/gitbook-x-prod.appspot.com/o/spaces%2F-LLTwFwbOqJj4dDhg8Ju%2Fuploads%2FVCBlP55EogtXWiSvSJuc%2FChooChoo%20tutorial%20rework%20(5).jpg?alt=media&amp;token=efdbb8e1-2a7e-4876-ae26-97609660e910" alt="" width="563"><figcaption><p>What will be built in Leadzy lesson 2.</p></figcaption></figure>

Humans begin to process speech from birth. We hear numerous sentences over time which help us understand new ones. Consider your bot as a baby: it needs you to 'teach' it many expressions to recognize ones it has never encountered before.

{% hint style="success" %}
Teaching a bot to process language is called Natural language processing, which you’ll see referred to as NLP. For a deep dive in NLP, read more [here](https://docs.chatlayer.ai/understanding-users/natural-language-processing-nlp).
{% endhint %}

In Chatlayer, building a NLP model is done in 3 steps:

1. Define what the users would mean (the [intents](https://docs.chatlayer.ai/understanding-users/natural-language-processing-nlp/intents)).
2. Define how users could formulate those intents (the [expressions](https://docs.chatlayer.ai/understanding-users/natural-language-processing-nlp#expressions)).
3. With those intents and expressions, [train the NLP](https://docs.chatlayer.ai/understanding-users/natural-language-processing-nlp#expressions) so that your bot learns to properly label an expression with an intent.

Let’s build a small NLP model for our retail chatbot.

## Step 4: Add an intent

After the bot introduced itself and suggested a discount, we would like users to be able to type if they’re interested. To do so, we need to add a yes intent.

{% hint style="success" %}
Intents are a group of expressions or utterances that mean the same thing. When you build a chatbot, an intent can be referred to as a user goal. For instance, the intent yes could be made of expressions like *I agree*, *Yes*, *yes please*, etc. Learn more about intent and expressions [here](https://docs.chatlayer.ai/understanding-users/natural-language-processing-nlp/intents).
{% endhint %}

### Create an intent

To create an intent:

1. Under the NLP tab on the left-hand side, click on **Intents**.

<figure><img src="https://2786867680-files.gitbook.io/~/files/v0/b/gitbook-x-prod.appspot.com/o/spaces%2F-LLTwFwbOqJj4dDhg8Ju%2Fuploads%2FKbX1GgzX9ehgVUIcEXhz%2FScreenshot%202024-03-26%20at%2015.57.46.png?alt=media&amp;token=3b190f0b-08d8-49d9-86c3-e763eaf42f39" alt=""><figcaption><p>The Intents tab is empty.</p></figcaption></figure>

2. Click on the **+** button at the top of the screen, or on the green **Create intent** button in the middle of the screen.
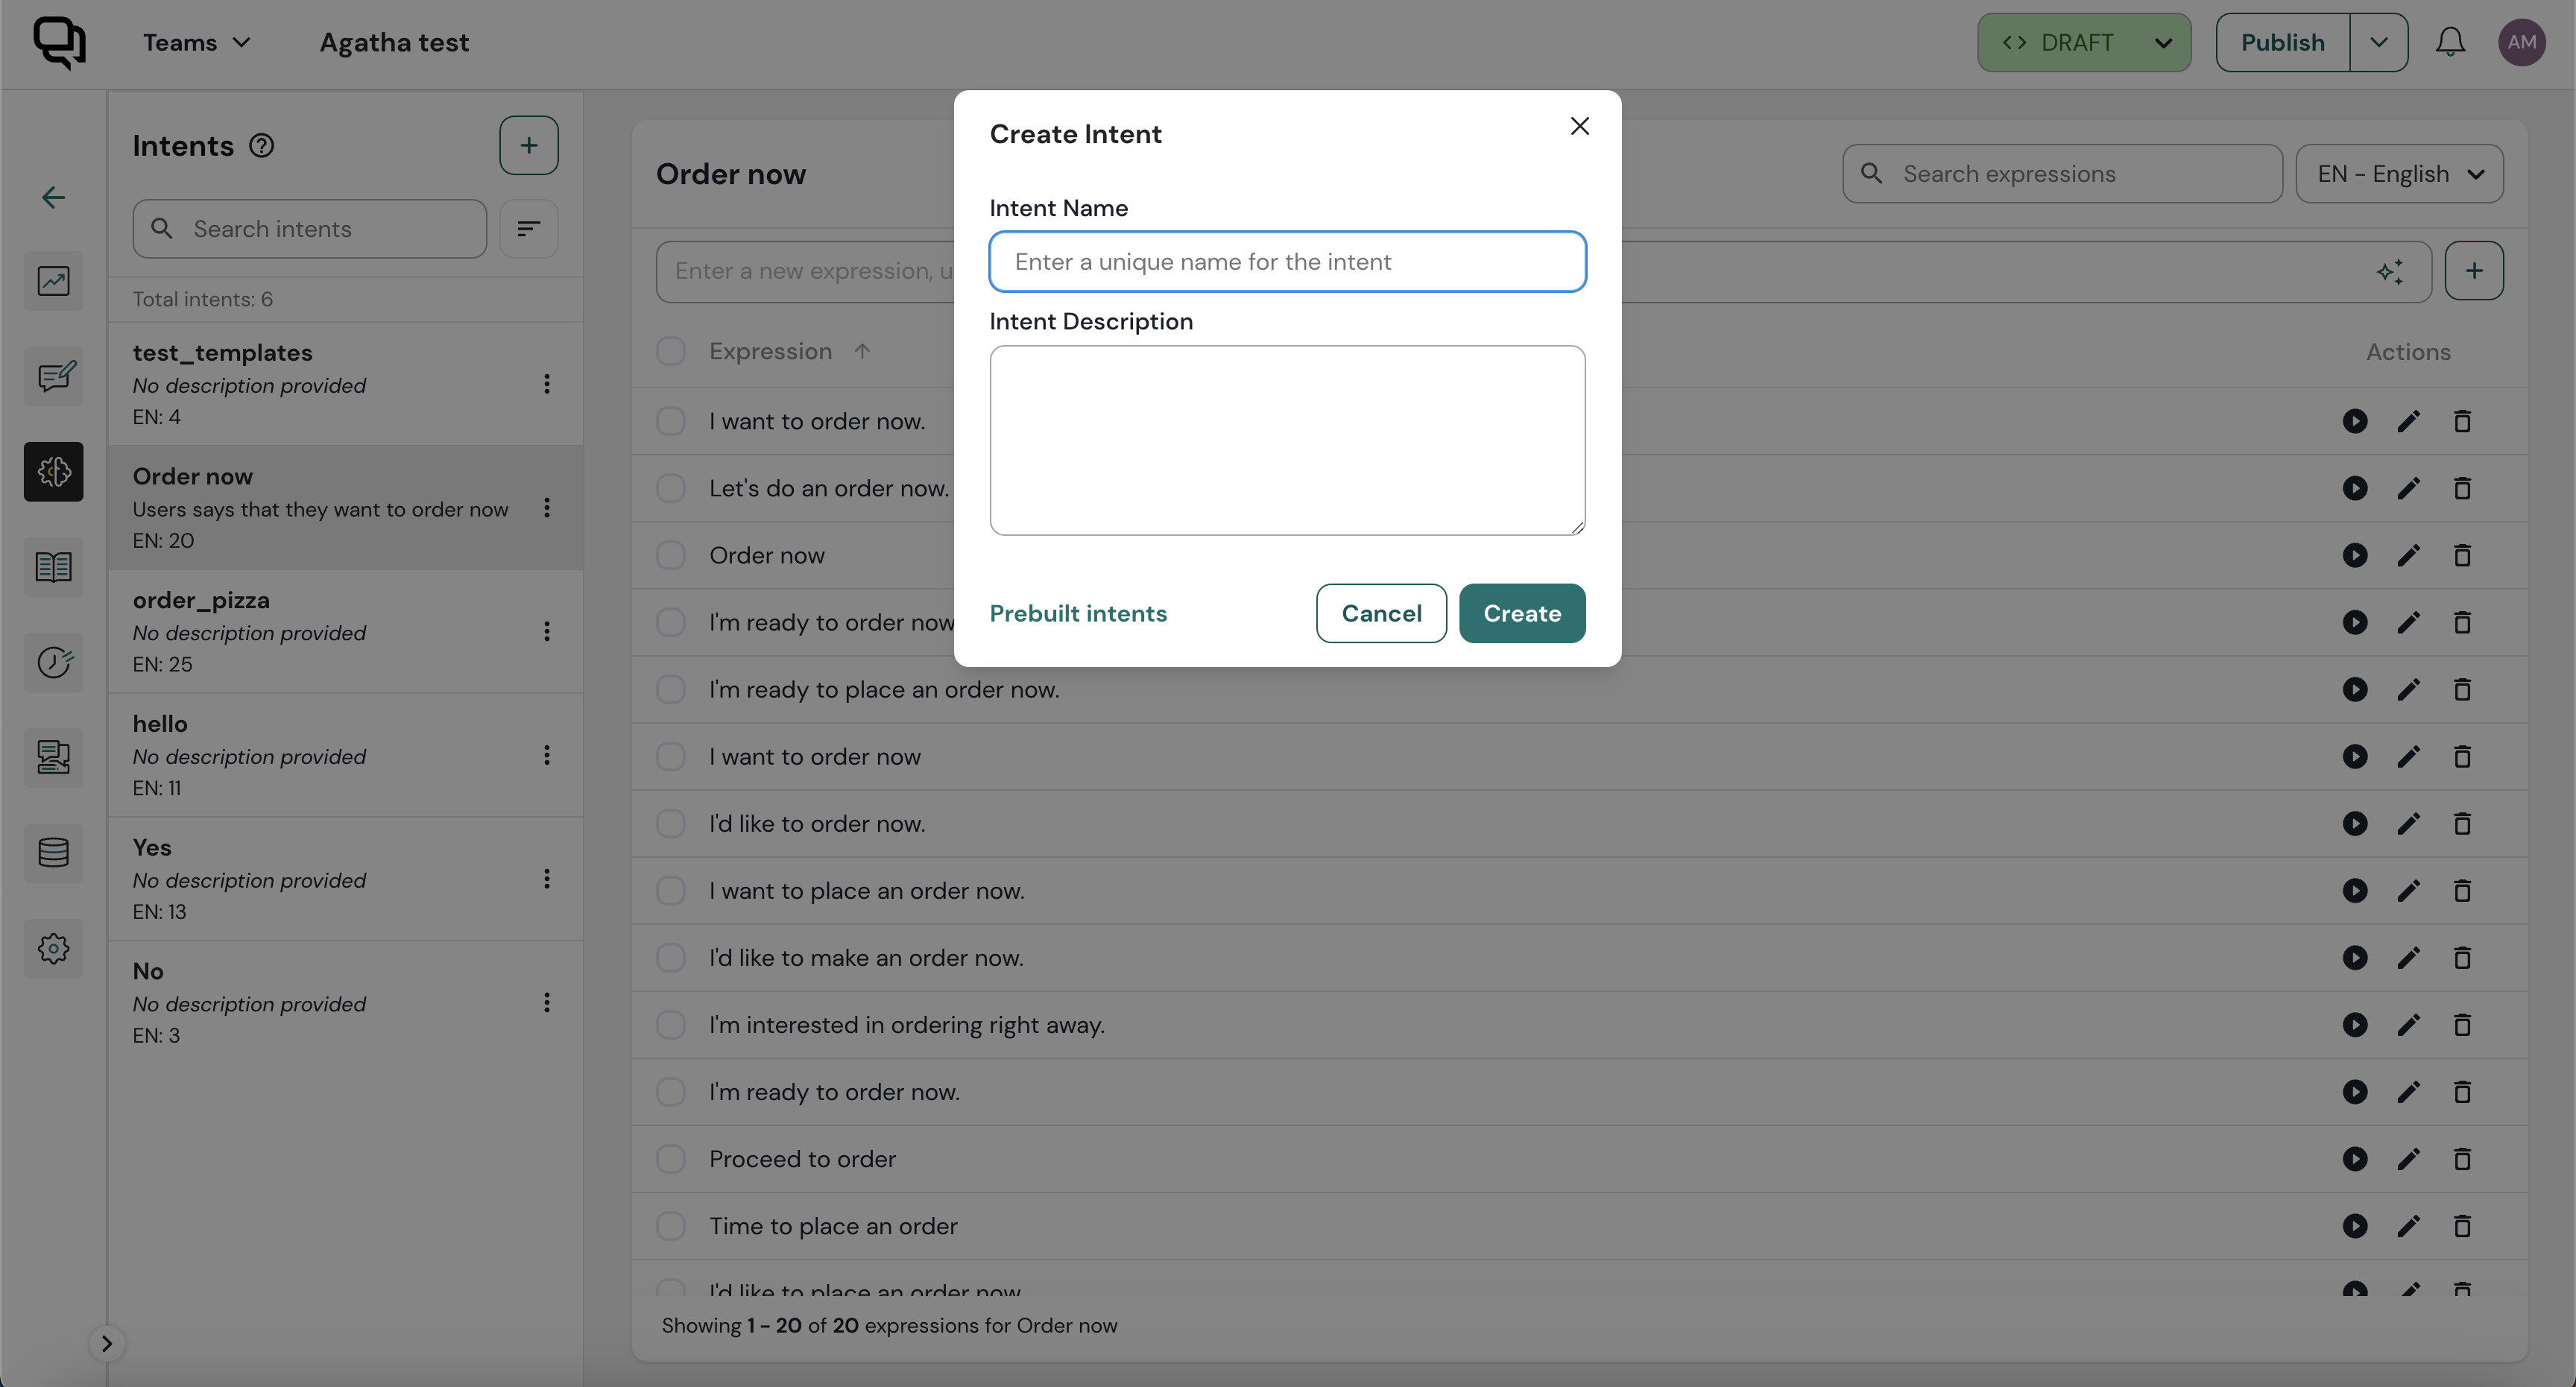
3. A **Create intent** window opens. Give your intent the name *yes*, and add a description to it, e.g. *An intent to agree or say yes to a discount*.

<figure><img src="https://2786867680-files.gitbook.io/~/files/v0/b/gitbook-x-prod.appspot.com/o/spaces%2F-LLTwFwbOqJj4dDhg8Ju%2Fuploads%2FHgYQ6y7YU9AgVvNWarDW%2FScreenshot%202024-02-02%20at%2012.13.38%20(1).png?alt=media&amp;token=8302b9f8-c5cc-4fca-ac0c-09b380fe6dac" alt="" width="375"><figcaption><p>Create a new yes intent and give it a description.</p></figcaption></figure>

4. Click on **Create**.

Your intent now appears on your screen, with zero expressions in it. This means that it is empty. We need to add expressions to it so that we can use it.

<figure><img src="https://2786867680-files.gitbook.io/~/files/v0/b/gitbook-x-prod.appspot.com/o/spaces%2F-LLTwFwbOqJj4dDhg8Ju%2Fuploads%2FFSDaY6QZag71tDSzyOZu%2FScreenshot%202024-03-26%20at%2016.01.15.png?alt=media&amp;token=9562f55b-1ef8-4e4e-9b17-194c533678b8" alt=""><figcaption><p>The yes intent has 0 expressions in it.</p></figcaption></figure>

### Add expressions to an intent

To add expressions to your **yes** intent:

1. From your **Intents** page, click on the **yes** intent that we just created.
2. Type your expression in the text field. For instance, type *yes please*.
3. Let’s first add expressions manually. Either click on the **+** button next to it, or click Enter on your keyboard. You can add expressions like:
   * *yes*
   * *oh yeah!*
   * *i'd love that*

<figure><img src="https://2786867680-files.gitbook.io/~/files/v0/b/gitbook-x-prod.appspot.com/o/spaces%2F-LLTwFwbOqJj4dDhg8Ju%2Fuploads%2FurCtyvW5WkeVZGfC20RY%2FScreenshot%202024-02-02%20at%2012.17.16.png?alt=media&amp;token=c8cdf2be-5c7c-4c37-9f92-3f347e05ff91" alt=""><figcaption><p>Manually add expressions to your intent.</p></figcaption></figure>

4. If you would like AI to generate expressions for you:
   * click the stars button next to the text field.

<figure><img src="https://2786867680-files.gitbook.io/~/files/v0/b/gitbook-x-prod.appspot.com/o/spaces%2F-LLTwFwbOqJj4dDhg8Ju%2Fuploads%2FpmtSXK0ky8NpQp2n8NSz%2FScreenshot%202024-03-26%20at%2016.05.04.png?alt=media&amp;token=ef1b5faa-4b87-4736-9042-8bd349523451" alt=""><figcaption><p>Generate new expressions using AI.</p></figcaption></figure>

* Accept the Generative AI terms and conditions.
* You’re suggested a list of expressions based on the intent that you made. Select the generated expressions that you’d like to keep.
* Click on **Add selected**.

<figure><img src="https://2786867680-files.gitbook.io/~/files/v0/b/gitbook-x-prod.appspot.com/o/spaces%2F-LLTwFwbOqJj4dDhg8Ju%2Fuploads%2FfPF0xn3sZAepkaE3IxCe%2FScreenshot%202024-02-02%20at%2012.20.39.png?alt=media&amp;token=534d689f-4fae-43c5-a6a7-728df8d7b1d9" alt=""><figcaption><p>Add AI-generated expressions to your intent.</p></figcaption></figure>

The added expressions appear now as a list underneath your intent.

<figure><img src="https://2786867680-files.gitbook.io/~/files/v0/b/gitbook-x-prod.appspot.com/o/spaces%2F-LLTwFwbOqJj4dDhg8Ju%2Fuploads%2FunjuaQKav2TNVnxSvDVb%2FScreenshot%202024-03-06%20at%2015.26.43.png?alt=media&amp;token=dfa746df-2e05-49bd-9002-dcbf45bf6fc9" alt=""><figcaption><p>The yes intent contains 6 expressions.</p></figcaption></figure>

You've successfully created an intent! This means that your intent now has expressions. However, it's not yet utilized in the bot. Let's explore how to connect this intent to a block.

### Make your intent trigger a response

For now, your intent exists in your chatbot but it isn’t used inside the conversation. In other words, when a user says ‘*yes*’, it wouldn’t trigger any response from the bot.

To make your intent trigger a response, we need to insert this intent in the bot canvas.

#### Add an Intent block to your canvas

To add your intent to your canvas:

1. Under **Bot dialogs**, click on **Flow** to access your bot canvas.
2. From the left-hand side, drag and drop an intent block to your canvas.

<figure><img src="https://2786867680-files.gitbook.io/~/files/v0/b/gitbook-x-prod.appspot.com/o/spaces%2F-LLTwFwbOqJj4dDhg8Ju%2Fuploads%2FrrIVDw1UWdeKNuSkqD1i%2FScreenshot%202024-02-02%20at%2016.13.19.png?alt=media&amp;token=afa526c5-6e1e-4d9d-be89-0f456d15a911" alt=""><figcaption></figcaption></figure>

3. The Intent block opens on the right-hand side on the screen. From the dropdown, select yes, which is [the intent that you just created](#create-an-intent).

<figure><img src="https://2786867680-files.gitbook.io/~/files/v0/b/gitbook-x-prod.appspot.com/o/spaces%2F-LLTwFwbOqJj4dDhg8Ju%2Fuploads%2F28xBu7bVwhh9qd6RvfYf%2FScreenshot%202024-02-02%20at%2016.18.15.png?alt=media&amp;token=a9a90db8-219f-4436-848f-9d977767ec15" alt="" width="375"><figcaption><p>Add the yes intent to your canvas.</p></figcaption></figure>

#### Connect your intent to a response

Now, if the user answers ‘**yes**’, we would the bot to answer ‘Amazing!’. To do so, we should link the intent block to another one by using a Go-to connection.

{% hint style="success" %}
On Chatlayer, a [Go-to connection](https://docs.chatlayer.ai/bot-answers/go-to-connections) is represented by an arrow on the canvas. If the block A is linked to block B by a Go-to, it means that block B will happen just after block B in the conversation.
{% endhint %}

To connect your intent to a response:

1. Still from inside your intent block, click on **Go to**, at the bottom of the window.
2. Click on the placeholder to select a block where the bot should go to after this one. Create a new block by giving it a name. Type *Yes to discount* and select the **Message** block type.

<figure><img src="https://2786867680-files.gitbook.io/~/files/v0/b/gitbook-x-prod.appspot.com/o/spaces%2F-LLTwFwbOqJj4dDhg8Ju%2Fuploads%2FJ5yFcFR7v8ioyxIaL8Ei%2FScreenshot%202024-03-06%20at%2015.34.57.png?alt=media&amp;token=471e3d97-ea9a-4a57-96da-88f17af595d9" alt="" width="375"><figcaption></figcaption></figure>

3. Click **Save**.

The **yes** intent now appears on your canvas and it’s linked to a block called **Yes to discount**.

Yet, the content of **Yes to discount** block is still empty. To edit the content of this new block:

1. Click on the **Yes to discount** block to open it.
2. Add a text there that says: *Amazing!*
3. **Save** your changes.

The result on your canvas should look like this:

<figure><img src="https://2786867680-files.gitbook.io/~/files/v0/b/gitbook-x-prod.appspot.com/o/spaces%2F-LLTwFwbOqJj4dDhg8Ju%2Fuploads%2FkTZvWFblK7QHakE6VUtM%2FScreenshot%202024-02-02%20at%2016.29.39.png?alt=media&amp;token=bc0acdc5-34de-42a7-80ef-2022cdede698" alt=""><figcaption><p>The yes intent triggers the Yes to discount block.</p></figcaption></figure>

Time for testing the changes!

#### Test your bot

Reproduce what we did in step 3 to test your bot:

1. Enter one of the expressions of the **yes** intent.
2. Your bot should recognize the expression and answer *Amazing*!

<figure><img src="https://2786867680-files.gitbook.io/~/files/v0/b/gitbook-x-prod.appspot.com/o/spaces%2F-LLTwFwbOqJj4dDhg8Ju%2Fuploads%2FvvJ2314s9uAvgLrOfVk8%2FScreenshot%202024-02-06%20at%2011.26.56.png?alt=media&amp;token=8adef3eb-1419-400f-b199-4b502e3f3991" alt="" width="374"><figcaption><p>Test your flow if you say yes to a discount.</p></figcaption></figure>

3. Click on the **Restart conversation** icon at the top right corner of the **Test window.**

<figure><img src="https://2786867680-files.gitbook.io/~/files/v0/b/gitbook-x-prod.appspot.com/o/spaces%2F-LLTwFwbOqJj4dDhg8Ju%2Fuploads%2FRBDZIDqyK8JZdjbreYPe%2FScreenshot%202024-03-26%20at%2016.15.31.png?alt=media&amp;token=fd87a80b-d790-453f-b52b-fb1fd8e0bbe6" alt="" width="375"><figcaption><p>Restart the test conversation.</p></figcaption></figure>

4. Now, enter something that wasn’t in your set of expressions, like *yeah sure*.
5. Your bot should display the **Not understood** block as follows:

<figure><img src="https://2786867680-files.gitbook.io/~/files/v0/b/gitbook-x-prod.appspot.com/o/spaces%2F-LLTwFwbOqJj4dDhg8Ju%2Fuploads%2FpEpdkRCijsXgVceSX1v7%2FScreenshot%202024-02-06%20at%2011.29.57%20(1).png?alt=media&amp;token=954aa5ff-6660-4a71-ba7c-4ca79e28ff95" alt="" width="373"><figcaption><p>Test your bot with an expression that wasn't in your intent.</p></figcaption></figure>

{% hint style="success" %}
The **Not understood** block is triggered when your bot didn’t understand what the user said.
{% endhint %}

This means that your bot doesn’t recognize *‘yeah sure’* as a **yes** intent. Why is that the case? Because you we haven’t trained the NLP model yet!

{% hint style="info" %}
If you haven’t [trained your NLP](#train-the-nlp-model), your chatbot will only be able to recognize the exact expressions that you have entered in an intent.
{% endhint %}

## Step 5: Train your NLP

Let's explore how to train the Natural Language Processing (NLP) model to recognize a wider range of expressions.

{% hint style="info" %}
[Training your NLP ](https://docs.chatlayer.ai/understanding-users/natural-language-processing-nlp#train-the-nlp)model allows your bot to understand new expressions that convey the same meaning as those already entered in an intent.
{% endhint %}

### Train the NLP model

To train your NLP:

1. From your Intents tab, click on the **Train** button at the upper right corner of your screen.

<figure><img src="https://2786867680-files.gitbook.io/~/files/v0/b/gitbook-x-prod.appspot.com/o/spaces%2F-LLTwFwbOqJj4dDhg8Ju%2Fuploads%2Fln2vShqI4mcc4Hbc2d1j%2FScreenshot%202024-03-19%20at%2011.52.56.png?alt=media&amp;token=6a437eee-d47f-42db-9640-a79d42a9e234" alt=""><figcaption><p>Train your NLP by clicking the button on the top right corner of your Intent tab.</p></figcaption></figure>

2. A window pops up. Select **English** as the language that you want to train.
3. Click on **Update**.

<figure><img src="https://2786867680-files.gitbook.io/~/files/v0/b/gitbook-x-prod.appspot.com/o/spaces%2F-LLTwFwbOqJj4dDhg8Ju%2Fuploads%2Fx8qCN6KfPnHpWgZ8chPL%2FScreenshot%202024-02-06%20at%2011.47.05.png?alt=media&amp;token=0b9a511e-8fbf-4d10-9b62-5efbfc077c22" alt="" width="374"><figcaption><p>Select the language to train your NLP on.</p></figcaption></figure>

{% hint style="info" %}
You can see when was the last time your NLP was updated by checking the [NLP dashboard](https://docs.chatlayer.ai/understanding-users/natural-language-processing-nlp/nlp-dashboard-and-nlp-improve#nlp-dashboard). To do so, go to **Dashboard** under the **NLP** tab.
{% endhint %}

{% hint style="success" %}
Tip: turn on the [AI Intent booster](https://docs.chatlayer.ai/understanding-users/natural-language-processing-nlp/ai-intent-booster) to increase the recognition of your intents for smaller bots. This will be explored in a follow-up tutorial dedicated to the Chatlayer AI functionalities.
{% endhint %}

### Test your bot

It’s time now to test the bot with our *yeah sure* again.

Your bot should recognize it, therefore answer with the right block!

<figure><img src="https://2786867680-files.gitbook.io/~/files/v0/b/gitbook-x-prod.appspot.com/o/spaces%2F-LLTwFwbOqJj4dDhg8Ju%2Fuploads%2F6r48IeCNCH9HqeatJrxB%2FScreenshot%202024-02-06%20at%2011.58.14.png?alt=media&amp;token=f4e33008-3747-4e75-bc66-85fe5a28b3b2" alt="" width="366"><figcaption><p>Test your flow with an expression which isn't part of your set of expressions.</p></figcaption></figure>

## \[Optional: Test your knowledge]

Reproduce the same steps so that you add a **no** intent: create the intent, fill it with expressions, link it to a block, train your NLP and test it.

This is what it should look like on your canvas:

<figure><img src="https://2786867680-files.gitbook.io/~/files/v0/b/gitbook-x-prod.appspot.com/o/spaces%2F-LLTwFwbOqJj4dDhg8Ju%2Fuploads%2Fl7hfm3I4nULvhGjsbgEj%2FScreenshot%202024-02-06%20at%2012.13.59.png?alt=media&amp;token=ea9a5553-2a9a-4592-a8ff-444595fc2c7f" alt=""><figcaption><p>The no intent triggers the No to discount block.</p></figcaption></figure>

## Step 6: Edit your Not Understood block

Every bot should have a way to redirect users to a human. Typically, this is what you want to happen if the user is not understood multiple times.

To edit your Not Understood block:

1. From your canvas, double click on the **Not Understood** block to open it.
2. Edit the text for the following: *I’m sorry, but I didn’t get that. Please try a rephrase or send us an email with your question:* [*email@company.com*](mailto:email@company.com)*.*
3. **Save** your changes.

It should look like so on your canvas:

<figure><img src="https://2786867680-files.gitbook.io/~/files/v0/b/gitbook-x-prod.appspot.com/o/spaces%2F-LLTwFwbOqJj4dDhg8Ju%2Fuploads%2F88VyzubsE4Dtp9NDpYNn%2FScreenshot%202024-03-19%20at%2011.57.11.png?alt=media&amp;token=8f6df572-35b6-4bd0-a517-a369cd1754c4" alt=""><figcaption><p>When the user says something that the bot doesn't understand, the Not understood block gets triggered.</p></figcaption></figure>

## Lesson 2 recap

In this lesson, you’ve learned how to:

* [ ] Make an NLP model.
* [ ] Add intents to your NLP, and give them expressions.
* [ ] Trigger a response from the bot based on what it recognized as an intent.
* [ ] Train your NLP model so that it recognizes more expressions.
* [ ] Edit your Not Understood block so that it redirects your user to a human.

## Coming next

In the next lesson, we will see how your bot can keep user input in memory to re-use it later.

{% content-ref url="/pages/XHdVTAwIAyBzUninnyAQ" %}
[3. Collect and display user input](/start-quickly/leadzy-tutorial/3.-collect-and-display-user-input)
{% endcontent-ref %}

## 💬 Feedback

{% hint style="warning" %}
Your feedback on the tutorial means the world to us! Please, let us know what you think through [this short form.](https://forms.office.com/Pages/ResponsePage.aspx?id=ropROyGJe0qEl2GddWziDlEYn6XpsIRDjnCtdRk8L21UMFZMMlAzN0tHOTI4UjMxVTgzTVAwTE5aOCQlQCN0PWcu)
{% endhint %}


# 3. Collect and display user input

In the previous lesson, we taught the bot to understand the user using Natural Language Processing (NLP). In this lesson, you'll learn how to gather user input for use in the conversation.

On Chatlayer, collecting responses from your users can be done in 3 ways:

* by using button clicks, which are better for closed questions, i.e. question with a limited set of possible answers.
* by using Collect input blocks, which are better for open questions, i.e. question with an open-ended set of possible answers.
* by using entities.

{% hint style="success" %}
[Entities](https://docs.chatlayer.ai/understanding-users/natural-language-processing-nlp/synonym-entities) are a special NLP feature to detect information within the user message. You’ll discover more about them in another tutorial.
{% endhint %}

In this lesson, you’ll learn how to use button clicks and Collect input blocks to save information that can be reused later.

<figure><img src="https://2786867680-files.gitbook.io/~/files/v0/b/gitbook-x-prod.appspot.com/o/spaces%2F-LLTwFwbOqJj4dDhg8Ju%2Fuploads%2FvgGsqwTgsVElWoE9jxdb%2FChooChoo%20tutorial%20rework.jpg?alt=media&amp;token=5607ad24-edd8-4ead-a60b-62fea043417e" alt=""><figcaption><p>What will be built in this lesson.</p></figcaption></figure>

## Step 6: Get responses from button clicks

A nice-and-easy way to get input quickly from your users is to add buttons to your chatbot.

We’ll create a block that asks whether if user is a new client, which will then give a different answer.

### Add buttons

To add buttons to your bot:

1. Go to your canvas.
2. Drag and drop a **Message** block to your canvas.

<figure><img src="https://2786867680-files.gitbook.io/~/files/v0/b/gitbook-x-prod.appspot.com/o/spaces%2F-LLTwFwbOqJj4dDhg8Ju%2Fuploads%2Fz8kcaRCMX6LeXWo4Fpom%2FScreenshot%202024-03-07%20at%2009.31.54.png?alt=media&amp;token=2be6dd05-f0c3-416a-a133-dc7ab1e08a97" alt="" width="375"><figcaption><p>Add a Message block to your canvas.</p></figcaption></figure>

3. The block opens on the right hand side of the screen. Add a **Buttons** step to your block by clicking on it.

<figure><img src="https://2786867680-files.gitbook.io/~/files/v0/b/gitbook-x-prod.appspot.com/o/spaces%2F-LLTwFwbOqJj4dDhg8Ju%2Fuploads%2Fh3CKu83zhniraPNGmbgP%2FScreenshot%202024-02-06%20at%2012.57.50.png?alt=media&amp;token=e7e23fd2-08fb-4195-82e1-ce51c6f37bb1" alt="" width="375"><figcaption><p>Add a Buttons step to your block.</p></figcaption></figure>

4. As a **Text message**, add: *Is it your first time shopping with us?*
5. Under it, click on **Add button**.
6. Click on **Go to**.

<figure><img src="https://2786867680-files.gitbook.io/~/files/v0/b/gitbook-x-prod.appspot.com/o/spaces%2F-LLTwFwbOqJj4dDhg8Ju%2Fuploads%2FhTwkzqz4wAbUALVQR6Gp%2FScreenshot%202024-03-07%20at%2008.43.03.png?alt=media&amp;token=283139fc-7f28-46b8-880f-df54bede1e20" alt="" width="375"><figcaption><p>Add a Go-to button to your block.</p></figcaption></figure>

{% hint style="success" %}
A [Go-to button](https://docs.chatlayer.ai/bot-answers/go-to-connections#go-tos-in-buttons) is a button that, when clicked, goes to another block in the conversation.
{% endhint %}

7. Under **Title**, add *I’m new*.
8. Under **Go to**, create a **Message** block called ‘Welcome new user’. It is a placeholder where will come back to later in the tutorial.
9. Repeat the same step to create another button called *I’m a client already* which goes to a new block that you’ll call *Welcome returning user.*

<figure><img src="https://2786867680-files.gitbook.io/~/files/v0/b/gitbook-x-prod.appspot.com/o/spaces%2F-LLTwFwbOqJj4dDhg8Ju%2Fuploads%2FiaMOPKp2V1iP0jNolF8w%2FScreenshot%202024-03-07%20at%2008.49.53.png?alt=media&amp;token=3fe69217-1e64-4b58-823c-107ae658261b" alt="" width="375"><figcaption><p>Fill your buttons with a title and a Go-to.</p></figcaption></figure>

10. **Save** your changes.

Your buttons are created! Let’s define what happens when they’re clicked now.

### Define responses after clicks

Time now to modify elements on your canvas so that the right block leads to the right answer.

{% hint style="info" %}
Your canvas offers flexible and multiple ways of navigating in it. Learn all about it [here](https://docs.chatlayer.ai/bot-answers/bot-canvas/canvas-functionalities).
{% endhint %}

#### Change a block’s name and content

1. From the canvas, double click on the last block you created to change its name:
   * Call it *Check user type*.
   * Click the **Checkmark** icon to save it.

<figure><img src="https://2786867680-files.gitbook.io/~/files/v0/b/gitbook-x-prod.appspot.com/o/spaces%2F-LLTwFwbOqJj4dDhg8Ju%2Fuploads%2FmVAByC9ExQMEMQ5WyDwO%2FScreenshot%202024-03-07%20at%2009.34.49.png?alt=media&amp;token=badc7c4a-8f8d-48b1-896f-bb4987497c28" alt=""><figcaption><p>Change your block name directly from the canvas.</p></figcaption></figure>

2. Open **Welcome returning user** and and change its content to: *Great to see you again!*
3. Open **Welcome new user** and change its content to: *Welcome then! It's your very lucky day: we have an extra 5% off for newbies!*

The changes should look like so on your canvas:

<figure><img src="https://2786867680-files.gitbook.io/~/files/v0/b/gitbook-x-prod.appspot.com/o/spaces%2F-LLTwFwbOqJj4dDhg8Ju%2Fuploads%2FOHWb1y2ywcIn6rsA8tgH%2FScreenshot%202024-03-07%20at%2008.55.10.png?alt=media&amp;token=489b3ba2-f55e-476c-a759-1afea9fbc902" alt="" width="375"><figcaption><p>Each button clicked triggers a different block.</p></figcaption></figure>

Good, your user can now click on a button and have a response accordingly. Let’s make sure that this question follows the previous steps of the conversation.

#### Draw Go-to connections

1. Draw a Go-to connection between **Yes to discount** and **Check user type** by holding down the mouse from the bottom-down node of your **Yes to discount** block.

<figure><img src="https://2786867680-files.gitbook.io/~/files/v0/b/gitbook-x-prod.appspot.com/o/spaces%2F-LLTwFwbOqJj4dDhg8Ju%2Fuploads%2Fa8HpF2at4dpoBsqm48fd%2FScreenshot%202024-03-07%20at%2009.00.15.png?alt=media&amp;token=ac13e7e7-5704-4e52-804b-053b78d8b073" alt=""><figcaption><p>Draw Go-to connections from your canvas.</p></figcaption></figure>

{% hint style="success" %}
A [Go-to connection](https://docs.chatlayer.ai/bot-answers/go-to-connections) between block A and block B means that block B will happen right after block A in the conversation. Go-to connections are respresented as plain arrows on your canvas.
{% endhint %}

2. Test your bot. If everything works fine, your conversation should look like so:

<figure><img src="https://2786867680-files.gitbook.io/~/files/v0/b/gitbook-x-prod.appspot.com/o/spaces%2F-LLTwFwbOqJj4dDhg8Ju%2Fuploads%2FCO9umYNolxRVI9xySCig%2FScreenshot%202024-03-07%20at%2009.11.10.png?alt=media&amp;token=95799b0e-a386-430b-b0fa-09a555b87195" alt="" width="280"><figcaption><p>Test your buttons flow.</p></figcaption></figure>

You've successfully added buttons to your bot for answering closed questions. Now, let's learn how to pose more open-ended questions.

## Step 7: Use Collect input blocks

Remember, our Bee bot project is a lead generation bot. We've reached the part of the bot flow where you'll collect people's details for future use.

On Chatlayer, you can gather open-ended responses during the conversation using Collect input blocks.

<figure><img src="https://2786867680-files.gitbook.io/~/files/v0/b/gitbook-x-prod.appspot.com/o/spaces%2F-LLTwFwbOqJj4dDhg8Ju%2Fuploads%2F44eDozRzl78TYTckpkYy%2FScreenshot%202024-02-06%20at%2014.17.35.png?alt=media&amp;token=6606c68b-42f4-4008-a946-23ae4b97ef50" alt="" width="134"><figcaption><p>The Collect input block.</p></figcaption></figure>

{% hint style="success" %}
[Collect input](https://docs.chatlayer.ai/bot-answers/dialog-state/user-input-bot-dialog) blocks are useful to get input from your user, check it, and save it as a variable that you can re-use later on.
{% endhint %}

### Add a Collect input block

1. From your canvas, drag and drop a **Collect input** block.

<figure><img src="https://2786867680-files.gitbook.io/~/files/v0/b/gitbook-x-prod.appspot.com/o/spaces%2F-LLTwFwbOqJj4dDhg8Ju%2Fuploads%2FcGm0vIQznhKe1Wk84fHM%2FScreenshot%202024-03-07%20at%2009.39.20.png?alt=media&amp;token=33e76e02-4abf-47c0-8527-a1d30df74534" alt=""><figcaption><p>Add a Collect input block to your canvas.</p></figcaption></figure>

2. The block opens to the right-hand side.
3. Under its **Settings**, change its name to *Ask name*.

<figure><img src="https://2786867680-files.gitbook.io/~/files/v0/b/gitbook-x-prod.appspot.com/o/spaces%2F-LLTwFwbOqJj4dDhg8Ju%2Fuploads%2FvMAyXbCUMMTlpvJOF1Qv%2FScreenshot%202024-03-07%20at%2009.39.56.png?alt=media&amp;token=5d35646f-4abb-492c-9def-b4d08492c643" alt="" width="330"><figcaption><p>Change a block name from its Settings.</p></figcaption></figure>

4. Come back to the block configuration and add a **Text step**.
5. Fill it with the following message: *What’s your name?*
6. Under **Check if response matches**, choose **any**.
7. Under **Destination variable**, create a new variable that you’ll call `userName`.

<figure><img src="https://2786867680-files.gitbook.io/~/files/v0/b/gitbook-x-prod.appspot.com/o/spaces%2F-LLTwFwbOqJj4dDhg8Ju%2Fuploads%2FDv7nbiAgV9DrWZN75jii%2FScreenshot%202024-03-07%20at%2009.40.56.png?alt=media&amp;token=146c61ba-031f-4034-a1ff-9d238b945e22" alt="" width="323"><figcaption><p>Check if a Collect input responses matches a variable.</p></figcaption></figure>

8. Under **Go to**, create the next block which will be a **Collect input** block called *Ask email*.

<figure><img src="https://2786867680-files.gitbook.io/~/files/v0/b/gitbook-x-prod.appspot.com/o/spaces%2F-LLTwFwbOqJj4dDhg8Ju%2Fuploads%2FjgD7C49Iw0wl8HWFIK27%2FScreenshot%202024-02-06%20at%2014.30.41.png?alt=media&amp;token=75ada538-8fa5-49e5-93f6-6101cdfe6ee8" alt="" width="375"><figcaption><p>Create a Collect input from a Go to.</p></figcaption></figure>

9. **Save** your changes.
10. Draw a Go-to connection between **Welcome new user** and **Ask name**.
11. Draw a Go-to connection between **Welcome returning user** and **Ask name**.

At this stage, your canvas should look like so:

<figure><img src="https://2786867680-files.gitbook.io/~/files/v0/b/gitbook-x-prod.appspot.com/o/spaces%2F-LLTwFwbOqJj4dDhg8Ju%2Fuploads%2FD4t9niqbE526dABKI1Ns%2FScreenshot%202024-03-07%20at%2009.45.44.png?alt=media&amp;token=1051ea3d-aed3-4f1f-b609-d8a0cc991f02" alt=""><figcaption><p>What your canvas should look like at this stage.</p></figcaption></figure>

## Step 8: Re-use a variable in the conversation

So that the user feels heard, we would like to re-use their name we’ve just collected in the previous block. To do so, we will re-use the {userName} variable.

{% hint style="success" %}
[Variables](https://docs.chatlayer.ai/bot-answers/settings/secure-variables-gdpr) are used to store any information the bot knows about a user. They can be reused inside text by using curly braces {}. Learn more about variables [here](https://docs.chatlayer.ai/bot-answers/settings/secure-variables-gdpr).
{% endhint %}

To reuse a variable inside text:

1. Open your **Ask email** block.
2. Change its content so that it asks *Great {userName}, and your email?*
3. Under **Check if response matches**, select **@sys.email.**

{% hint style="info" %}
Chatlayer offers [pre-defined](https://docs.chatlayer.ai/bot-answers/dialog-state/user-input-bot-dialog#system-entities-input-type) entities to recognize emails, phone numbers or URLs. They provide a time-saving way to build your Collect input blocks!
{% endhint %}

4. Under Destination variable, create {userEmail}.

<figure><img src="https://2786867680-files.gitbook.io/~/files/v0/b/gitbook-x-prod.appspot.com/o/spaces%2F-LLTwFwbOqJj4dDhg8Ju%2Fuploads%2FEgG9MBpDfc9SYq9osMnr%2FScreenshot%202024-03-07%20at%2010.00.10.png?alt=media&amp;token=8df5bf1b-7c3a-4218-900a-907417c8a514" alt="" width="325"><figcaption><p>Save the user email under a variable.</p></figcaption></figure>

5. As a Go-to, create a placeholder block called **Next block**.

<figure><img src="https://2786867680-files.gitbook.io/~/files/v0/b/gitbook-x-prod.appspot.com/o/spaces%2F-LLTwFwbOqJj4dDhg8Ju%2Fuploads%2FQSMbLNuLzT76fQWELGZP%2FScreenshot%202024-03-07%20at%2010.00.38.png?alt=media&amp;token=ddec85d5-9088-4377-a206-e838ded18825" alt="" width="334"><figcaption><p>Create the Next block from the Go to.</p></figcaption></figure>

6. **Save** your changes.
7. Fill your **Next block** with a placeholder text like *This is a next block*.
8. **Save** your changes.

What you’ve created should look like so on your canvas:

<figure><img src="https://2786867680-files.gitbook.io/~/files/v0/b/gitbook-x-prod.appspot.com/o/spaces%2F-LLTwFwbOqJj4dDhg8Ju%2Fuploads%2Fe9L183F6FJj8zHYWLBMC%2FScreenshot%202024-03-07%20at%2010.30.39.png?alt=media&amp;token=6f33f05b-9a1e-4604-a9f8-31ff9c98ad85" alt=""><figcaption><p>What your canvas should look like at this stage.</p></figcaption></figure>

What happens after we implemented something? Testing of course!

### Test your Collect input

You can test your bot from anywhere in the conversation. We’re going to test the small piece of flow we’ve just created only, and see that the variable is indeed understood in the back-end.

#### Test from the middle of a flow

To test a bot from the middle of a flow:

1. Click on the **Ask name** block.
2. A toolbar opens. Click on the **Test** button.

<figure><img src="https://2786867680-files.gitbook.io/~/files/v0/b/gitbook-x-prod.appspot.com/o/spaces%2F-LLTwFwbOqJj4dDhg8Ju%2Fuploads%2FFIjePXa2pZUlOsG1ybzq%2FScreenshot%202024-02-06%20at%2015.51.36.png?alt=media&amp;token=26256e34-ec1c-449e-be14-52aa9e69be89" alt="" width="374"><figcaption><p>Test your block from the canvas.</p></figcaption></figure>

3. Test your piece of flow with the Collect input blocks. Your conversation should look like this:

<figure><img src="https://2786867680-files.gitbook.io/~/files/v0/b/gitbook-x-prod.appspot.com/o/spaces%2F-LLTwFwbOqJj4dDhg8Ju%2Fuploads%2FMq1mLTwZ4i2K0BvNpXBN%2FScreenshot%202024-03-07%20at%2010.08.53.png?alt=media&amp;token=f45e7b5f-93f2-43d3-a357-d2a878c755a8" alt="" width="280"><figcaption><p>Test your Collect input flow.</p></figcaption></figure>

#### Check the variable in the user session

The Debugger tab allows you to check your session data and see for yourself that a variable is indeed understood. To do so:

1. Open the Test your bot window.
2. Click on the Debugger icon at the top-right corner of the screen.

<figure><img src="https://2786867680-files.gitbook.io/~/files/v0/b/gitbook-x-prod.appspot.com/o/spaces%2F-LLTwFwbOqJj4dDhg8Ju%2Fuploads%2FGqVX6i44hN04ghyEzSVc%2FScreenshot%202024-03-07%20at%2010.13.40.png?alt=media&amp;token=8a2b4154-2d44-494d-bc16-286f735b32b0" alt=""><figcaption><p>Open the Debugger from your Test window.</p></figcaption></figure>

3. Read down the **Session data** and see that {userName} and {userEmail} indeed exist and are filled with the right values.

<figure><img src="https://2786867680-files.gitbook.io/~/files/v0/b/gitbook-x-prod.appspot.com/o/spaces%2F-LLTwFwbOqJj4dDhg8Ju%2Fuploads%2FsY82XVU9KuwEVmDBpTBB%2FScreenshot%202024-03-07%20at%2010.15.34.png?alt=media&amp;token=d38bc1d7-b327-47a9-b445-25ad6a7d9216" alt=""><figcaption><p>Check your variables in the Debugger.</p></figcaption></figure>

{% hint style="success" %}
The [Debugger](https://docs.chatlayer.ai/tips-and-best-practices/solving-bot-issues#debugger-tab) is useful to detect where an issue comes from if something went wrong with the behavior of your bot.
{% endhint %}

Hurray! You’ve collected a response and used it inside your conversation, just like humans do.

## Lesson 3 recap

In this lesson, you’ve learned how to:

* [ ] Add buttons to your chatbot.
* [ ] Steer the conversation based on a button click.
* [ ] Get user input by using Collect input blocks, and store it as a variable.
* [ ] Reuse variables inside the conversation.
* [ ] Draw Go-to connections from your canvas.
* [ ] Change a block’s name from your canvas.
* [ ] Test your bot from a certain block in the conversation.
* [ ] Use the Debugger to check that a variable is working.

## Coming next

In the next lesson, we’ll explore how to use variables at any point of the conversation to steer it based on certain conditions.

{% content-ref url="/pages/lVw1aeY3gFbPeToSDqH3" %}
[4. Steer the conversation with Conditions](/start-quickly/leadzy-tutorial/4.-steer-the-conversation-with-conditions)
{% endcontent-ref %}

## 💬 Feedback

{% hint style="warning" %}
Your feedback on the tutorial means the world to us! Please, let us know what you think through [this short form.](https://forms.office.com/Pages/ResponsePage.aspx?id=ropROyGJe0qEl2GddWziDlEYn6XpsIRDjnCtdRk8L21UMFZMMlAzN0tHOTI4UjMxVTgzTVAwTE5aOCQlQCN0PWcu)
{% endhint %}


# 4. Steer the conversation with Conditions

In the previous lesson, you learned how to get user input and re-use it as variables. Let's see now how the conversation can be steered in different directions based on variables.

Apart from being re-used inside the conversation itself, variables can help the bot steer the conversation in different directions, by using Condition blocks.

<figure><img src="https://2786867680-files.gitbook.io/~/files/v0/b/gitbook-x-prod.appspot.com/o/spaces%2F-LLTwFwbOqJj4dDhg8Ju%2Fuploads%2FOpTqVBEPZ3mUui0Hf7Dq%2FChooChoo%20tutorial%20rework%20(1).jpg?alt=media&amp;token=00288ef5-a306-49d6-a153-0a5c5b3219a5" alt=""><figcaption><p>What we will build in lesson 4.</p></figcaption></figure>

## Step 8: Check a variable in a Condition block

Our Bee bot now asks if the user is new, then asks the user information.

We would like Bee to give a slightly different answer depending on if the user is new or returning. To do so, we’ll need a **Condition** block that checks a {userType} variable.

<figure><img src="https://2786867680-files.gitbook.io/~/files/v0/b/gitbook-x-prod.appspot.com/o/spaces%2F-LLTwFwbOqJj4dDhg8Ju%2Fuploads%2FeXQDTkIVjsNPMgyrSti9%2FScreenshot%202024-02-07%20at%2015.22.07.png?alt=media&amp;token=2f099ed1-95ab-45c1-843d-29cd3976b9cd" alt=""><figcaption><p>The Condition block type.</p></figcaption></figure>

{% hint style="success" %}
[Condition](https://docs.chatlayer.ai/bot-answers/dialog-state/plugins) blocks enable your bot to redirect the user to another block depending on the conditions of the session variables, following an if-then logic.
{% endhint %}

### Get variables under button clicks

We’ll save a {userType} variable under button click of the **Check user type** block. This variable can have either the value *returning* or *new*.

To save a variable under a button click:

1. Open the **Check user type** block.
2. Under the first **I’m new** button, click on **+ Add a variable** and create the variable *userType.*

<figure><img src="https://2786867680-files.gitbook.io/~/files/v0/b/gitbook-x-prod.appspot.com/o/spaces%2F-LLTwFwbOqJj4dDhg8Ju%2Fuploads%2FyvSA3svIfKYqhW3jVxTo%2FScreenshot%202024-03-07%20at%2010.40.50.png?alt=media&amp;token=a19b205a-142e-49d8-abfd-897c3b2684f4" alt="" width="302"><figcaption><p>Create a variable under a button click.</p></figcaption></figure>

3. Add the value *new*.
4. For the second button, do the same with the value *returning*.

<figure><img src="https://2786867680-files.gitbook.io/~/files/v0/b/gitbook-x-prod.appspot.com/o/spaces%2F-LLTwFwbOqJj4dDhg8Ju%2Fuploads%2Fsvwqt2MuKk6TovRkgC5c%2FScreenshot%202024-03-07%20at%2010.41.41.png?alt=media&amp;token=6a64d6bc-10a9-469f-817a-45eaf734dbd8" alt=""><figcaption><p>Make your Go-to buttons capture variables.</p></figcaption></figure>

5. **Save** your changes.

Now, when a user clicks on one of these buttons, the system will remember the {userType} variable. Let's utilize this variable within a Condition block.

### Add a Condition block

We aim to create a Condition block that evaluates the {userType} variable and provides a different response based on its value.

To add a Condition block:

1. Open the **Next block** block.
2. Go to its **Settings**.
3. Change its Type to **Condition**.

<figure><img src="https://2786867680-files.gitbook.io/~/files/v0/b/gitbook-x-prod.appspot.com/o/spaces%2F-LLTwFwbOqJj4dDhg8Ju%2Fuploads%2FdPavNOfNDFCfn9ByPSWz%2FScreenshot%202024-03-07%20at%2010.44.58.png?alt=media&amp;token=9332a770-a8cb-4010-b98f-aad38c4da854" alt=""><figcaption><p>Change a block dialog type from its Settings.</p></figcaption></figure>

4. You’ll get a warning message. Click **Yes, change type**.
5. Under **Bot dialog name**, change the block name to *Route userType*.

<figure><img src="https://2786867680-files.gitbook.io/~/files/v0/b/gitbook-x-prod.appspot.com/o/spaces%2F-LLTwFwbOqJj4dDhg8Ju%2Fuploads%2FVpeMkuYyMzPTWBs1sh1B%2FScreenshot%202024-03-07%20at%2010.46.52.png?alt=media&amp;token=0f2784c6-b38c-49f0-b825-f69c899f6038" alt=""><figcaption><p>Change a block name from its Settings.</p></figcaption></figure>

6. Go back to its configuration, and click on the **+** to add your first condition.
7. Fill in the block as follows, using the **equal case insensitive operator**:
   * If {userType} = new,
     * then Go to **Send email new user**. You can create this new block directly from the text field.
   * Else if {userType} = returning,
     * then Go to **Send email returning user**. You can create this new block directly from the text field.
   * Else:
     * Go to **Error occurred**.

{% hint style="success" %}
The Error occurred block is a [default block](https://docs.chatlayer.ai/bot-answers/dialog-state#default-blocks) triggered when an API integration fails to complete a certain request, or when Chatlayer considers your bot to be blocked in a loop.
{% endhint %}

Your window should look like this:

<figure><img src="https://2786867680-files.gitbook.io/~/files/v0/b/gitbook-x-prod.appspot.com/o/spaces%2F-LLTwFwbOqJj4dDhg8Ju%2Fuploads%2FMnEeGhjLjfF55ACpMLvY%2FScreenshot%202024-03-07%20at%2010.51.53.png?alt=media&amp;token=aa6e3679-c1d2-4a78-b000-ed297a75d3d4" alt=""><figcaption><p>Fill your Condition block with conditions.</p></figcaption></figure>

8. **Save** your changes.

Your canvas looks a bit messy now, and that’s totally normal. Let’s organize it a bit:

### Organize your flow

To re-organize your flow when it looks messy, click on the **Auto-layout** button at the bottom-right corner of your canvas.

<figure><img src="https://2786867680-files.gitbook.io/~/files/v0/b/gitbook-x-prod.appspot.com/o/spaces%2F-LLTwFwbOqJj4dDhg8Ju%2Fuploads%2Ffqd3UDD83T7dxXhKLhdR%2FScreenshot%202024-03-07%20at%2010.53.15.png?alt=media&amp;token=e0582baa-a496-4199-bbe1-9f3001c9a745" alt=""><figcaption></figcaption></figure>

What we created should look like this now:

<figure><img src="https://2786867680-files.gitbook.io/~/files/v0/b/gitbook-x-prod.appspot.com/o/spaces%2F-LLTwFwbOqJj4dDhg8Ju%2Fuploads%2F0fRltJgtmzgOc4V5zmhj%2FScreenshot%202024-03-07%20at%2010.54.13.png?alt=media&amp;token=1fffcd9b-b143-4209-b453-6a73b9dd0095" alt=""><figcaption><p>What your canvas should look like at this point.</p></figcaption></figure>

## Lesson 4 recap

Congratulations! In this lesson, you’ve learned how to:

* [ ] Store variables from button clicks.
* [ ] Add a Condition block.
* [ ] Check variables inside a Condition block and steer the conversation accordingly.
* [ ] Organize your canvas by using Auto-layout.

## Coming next

Coming next, we’ll see how to connect your bot to 3rd party providers so that you leverage your bot’s functionalities.

{% content-ref url="/pages/hejRQvvKlH9sxWwhYqF6" %}
[5. Empower your bot with Actions](/start-quickly/leadzy-tutorial/5.-empower-your-bot-with-actions)
{% endcontent-ref %}

## 💬 Feedback

{% hint style="warning" %}
Your feedback on the tutorial means the world to us! Please, let us know what you think through [this short form.](https://forms.office.com/Pages/ResponsePage.aspx?id=ropROyGJe0qEl2GddWziDlEYn6XpsIRDjnCtdRk8L21UMFZMMlAzN0tHOTI4UjMxVTgzTVAwTE5aOCQlQCN0PWcu)
{% endhint %}


# 5. Empower your bot with Actions

So far, you’ve created a bot that understands, responds and redirects the conversation based on certain variables. Learn now how to connect it to 3rd-party systems to increase its functionalities.

<figure><img src="https://2786867680-files.gitbook.io/~/files/v0/b/gitbook-x-prod.appspot.com/o/spaces%2F-LLTwFwbOqJj4dDhg8Ju%2Fuploads%2FmT40CAJcMQs3qHR3nJUi%2FChooChoo%20tutorial%20rework%20(2).jpg?alt=media&amp;token=f5a3e272-b9b7-43d6-ba66-e507c6d696a9" alt=""><figcaption><p>What we will build in lesson 5.</p></figcaption></figure>

Action blocks empower chatbots to perform tasks beyond their built-in capabilities by leveraging the functionality of external tools and services, enhancing the overall user experience and utility of the bot.

<figure><img src="https://2786867680-files.gitbook.io/~/files/v0/b/gitbook-x-prod.appspot.com/o/spaces%2F-LLTwFwbOqJj4dDhg8Ju%2Fuploads%2Fv1QzXOyYXUg0vIfwcUzz%2FScreenshot%202024-02-16%20at%2015.21.52.png?alt=media&amp;token=38aad9bb-afcf-4df3-8836-7b9242782467" alt="" width="156"><figcaption><p>The Action block type.</p></figcaption></figure>

## Step 9: Send an email with an Action block

Now that the bot asks the user info, let’s use the gathered info to send an email so that they receive their discount code.

### Send an email

To add a Send email Action:

1. From the canvas, open the **Send email returning user** block.
2. Go to its **Settings**.
3. Change its type to **Action**.
4. Back to the block content, scroll down to **Send mail**.

<figure><img src="https://2786867680-files.gitbook.io/~/files/v0/b/gitbook-x-prod.appspot.com/o/spaces%2F-LLTwFwbOqJj4dDhg8Ju%2Fuploads%2F9K7lHHbdbn8SUcUyBzoP%2FScreenshot%202024-03-12%20at%2010.11.55.png?alt=media&amp;token=ea574da8-e155-4109-9513-53de68514b6a" alt="" width="335"><figcaption><p>Add a Send mail step in your Action block.</p></figcaption></figure>

5. Fill the text fields with the following:

<figure><img src="https://2786867680-files.gitbook.io/~/files/v0/b/gitbook-x-prod.appspot.com/o/spaces%2F-LLTwFwbOqJj4dDhg8Ju%2Fuploads%2FlOY4O4jzV0LuXsyWjh7H%2FScreenshot%202024-03-12%20at%2010.16.27%20(1).png?alt=media&amp;token=ade79de8-aab0-48ec-9bc0-15657ce916c2" alt=""><figcaption><p>Use the collected variables to send an email to a user who is already a client.</p></figcaption></figure>

6. Click **Save**.
7. Do the same process for the Send email new user block, and fill it in with the following content:

<figure><img src="https://2786867680-files.gitbook.io/~/files/v0/b/gitbook-x-prod.appspot.com/o/spaces%2F-LLTwFwbOqJj4dDhg8Ju%2Fuploads%2F1YVIN5LIOvflrvDNSCHv%2FScreenshot%202024-03-12%20at%2010.16.13.png?alt=media&amp;token=9c0ef916-8167-42cb-9214-245733a547e6" alt=""><figcaption><p>Use the collected variables to send an email to a first-time user.</p></figcaption></figure>

8. **Save** your changes.

### Confirm the email to users

Let’s now wrap up the conversation by confirming users that their code has been send.

To add a confirmation message:

1. Drop a **Message** block to your canvas.
2. Go to the block **Settings**.
3. Change its name to *Thanks*.
4. Back to the block configuration, add a **Text** step.
5. Fill it with the following text: *Thanks {userName}, we just send you an email with the code!*
6. **Save** your changes.
7. Draw a Go-to connection from the two blocks that send email to the **Thanks** block.

Your canvas should look like so:

<figure><img src="https://2786867680-files.gitbook.io/~/files/v0/b/gitbook-x-prod.appspot.com/o/spaces%2F-LLTwFwbOqJj4dDhg8Ju%2Fuploads%2FrqZ2mbF06dEPm1iA60iW%2FScreenshot%202024-03-12%20at%2011.27.41.png?alt=media&amp;token=678a813e-3df6-4c1e-9c7a-c617d37cd207" alt=""><figcaption><p>What your canvas should look like at this point.</p></figcaption></figure>

### Test your bot

Make sure to test your bot. Is everything working as expected? If so, your conversation should like so:

<figure><img src="https://2786867680-files.gitbook.io/~/files/v0/b/gitbook-x-prod.appspot.com/o/spaces%2F-LLTwFwbOqJj4dDhg8Ju%2Fuploads%2F7edPbN5ymT3XLQ6VuAVW%2FScreenshot%202024-03-12%20at%2011.29.45.png?alt=media&amp;token=df73c0df-3aae-483e-9b61-c235738b28eb" alt=""><figcaption><p>Test your whole flow.</p></figcaption></figure>

And if you check your emails, you should have received something like this:

<figure><img src="https://2786867680-files.gitbook.io/~/files/v0/b/gitbook-x-prod.appspot.com/o/spaces%2F-LLTwFwbOqJj4dDhg8Ju%2Fuploads%2F13X1yqEGIWLhZRwFWO3H%2FScreenshot%202024-03-27%20at%2017.06.23.png?alt=media&amp;token=9345c3d7-ebe3-47b5-9956-a7b2857e0b94" alt="" width="375"><figcaption><p>An email send with the chatbot.</p></figcaption></figure>

## Lesson 5 recap

In this lesson, you’ve learned how to:

* [ ] Add an Action block to your canvas so that you can integrate your bot with 3rd-party systems.
* [ ] Use collected variables from users inside a Send mail Action block.

## Coming next

You’ve just built your whole flow, congratulations! The final step in your bot building journey will be to publish your bot.

{% content-ref url="/pages/Dz2hLNQAcWigTPFA2ltD" %}
[6. Set up a channel and publish your bot](/start-quickly/leadzy-tutorial/6.-set-up-a-channel-and-publish-your-bot)
{% endcontent-ref %}

## 💬 Feedback

{% hint style="warning" %}
Your feedback on the tutorial means the world to us! Please, let us know what you think through [this short form.](https://forms.office.com/Pages/ResponsePage.aspx?id=ropROyGJe0qEl2GddWziDlEYn6XpsIRDjnCtdRk8L21UMFZMMlAzN0tHOTI4UjMxVTgzTVAwTE5aOCQlQCN0PWcu)
{% endhint %}


# 6. Set up a channel and publish your bot

Congratulations on building your bot! Yet, it's still not available for your customers. In this lesson, you will learn how to connect your bot to a channel and publish it.

<figure><img src="https://2786867680-files.gitbook.io/~/files/v0/b/gitbook-x-prod.appspot.com/o/spaces%2F-LLTwFwbOqJj4dDhg8Ju%2Fuploads%2FJVfNdz7UWxiUiaOhE0sB%2FScreenshot%202024-03-27%20at%2017.21.59.png?alt=media&amp;token=56655a1c-5480-468d-9aa3-094a4de1449e" alt="" width="373"><figcaption><p>What your web widget will look like once the bot is published on a Web channel.</p></figcaption></figure>

## Step 10: Set up a Web channel

For this bot, we will use a Web channel.

{% hint style="danger" %}
Bear in mind that we're not still operating in the DRAFT environment of your bot, i.e. an environment for building and testing. To have a channel in your LIVE environment (i.e. the customer-facing environment), you'll need to re-do these steps after publishing, in the LIVE environment. Lean more [here](https://docs.chatlayer.ai/bot-answers/publishing-your-bot#understanding-the-draft-version).
{% endhint %}

To set up a Web channel for your chatbot:

1. From your left-hand menu, click on **Channels**.

{% hint style="warning" %}
There are many other channels where you can publish your bot, yet, they require some configuration that we’re not covering in this short tutorial. To learn more about channels, check [this page](https://docs.chatlayer.ai/channels/multi-channel).
{% endhint %}

<figure><img src="https://2786867680-files.gitbook.io/~/files/v0/b/gitbook-x-prod.appspot.com/o/spaces%2F-LLTwFwbOqJj4dDhg8Ju%2Fuploads%2FoD181g9MO8BsMvw4sewg%2FScreenshot%202024-03-19%20at%2012.03.19.png?alt=media&amp;token=5bdb87b4-e516-40b3-abb3-43d4e7466410" alt=""><figcaption><p>The Channels tab.</p></figcaption></figure>

2. Click on the **Add channel** button, at the top-right corner of your screen.
3. Click on **Web**.
4. Here, set up your chatbot widget as you please. For this tutorial we will:
   * call the chatbot *Leadzy*,
   * give her *Your shopping assistant* as a subtitle,
   * and disable audio input and file upload since our bot doesn’t use that.

<figure><img src="https://2786867680-files.gitbook.io/~/files/v0/b/gitbook-x-prod.appspot.com/o/spaces%2F-LLTwFwbOqJj4dDhg8Ju%2Fuploads%2F2B5UkVwNWbDKxk9Lyf1J%2FScreenshot%202024-03-27%20at%2017.26.06.png?alt=media&amp;token=725ef986-1d40-402c-83d6-7b5371c3d1a2" alt=""><figcaption><p>Set up the basics of your web widget.</p></figcaption></figure>

5. Under the **Appearance** tab, select colors and add an image for your bot avatar.

<figure><img src="https://2786867680-files.gitbook.io/~/files/v0/b/gitbook-x-prod.appspot.com/o/spaces%2F-LLTwFwbOqJj4dDhg8Ju%2Fuploads%2FfMSB5jsL42iI7k3myjq9%2FScreenshot%202024-03-27%20at%2017.23.46.png?alt=media&amp;token=c4b89c26-7e01-45fd-92c3-421c5eae1eb4" alt=""><figcaption><p>Set up the appearance of your web widget.</p></figcaption></figure>

![Screenshot 2024-02-21 at 16.38.00.png](https://prod-files-secure.s3.us-west-2.amazonaws.com/6d68ea67-ee27-4a92-8691-2a4d5aaf90c6/a5bb36b9-6c5c-4d98-83d1-43eb81ff2a28/Screenshot_2024-02-21_at_16.38.00.png)

6. Click **Save**.

Your widget is now designed and ready to be used!

### Test your web widget on Webchat

To test your bot on Webchat:

1. From your Web channel menu, click on the **Installation** tab.
2. Here, copy your iframe URL from the link provided at the top:

<figure><img src="https://2786867680-files.gitbook.io/~/files/v0/b/gitbook-x-prod.appspot.com/o/spaces%2F-LLTwFwbOqJj4dDhg8Ju%2Fuploads%2F9knGfrPkPeixpikCU0RO%2FScreenshot%202024-02-21%20at%2016.39.44%20(1).png?alt=media&amp;token=1600d13f-0c7b-4c0a-8714-6b73b87082ca" alt="" width="375"><figcaption><p>Copy the iframe link.</p></figcaption></figure>

3. Paste it to a new window: you can test your bot here on Webchat!

<figure><img src="https://2786867680-files.gitbook.io/~/files/v0/b/gitbook-x-prod.appspot.com/o/spaces%2F-LLTwFwbOqJj4dDhg8Ju%2Fuploads%2FM23GT16hUrrWa0ELnMAf%2FScreenshot%202024-03-27%20at%2017.30.08.png?alt=media&amp;token=c1a7083f-fd81-4494-b9c2-891101abe6f2" alt=""><figcaption><p>Test your chatbot in an iframe.</p></figcaption></figure>

{% hint style="info" %}
Please bear in mind that we're still in the DRAFT environment here.
{% endhint %}

### Test your web widget on Codepen

To test your bot on Codepen:

1. From your web channel menu, go to the **Installation** tab.
2. Click on **Preview** at the bottom-left corner of the screen.
3. A **Codepen** page opens that simulates what your chatbot widget would look like on your website.

<figure><img src="https://2786867680-files.gitbook.io/~/files/v0/b/gitbook-x-prod.appspot.com/o/spaces%2F-LLTwFwbOqJj4dDhg8Ju%2Fuploads%2Fb5vxEU2SMjP53E5Vt6Xo%2FScreenshot%202024-03-27%20at%2017.30.50.png?alt=media&amp;token=ddaf6679-fd36-4f11-a2bc-d105eba83fd1" alt=""><figcaption><p>Test your bot on Codepen.</p></figcaption></figure>

## Step 11: Publish your bot

To publish your bot:

1. Open your **Flows** view.
2. On the top-right corner of your screen, click on **Publish**.
3. A window pops up and asks you to describe what you’re publishing. Add a short description as a release note.

<figure><img src="https://2786867680-files.gitbook.io/~/files/v0/b/gitbook-x-prod.appspot.com/o/spaces%2F-LLTwFwbOqJj4dDhg8Ju%2Fuploads%2FpdyswBflPv8IXs8QQEeg%2FScreenshot%202024-02-21%20at%2016.50.14.png?alt=media&amp;token=f5694eaf-1929-44d2-b865-b73d1301eb3a" alt="" width="324"><figcaption><p>Give a short description of the version of your bot that you're about to publish.</p></figcaption></figure>

4. Click on **Publish.**
5. [Set up a Web channel](#step-10-set-up-a-web-channel) in your LIVE environment this time.

{% hint style="danger" %}
To have a channel in your LIVE environment (i.e. the customer-facing environment), you' need to set up a channel inside that LIVE environment. Lean more [here](https://docs.chatlayer.ai/bot-answers/publishing-your-bot#understanding-the-draft-version).
{% endhint %}

### Check the different versions of your bot

You know if you are in the DRAFT or LIVE version of your bot depending on what you see on the bottom right corner of your screen.

{% hint style="info" %}
When editing the LIVE version of your bot, you are editing what users interact with immediately. Be careful! It’s always best to work on the DRAFT environment then publish it so that it overwrites the LIVE one. Lean more [here](https://docs.chatlayer.ai/bot-answers/publishing-your-bot#understanding-the-draft-version).
{% endhint %}

To check the different versions of your bot:

1. From the left-hand menu, under the **History** tab, click on **Versions**.
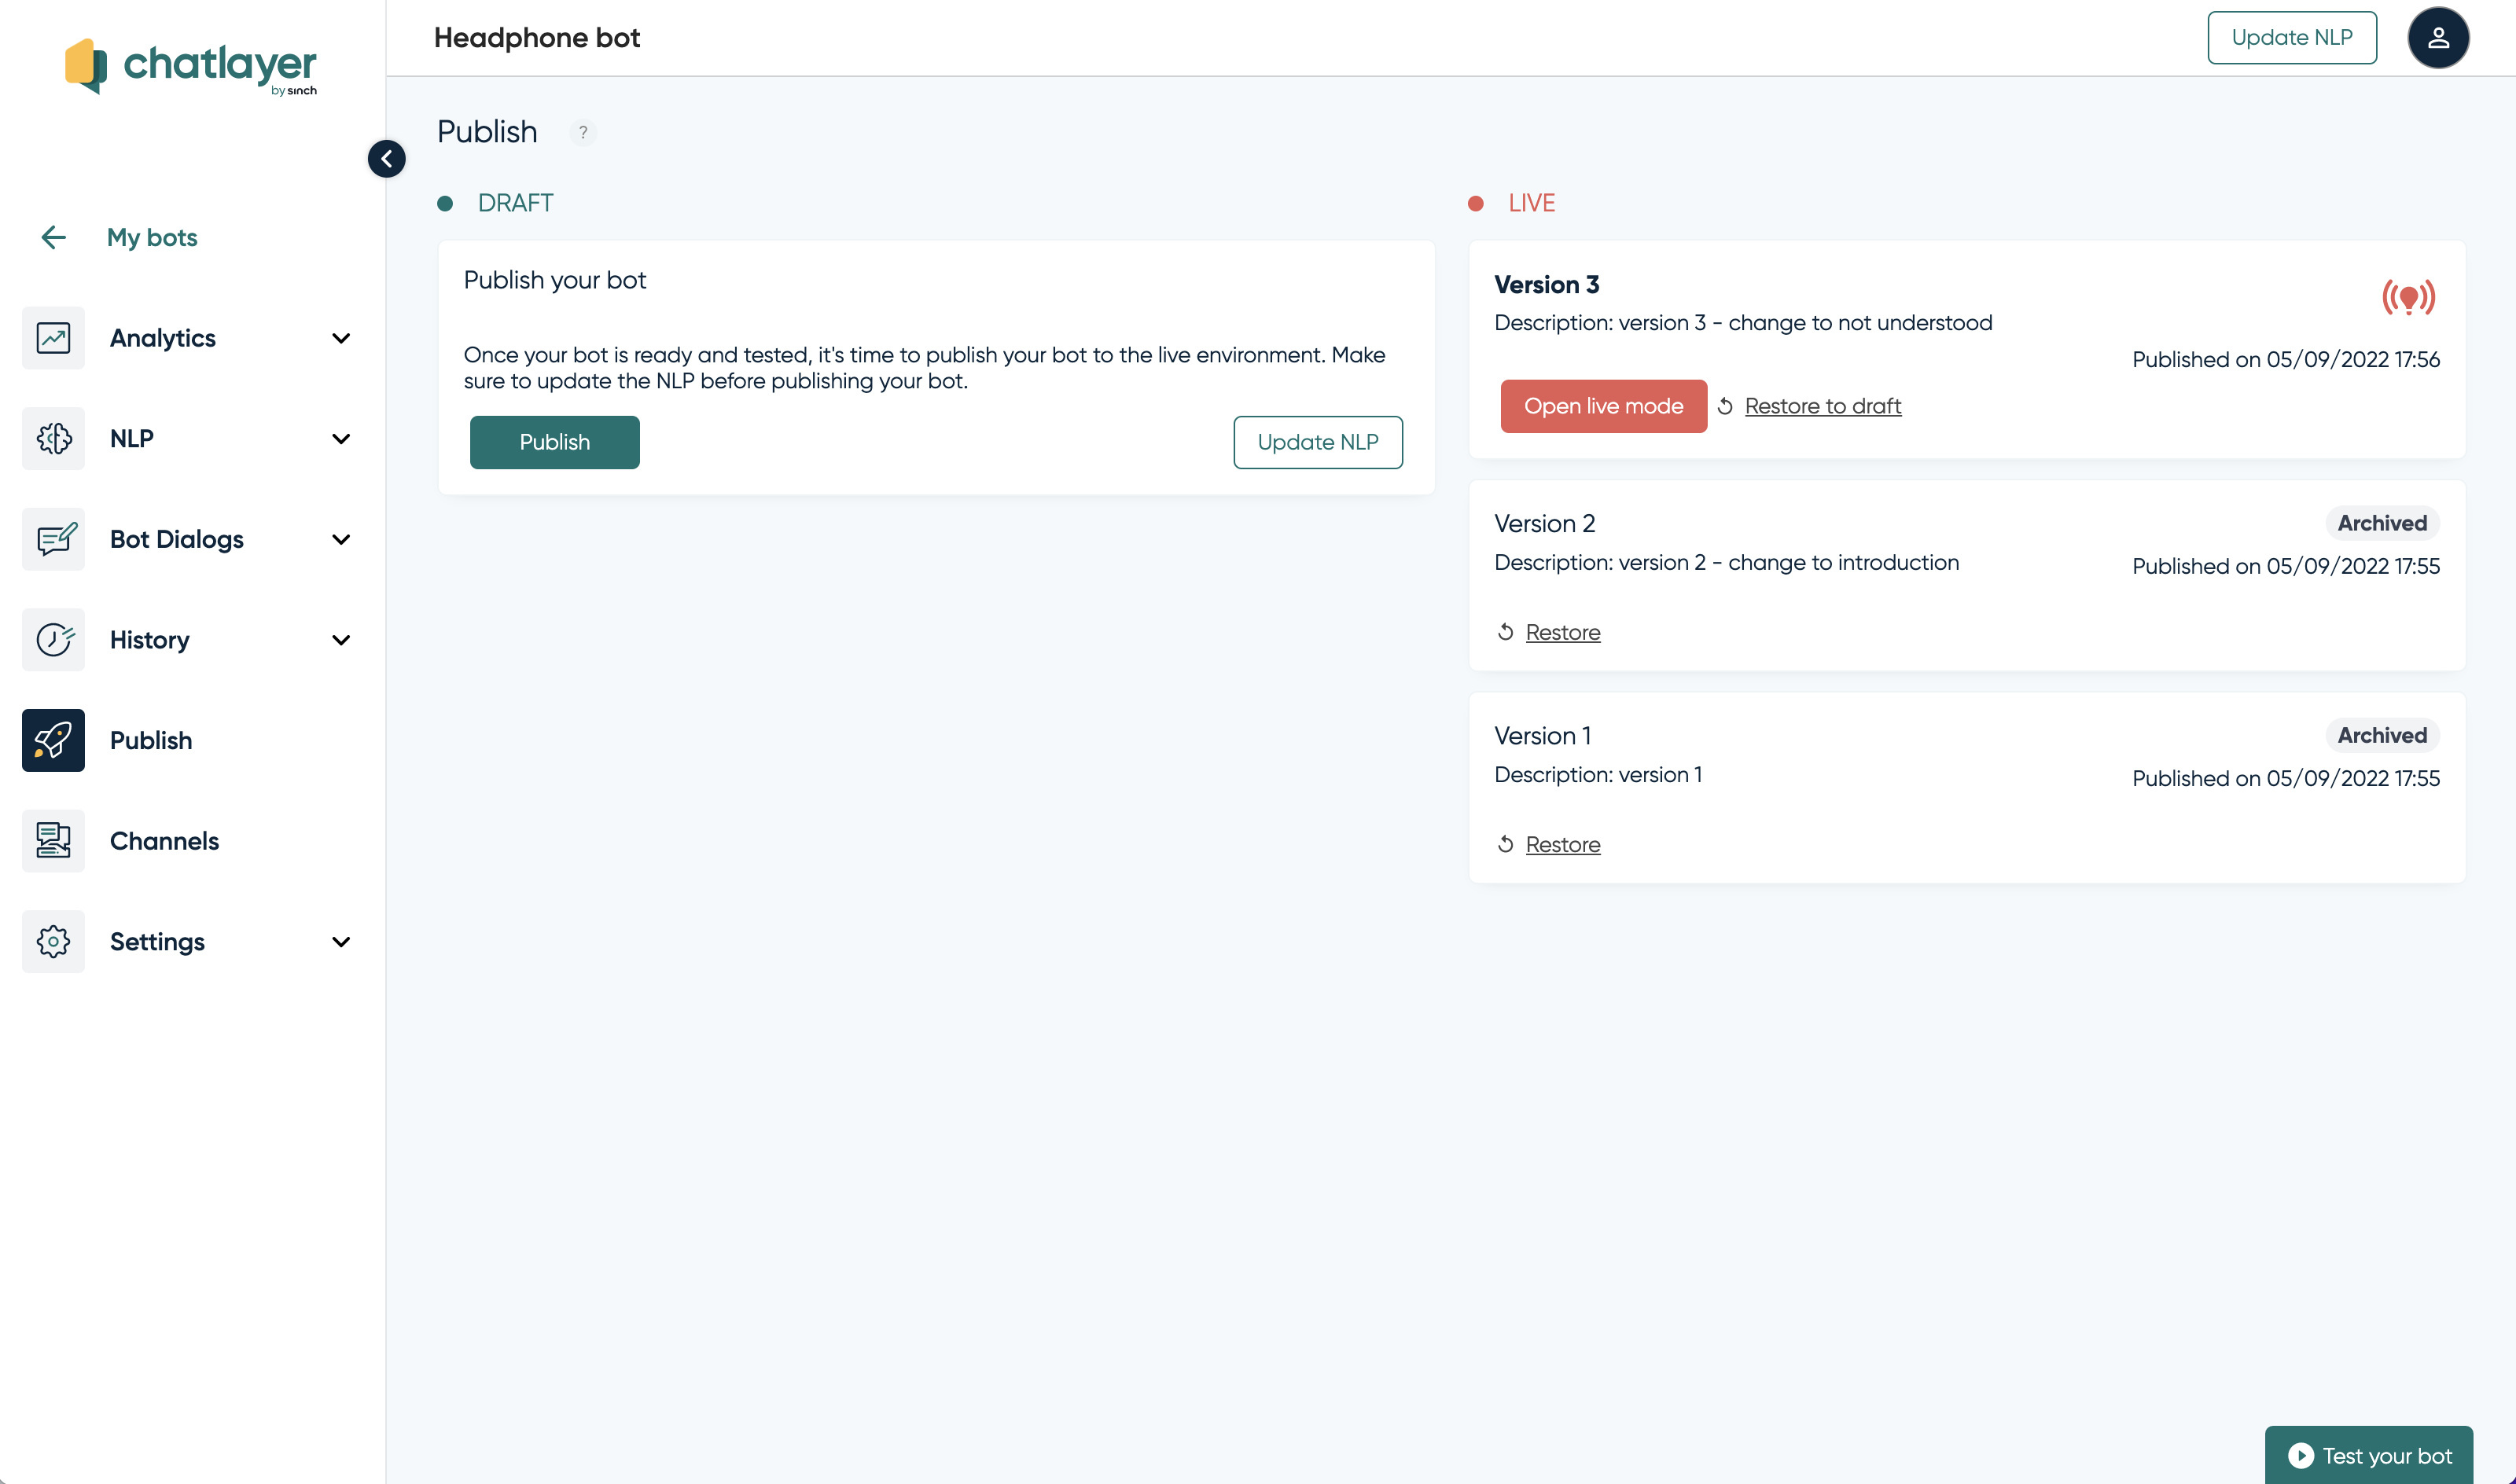
2. There, you can see the different versions of your bot that were published.

<figure><img src="https://2786867680-files.gitbook.io/~/files/v0/b/gitbook-x-prod.appspot.com/o/spaces%2F-LLTwFwbOqJj4dDhg8Ju%2Fuploads%2F1OAOMbAWx4j0rQa51lJW%2FScreenshot%202024-02-21%20at%2016.58.15.png?alt=media&amp;token=6c142f0f-9ccc-4c08-8752-39228c9631a2" alt=""><figcaption><p>Check the different versions of your bot.</p></figcaption></figure>

{% hint style="info" %}
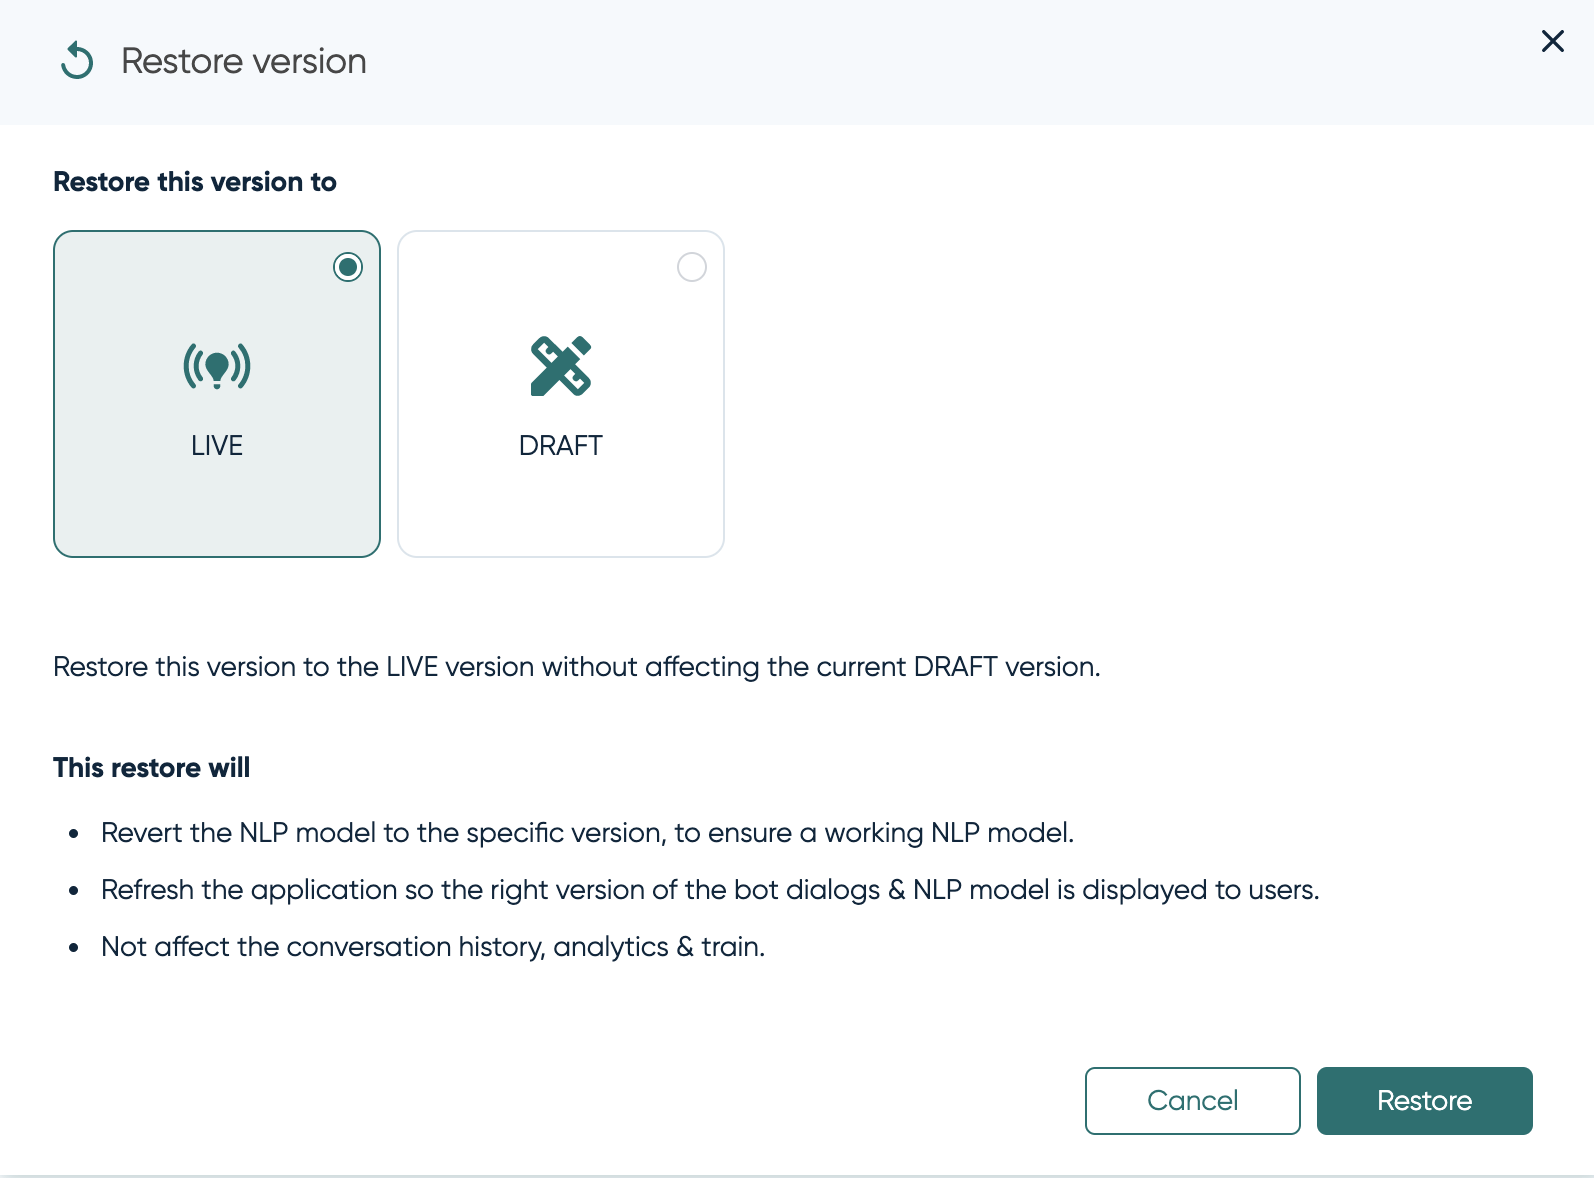
In case of a problem, the Versions allows you to publish an older version of your bot. Learn more about versioning [here](https://docs.chatlayer.ai/bot-answers/publishing-your-bot/restore-a-version).
{% endhint %}

## Lesson 6 recap

You’re done with this very first Chatlayer tutorial, congratulations to you! 👏

In this last lesson, you’ve learned how to:

* [ ] Add a Web channel to your bot.
* [ ] Configure your chatbot widget.
* [ ] Test your widget on Codepen and Webchat.
* [ ] Publish your bot.
* [ ] Check the different versions of your bot.

## 💬 Feedback

{% hint style="warning" %}
Your feedback on the tutorial means the world to us! Please, let us know what you think through [this short form.](https://forms.office.com/Pages/ResponsePage.aspx?id=ropROyGJe0qEl2GddWziDlEYn6XpsIRDjnCtdRk8L21UMFZMMlAzN0tHOTI4UjMxVTgzTVAwTE5aOCQlQCN0PWcu)
{% endhint %}


# Templates

Chatlayer offers multiple bot templates for you to explore many of our features. It's play time!

When you create a new bot on the Chatlayer platform, you have two options to get started:

* [Build a bot from scratch](https://docs.chatlayer.ai/tutorials/bot-tutorials/leadzy-tutorial/1.-new-bot-new-block#step-1-create-a-new-bot).
* [Load a bot template](#create-a-bot-from-a-template) and customise it.

Templates are bots built by the Chatlayer Conversation Design team:

* Some templates offer comprehensive bot designs covering common industry-specific use cases. These ready-to-use models are perfect for kickstarting your bot creation or exploring construction possibilities on our platform.
* Other templates can either focus on a single use case, streamlining the integration of specific functionality into your existing bot. This approach allows for rapid expansion and customization of bot capabilities.

{% hint style="info" %}
Most templates will work right out of the box after you load them, though in some cases you will need to make some small modifications to make it work, for example when an integration is used. You can find full guidelines on how to set up and customise each template in the following pages.
{% endhint %}

## Create a bot from a template

To create a new bot from a template:

* Go to the **Bots** page.
* Find a template that you like and click on **Get started**.
* Read through the template description.
* Click on **Create**.

<figure><img src="https://2786867680-files.gitbook.io/~/files/v0/b/gitbook-x-prod.appspot.com/o/spaces%2F-LLTwFwbOqJj4dDhg8Ju%2Fuploads%2Fez2erXLkk5EWFCll7JV3%2FScreenshot%202024-04-10%20at%2016.14.56.png?alt=media&amp;token=826b864c-045c-442d-8ab8-f858a9033a0a" alt=""><figcaption></figcaption></figure>

{% hint style="info" %}
Once the template is make sure to [update the NLP](https://docs.chatlayer.ai/understanding-users/natural-language-processing-nlp#updating-the-nlp).
{% endhint %}

## Bot templates overview

Here's an overview of all available template bots, ready to use!

### [Banking](/start-quickly/bot-templates/banking)

This chatbot banking assistant can help its users make payments, check their account balance or card limit, and report a card in case it got stolen or lost. A seamless experience that makes banking easy!

### [eCommerce Returns](/start-quickly/bot-templates/e-commerce-returns)

This template allows your customers to easily return items they bought in your online store.

### [E-Bike Shop](https://docs.chatlayer.ai/tips-and-best-practices/bot-templates/e-bike-shop)

A template for modern mobility providers to guide new clients through their products and book try-outs. This virtual assistant also provides information on order tracking and schedules checkup appointments. A conversational way to meet your customers where they are, right when they need you!

### [E-Scooter Support](https://docs.chatlayer.ai/tips-and-best-practices/bot-templates/e-scooter-support)

A FAQ bot to support your shared mobility customers wherever they are, whenever they need it. This bot checks if something is wrong with your account, helps you if you found a damaged scooter, and answers questions about pricing and renting!

### [Feedback](/start-quickly/bot-templates/feedback)

Leave those traditional feedback forms behind and get valuable customer input in a conversational way! Ask customers for product and service feedback when shopping on your website. Use intuitive star rating buttons to increase the engagement and offer them a voucher at the end of the survey as a reward.

### [Find Nearest Location](/start-quickly/bot-templates/find-nearest-location)

With this template flow, users can easily find your organisation’s nearest branch using your chatbot. After asking the user for their address, the bot will look through all your branch locations and then calculate which one is closest to the user’s address. The bot will give the address and show the location on Google Maps.

### [GPT](https://docs.chatlayer.ai/tutorials/bot-templates/gpt-3)

This bot template is using the state-of-the-art GPT technology to generate responses on retail use-cases, to make jokes or just to improvise on anything. Play with it and make it your own!

### 🆕 [Gym](/start-quickly/bot-templates/gym)

This booking assistant helps your customers to schedule their gym sessions. It offers a free trial to new joiners, books and reschedule collective classes, and answers some FAQ questions. A valuable tool to make your customers freer!

This template was recently updated to integrate the [Tables](/navigation/tables) feature.

### [Job Applications](/start-quickly/bot-templates/job-applications)

With this template job candidates can easily look up and apply for job openings at your company. Candidates can either browse through the open positions or directly ask about an opening for specific role.

### [Knowledge Base AI](/start-quickly/bot-templates/knowledge-base-ai-template)

This templates uses our latest [Knowledge Base AI feature](/navigation/knowledge-base-ai) to show you how your bot can generate answers based on your own data sources. No need to write a flow per question anymore!

### [Lead Generation](/start-quickly/bot-templates/lead-generation)

This is a short template for lead generation: your customers get a free trial if they give in their details. A flow easy to adapt to any chatbot! Please update the NLP before using.

### [Net Promoter Score® (NPS)](/start-quickly/bot-templates/nps)

Collect feedback from customers in a conversational way through our Net Promoter Score® (NPS) bot!

### [Restaurant](/start-quickly/bot-templates/restaurant)

Let your customers order food with just a few clicks of the button! This chatbot can help users with booking a table, placing an online order, and showing them the latest menu. If a question isn’t supported yet, the bot encourages users to contact the restaurant directly.

### [Retail](/start-quickly/bot-templates/retail)

Create an interactive shopping experience that offers support to your customers, whilst also promoting products based on previous orders. This bot can help customers trace or return an order, offer personalised shopping suggestions, and locate the nearest store based on the customer’s location.


# Banking

## Template overview

This chatbot can help users check their account balance, card limit, report a card as lost or stolen, and find the office closest to them.

Let's dive into how you can adapt this template for your business!

{% hint style="info" %}
Make sure to always [update the NLP](https://docs.chatlayer.ai/understanding-users/natural-language-processing-nlp#updating-the-nlp) after loading a template!
{% endhint %}

## How to customize this template

This template only uses [this Airtable database](https://airtable.com/shr9h2cv6y5LzTr5q) to search for records. Learn how to set up your own Airtable integration [here](https://docs.chatlayer.ai/integrations/app-integrations/airtable?q=airtabe).

{% hint style="info" %}
Using another service to store your data? You can link any type of database to this bot, as long as it has an API. Read more about our API integrations [here](/integrateandcode/custom-back-end-integrations/integrations-101).
{% endhint %}

### Flow: General

#### Block: Introduction

In the introduction message, you can change the Botbank image to your own business logo. Make sure that the Quick Reply buttons cover your bot's use cases.

#### Block: Not Understood

This Block uses a [Not Understood Counter](https://docs.chatlayer.ai/tips-and-best-practices/not-understood-bot-dialog/not-understood-counter?q=not+under) to create a better user experience and make the bot feel more natural. Have fun with it so that it matches your bot's persona!

#### Block: Anything Else

This Block is where the conversation ends up when a flow is over. For instance, when the user is done checking their account, they will be asked if there is anything else that can be done to help them.

### Flow: Check account

This flow captures two use cases: checking an account balance, and checking a card limit. A spreadsheet for Accounts and another for Cards were created in an [Airtable base](https://airtable.com/shr9h2cv6y5LzTr5q/tblpP867BDn6KHPXK/viwC9GRRqh8qMslvC?blocks=hide) that was made by using the [Airtable App integration](https://docs.chatlayer.ai/integrations/app-integrations/airtable-app-integration).

On the one hand, if users ask to check their card limit, and they get a different response depending on what card type they choose. Card types are defined under the `cardtype` contextual entity in the NLP section. This flow is triggered either by a Quick Reply button or by the `Card.Limit` intent.

![View of the Cards table from the Airtable database used for this template. Learn how to set up your own here.](https://2786867680-files.gitbook.io/~/files/v0/b/gitbook-x-prod.appspot.com/o/spaces%2F-LLTwFwbOqJj4dDhg8Ju%2Fuploads%2FxhH3vAc4o0PcLYUAOXaq%2FScreenshot%202022-07-28%20at%2010.14.53.png?alt=media\&token=917e29af-0c01-4a8a-8ac4-8e1d321a3809)

On the other hand, if users ask to check their account balance, they can choose to check their current account or savings account. Those are defined under the `accounttype` contextual entity. This flow is triggered either by a Quick Reply button or by the `Check.Balance` intent. Once the balance is checked, the user is asked if they want to make a money transfer from that account. This redirects us to the `Transfer money` flow where a `Is account known?` Go-To block checks that the `accounttype` variable is already filled before proceeding to the money transfer.

![View of the Accounts table from the Airtable database used for this template. Learn how to set up your own here.](https://2786867680-files.gitbook.io/~/files/v0/b/gitbook-x-prod.appspot.com/o/spaces%2F-LLTwFwbOqJj4dDhg8Ju%2Fuploads%2FsBpBTLRq5Z9hoyKzxZy2%2FScreenshot%202022-07-28%20at%2010.15.01.png?alt=media\&token=d618fb96-44ff-4da8-a9e7-ecbb868e0cd1)

### Flow: Transfer money

In this flow, users can make a one-time money transfer, or create a standing order.

#### Block: One-time transfer

Here, the bot first asks the amount to transfer, from which account, and finally the bank account number of the recipient. These values are stored as:

`amount` : the amount to be transferred

`accounttype` : the account from which the money is transferred

`IBAN` : the recipient's account number

To check that the bank account corresponds to a correct IBAN format, we use a Condition block that verifies if the `IBAN` exists. To do so, the bot checks that the entered IBAN matches the IBAN Regex pattern. In short, it verifies whether this is a valid IBAN. To see this pattern and adapt it to your needs, you can go in the Entities tab > Match Entities > `@IBAN.`

#### Block: Standing order

To set up a standing order, the bot first asks the user how often the payment should occur. This is stored under the`frequency`variable. After that, it asks for the the start and end date. To check if the user's input is a valid date, we check if the value matches "date" before saving it as the variables `startDate` and `endDate`. Here users can also add a reference in their transfer, stored under the `reference` variable.

### Flow: Report lost card

This flow allows users to report their card as lost or stolen. They are immediately redirected to external links to help block the card, after which they're asked if they want to order a new card. This flow is triggered by either a Quick Reply button or the `Lost.Or.Stolen.Card` intent.

To find the nearest office locations, the conversation is steered to the Office locations flow.

#### Block: Report lost card

You can customize the external links to redirect your users to your website and/or phone number.

{% hint style="info" %}
In the Action block *clear address*, the bot deleted the variable `user_address` because the user wants to correct their address by entering a new one. We need to clear the old variable in order to save a new one.
{% endhint %}

### Flow: Office locations

This flow is triggered when we want to show the user the office that is the closest to them. For the sake of this template, addresses are predefined within the block, but you customize yours following the [Find Nearest Location Template](https://docs.chatlayer.ai/tips-and-best-practices/bot-templates/use-case-templates/template-find-nearest-location) that uses Google Maps.

![View of the Office Locations table from the Airtable database used for this template. Learn how to set up your own here.](https://2786867680-files.gitbook.io/~/files/v0/b/gitbook-x-prod.appspot.com/o/spaces%2F-LLTwFwbOqJj4dDhg8Ju%2Fuploads%2FAi6LPCj2TnsvU8gpnaOR%2FScreenshot%202022-07-28%20at%2010.14.45.png?alt=media\&token=2f1c54fe-907e-4e6e-b505-2fc0c17e1ffb)

### Flow: Random questions

In this flow are grouped all blocks meant to answer random questions like: *Which cards do you offer?, How are you?, Who built this?, ...* All those blocks are triggered by intents so that the bot can answer those at any time in the conversation. Make sure that you foresee many of them whilst building your bot so that the conversation flows smoothly!


# E-Commerce Returns

## Template overview

This template allows your customers to easily return an item they bought in your online store.

After your customer chooses which item they want to return, the bot asks for the reason why they are returning the item (e.g., wrong size or color), generating valuable customer feedback. Additionally, based on the reason for return, the bot will offer them the option to order an alternative item that does meet their requirements.

The template uses a sneaker store as an example, but it can of course be customised to fit any type of online store. Keep reading to learn how you can customise this template for your own organisation.

## How to customise this template

{% hint style="info" %}
Make sure to always [update the NLP](https://docs.chatlayer.ai/understanding-users/natural-language-processing-nlp#updating-the-nlp) after loading a template!
{% endhint %}

This template uses two third party services:

1. Airtable, as a database for customer orders
2. Google Maps API, for finding the nearest post office

To let your bot interact with these services you will need an API key for each and configure these in the Action blocks where the bot makes the API calls.

{% hint style="info" %}
Using another service to manage your customer orders? You can link any type of database to this bot, as long as it has an API. Read more about our API integrations [here](/integrateandcode/custom-back-end-integrations/integrations-101).
{% endhint %}

Below is an overview of the key blocks in each flow of the bot. Here we will walk you through how to configure the connection with the Airtable and Google Maps APIs, as well as some other tips to customise this template for your business.

### Flow: General

#### Block: Introduction

Modify the text in this block so it reflects the branding of your own business. Replace *The Sneaker Store* by the name of your business.

#### Block: Use cases

If your bot is capable of handling other use cases besides returns, introduce them to the user here.

#### Block: Offloading email yes

In this block under the *Talk to Human* subflow, replace the email address by your business’ own support email address.

### Flow: Returns

#### Block: Returns

This block is the start of the *Returns* flow and is triggered by the `Request_return` intent.

This intent has been trained to detect both the item the customer wants to return and their reason for returning it in their message. For example, the customer might say:\
"*I want to return my **Stan Smiths** because they're **too small**"*\
The bot will then recognise *Stan Smith* and *too small* as the `@model` and `@reason_return` entities respectively and save them to variables of the same name. This way the bot won't have to ask again for this information later on in the conversation.

#### Blocks: Get email address, Get credit card digits

In this flow we ask for the customer’s email address and last four digits of their credit card as authentication to look up their past orders. If you want to authenticate your customer in another manner, replace these blocks by your authentication method of choice.\
\
When you first imported this template, the blocks will suggest you use *<test@sinch.com>* as email address and *6789* as credit card digits to authenticate. You can use these credentials to test the template with the sample order data, before connecting the bot to business' own orders database. You should remove these suggestions when you're ready to publish your bot.

#### Block: Look up orders

After the user has given their email address and last 4 digits of their credit card, this block will look up their orders in an external database. By default, this template will look up the orders in an Airtable using the Search Record function of our Airtable integration.

You can read more about Chatlayer’s Airtable integration [here](/integrateandcode/app-integrations/airtable).

{% hint style="info" %}
Not using Airtable within your organisation? You can link any type of database to this bot, as long as it has an API. Read more about integrations [here](https://docs.chatlayer.ai/integrations/integrations-101).
{% endhint %}

You will need to customise this block by connecting it to your own Airtable account and your own Airtable base. However, when you have newly imported the Returns template, it will be linked to [this Airtable](https://airtable.com/invite/l?inviteId=invhqmqDmH7ml8On5\&inviteToken=e6e65b9ba9087229f7ac9165f3a82b2943efaf715343ede7618fec880226d959\&utm_medium=email\&utm_source=product_team\&utm_content=transactional-alerts). The order data is in the *Orders* table. Feel free to use it as an example of what the data in your own Airtable should look like, but make sure to replace it once you start using the bot for your own organisation.

If you do not yet have an Airtable account set up in Chatlayer, you can do so by clicking *Connect new account* and following the steps in the pop-up window. You will need your Airtable API key for this, which you can find on your [Airtable account page](https://airtable.com/account).

Once you have set up your own Airtable base, head back to the block in Chatlayer. In the *Base* field replace the ID of the example Airtable base with the ID of your own Airtable base. In the *Table* field replace the example ID with the ID or name of the table in your own Airtable base where you store the order data. You can find your Airtable's base ID and table IDs [here](https://airtable.com/api), or in the URL of your table view.

#### Block: Register return in Airtable

This action block changes the return status of the item to be returned in Airtable with the Update Record function. As in the Look up orders block, you will need to connect to your own Airtable account and replace the example base and table IDs by your own.

This block also sends an email to the customer with their return label. Change the destination address in the return label to your own business’ address.

#### Block: Look up other colors

If the user is returning their item because they don’t like the color, this block will look in the Airtable database if it is available in other colors. In our example Airtable base, you will find these other colors in the *catalog* table. As in the other Airtable integration blocks, you will need to connect to your own Airtable account and replace the example base and table IDs by your own.

#### Block: Add new order in Airtable

After the user has given the details for their replacement order, this block adds the new order in the *new\_orders* table in Airtable using the Create Record function. Like in the other Airtable integration blocks, you will need to connect to your own Airtable account and replace the example base and table IDs by your own.

After the order has been added in Airtable, you should also add a payment link to the record for the new order in the *payment\_link* field. You can do this by creating a Zapier integration that automatically creates a payment link with your payment provider (for example Stripe) once a new record is added in Airtable, and then adds that automatically adds then payment link in Airtable.\
You can find more info on how to use Zapier [here](https://zapier.com/learn/zapier-quick-start-guide/).\
\
Alternatively you can also create a custom integration directly in Chatlayer with your business’ payment provider to generate a payment link and add it to your Airtable.

### Flow: Nearest post office

With this flow, your customers can find the post office closest to their delivery address. The functionality of this flow is the same as the Find nearest location pre-built flow template. To find out how to customise this flow, you can consult the tutorial for that flow template [here](https://docs.chatlayer.ai/tips-and-best-practices/bot-templates/pre-built-flow-templates/template-find-nearest-location).

### NLP

In addition to changing the flows, you will also need to make some changes to the entities in the NLP section of your bot. The contextual entity `@model` and the match entity `@model_match` capture the products available in the online store. You will need to replace the example values by the names of the products in your own store.

If you want to offer your bot in other languages than English and Dutch you will also need to add the ISO 639-1 code for that language as a value in the contextual entity `@tempLanguage`.


# E-Bike Shop

## Template overview

This template allows your new customers to find a bike model that fits their expectations, and book a try-out. Returning customers can book a checkup at the shop or even ask what their order status is. A template for modern mobility providers!

<figure><img src="https://2786867680-files.gitbook.io/~/files/v0/b/gitbook-x-prod.appspot.com/o/spaces%2F-LLTwFwbOqJj4dDhg8Ju%2Fuploads%2FwuNrwyhZegp7x9rMXPyj%2FScreenshot%202023-07-06%20at%2014.56.30.png?alt=media&amp;token=3ba7df29-bd31-4853-a6ca-6e9adc86a8e5" alt="" width="336"><figcaption></figcaption></figure>

{% hint style="info" %}
Make sure to always [update the NLP](https://docs.chatlayer.ai/understanding-users/natural-language-processing-nlp#updating-the-nlp) after loading a template!
{% endhint %}

## How to customise this template

### Flow: Bike quizz

This flow is where a new customer is redirected when they do not know what to look for. After asking 3 questions, the bot suggests a bike for testing.

#### Block: Find bike suggestion

Make sure that you replace the logic in this Condition block by your own, so that your virtual agent gives good advices to your customers.

### Flows: Book try-out & Book checkup

Those flows are quite similar. The first one is where is where users are redirected once they have accepted to test the suggested bike. The second one is triggered when users want to book a general checkup.

#### Blocks: Find a slot for bike testing & Book checkup

For the sake of this template, this flow is hacked so that only two dates are suggested to make an appointment. Of course, you can use your own API integration to connect your company's agenda to the bot.

{% hint style="info" %}
You can integrate your own API calls through Action blocks. Find more about those [here](https://docs.chatlayer.ai/integrations/custom-back-end-integrations).
{% endhint %}

#### Block: Send email

This action block uses the `{userEmail}` and `{userName}` variables to send an email to your customers. Just replace the text by your own and it will be sent directly once this block is triggered!

![Example of the confirmation email send when users book a checkup. This one uses the variables {userName}, {userEmail}, {bikeToCheck}, {appointmentTime} and {appointmentDay}.](https://2786867680-files.gitbook.io/~/files/v0/b/gitbook-x-prod.appspot.com/o/spaces%2F-LLTwFwbOqJj4dDhg8Ju%2Fuploads%2FgMaPId1d44qzZs4tgK4R%2FScreenshot%202022-07-15%20at%2011.10.16.png?alt=media\&token=7806cb20-7f1a-4029-967d-dad12d44f5bd)

### Flow: Track order

First, the order number is asked before giving an answer on the order status. For the sake of this template, we used an [Airtable](https://airtable.com/shr11ZQQJjT9aeb8T) to store sample data.

![Screen capture of the Airtable spreadsheet that is used to store sample data for this template. Learn more about Airtable integrations here.](https://2786867680-files.gitbook.io/~/files/v0/b/gitbook-x-prod.appspot.com/o/spaces%2F-LLTwFwbOqJj4dDhg8Ju%2Fuploads%2FZhHeMAXsSGIT96Kk2myJ%2FScreenshot%202022-07-15%20at%2010.58.43.png?alt=media\&token=a5a02047-ba4b-4224-8c68-9901fcbb7933)

However, when customising your own bot, the best way to go is to use your own API integration.

{% hint style="info" %}
You can integrate your own API calls through action blocks. Find more about those [here](https://docs.chatlayer.ai/integrations/custom-back-end-integrations).
{% endhint %}


# E-Scooter Support

## Template overview

A FAQ bot to support your shared mobility customers wherever they are, whenever they need it. This bot checks if something is wrong with your account, helps you if you found a damaged scooter, and answers questions about pricing and renting!

{% hint style="info" %}
Make sure to always [update the NLP](https://docs.chatlayer.ai/understanding-users/natural-language-processing-nlp#updating-the-nlp) after loading a template!
{% endhint %}

## How to customise this template

### Flow: Getting started

Customers are directed to this flow if they would like to know more about how the shared scooters renting works.

#### Block: Channel router show passes

When a user asks about the fees, this block is triggered. This can be done by clicking on the Fees per ride button or by writing something that will be recognised as the `ask_pricing` intent.

This Condition block checks on what channel the customer is talking to the bot. On web they are directed to the block *WEB Show passes* which shows the passes in a carousel, which is not supported by WhatsApp; on WhatsApp they are directed to the block *WA Show passes* which shows the passes in a WhatsApp list menu instead.

#### Block: Channel router Show video

When a user asks about how to start or end a ride, this block is triggered. This can be done by clicking on the Start/end ride button or by writing something that will be recognised as the `start_ride` intent.

This Condition block again checks on what channel the customer is talking to the bot. On web they are directed to the block *WEB Show video* which shows the video embedded in an iFrame , which is not supported by WhatsApp; on WhatsApp they are directed to the block *WA Show video* which shows a link to the video instead.

{% hint style="info" %}
If you plan on building a multichannel bot, have a look at the [differences between channels](https://docs.chatlayer.ai/channels/multi-channel#channel-comparison) first.
{% endhint %}

In the *WEB Show video* and *WEB Show video* blocks, replace the link to the video by your own.

### Flow: Can't rent a scooter

This flow uses [this Airtable spreadsheet](https://airtable.com/shrWNu14PYWGOuWMx) to check if it contains a record with the `userPhone` given by the user.

{% hint style="info" %}
Learn how to use the Chatlayer Airtable Integration [here](https://docs.chatlayer.ai/integrations/app-integrations/airtable).
{% endhint %}

If there is a matching record with the `userPhone`, then the bot checks if the `accountStatus` is set to 'activated'. If not, the bot answers that there is no client account with that number.

{% hint style="info" %}
You can integrate your own API calls through action blocks. Find more about those [here](https://docs.chatlayer.ai/integrations/custom-back-end-integrations).
{% endhint %}

#### Block: Find account

This is the block where the [Airtable](https://airtable.com/shrWNu14PYWGOuWMx) is used to check if `userPhone` is found in the database.

<figure><img src="https://2786867680-files.gitbook.io/~/files/v0/b/gitbook-x-prod.appspot.com/o/spaces%2F-LLTwFwbOqJj4dDhg8Ju%2Fuploads%2FooH4doLhA0Y9modbjXfA%2FScreenshot%202022-09-02%20at%2018.02.59.png?alt=media&amp;token=33c0b8e3-84fa-41ed-a94f-e1fe759c7870" alt=""><figcaption><p>A screenshot of the <a href="https://airtable.com/shrWNu14PYWGOuWMx">Airtable</a> that is used with this template.</p></figcaption></figure>

### Flow: Scooter is damaged

In this flow, the user details are asked so that a report can be made about a damaged scooter. The *Send Email* block sends an email with a summary of the report.

<figure><img src="https://2786867680-files.gitbook.io/~/files/v0/b/gitbook-x-prod.appspot.com/o/spaces%2F-LLTwFwbOqJj4dDhg8Ju%2Fuploads%2FrF7YfSxSLbtCu3HkJT3Z%2FScreenshot%202022-09-02%20at%2018.08.19.png?alt=media&amp;token=85a6931f-3277-4534-a951-30b6d3414d33" alt=""><figcaption><p>The email sent by the <em>Send email</em> action block.</p></figcaption></figure>


# Feedback

## Template overview

This template allows you to collect easily feedback from your users.

The template asks the user to rate their experience in three areas (products, delivery and customer service) and asks them to give more detailed feedback if they did not give a perfect three star rating. These ratings and comments are stored as variables and are then sent to an external database (Airtable). If the user gives their email address, they will also be offered a discount code for your store.

## How to customize this template

{% hint style="info" %}
Make sure to always [update the NLP](https://docs.chatlayer.ai/understanding-users/natural-language-processing-nlp#updating-the-nlp) after loading a template!
{% endhint %}

This template uses Airtable as an external database to store the user feedback and discount codes. To customise this flow, you will therefore need an Airtable account, an Airtable base with feedback and discount code tables, and your Airtable API key.

{% hint style="info" %}
Want to use a different service to store your user feedback? You can link any type of database to this bot, as long as it has an API. Read more about our API integrations [here](/integrateandcode/custom-back-end-integrations/integrations-101).
{% endhint %}

### Flow: Feedback

#### Block: Ask email address

This block offers the user a discount code if they give their email address. If the user doesn’t want to give their email, they will be redirected to the end of the flow.

#### Block: Search discount code

If the user does give their email address, this block will look up an available discount code in an external database. By default, this template is set up to look up this code in an Airtable using the Search Record function of Chatlayer’s Airtable integration.

{% hint style="info" %}
You can link any sort of database to this bot, as long as it has an API. Read more about integrations [here](https://docs.chatlayer.ai/integrations/integrations-101).
{% endhint %}

You will need to customize this block by connecting it to your own Airtable account and your own Airtable base. However, when you have newly imported the Feedback template, it will be linked to [this Airtable](https://airtable.com/invite/l?inviteId=inv4OOmgw4Z9LECqW\&inviteToken=a76823d9162c8ffc11225de76fa27ced854aaaeaf90c1013bc5f65ffebf4a8ae\&utm_source=email). Feel free to use it to test the template but make sure to connect your own database once you start using the bot for your own business.

If you do not yet have an Airtable account set up in Chatlayer, you can do so by clicking Connect new account and following the steps in the pop-up window. You will need your Airtable API key for this, which you can find on your [Airtable account page](https://airtable.com/account).

Like the example Airtable, your own Airtable base should have a table with one *Code\_status* column and one *Discount\_code* column.

Once your Airtable has been set up, head back to this block in Chatlayer. In the Base field replace the exampleID with the ID of your own Airtable base. In the Table field replace the example ID with the ID or name of the table in your own Airtable base where you want to store the feedback. You can find your Airtable's base ID and table IDs [here](https://airtable.com/api).

#### Block: Set discount code used

This action block changes the status of the discount code that was looked up in the previous block from Available to Used with the Update Record function. As in the previous block, you will need to connect to your own Airtable account and replace the example base and table IDs by your own.

#### Block: Send feedback to Airtable

This Action block sends the feedback the bot has gathered to Airtable using the Create Record function. As in the previous Airtable integration blocks you will need to connect your own Airtable account and base and table IDs. In your Airtable base you will need a table with columns for each of the feedback variables, as well as the user’s email address.

![](https://2786867680-files.gitbook.io/~/files/v0/b/gitbook-x-prod.appspot.com/o/spaces%2F-LLTwFwbOqJj4dDhg8Ju%2Fuploads%2FodrSnrRW1Qay9zT2IFNx%2FScreenshot%202022-03-23%20at%2010.37.51.png?alt=media\&token=b0dc62db-dcd0-4b38-8f9b-b3121415adfe)

If your own Airtable uses different field (column) names you will also need to replace the names in the left hand column in the Record field by the field (column) names in your own Airtable.

Once you've connected the bot to your own Airtable, use the emulator to test your bot and verify if the feedback is written correctly to your Airtable.

That's it, now your bot can easily collect feedback from your users!


# Find Nearest Location

With this template, your customers can easily find your business' nearest branch by simply asking your chatbot! After asking the user for their address, the bot will look through an external database (Airtable) which contains the data for all your branch locations. Then it will calculate which location is closest to the user’s address by using the Google Maps API. Finally, the bot will show the result on Google Maps, within an iFrame.

Keep reading to learn how you can customise this template for your own organisation.

## How to customise this template

{% hint style="info" %}
Make sure to always [update the NLP](https://docs.chatlayer.ai/understanding-users/natural-language-processing-nlp#updating-the-nlp) after loading a template!
{% endhint %}

This template uses two third party services:

1. Airtable, as a database for branch locations
2. Google Maps API, for finding the user address

To let your bot interact with these services you will need an API key for each and configure these in the Action blocks where the bot makes the API calls.\`

#### Setting up your own Airtable base

If you have not worked with Airtable before, you can sign up for free [here](https://airtable.com/signup) and learn the basics [here](https://support.airtable.com/hc/en-us/articles/360021518753-Getting-started-starting-with-the-base-ics).

For each of your organisation's locations, your Airtable will need fields with the following information:

1. Name of the branch
2. Address
3. Latitude
4. Longitude

When you’ve newly imported the 'Nearest Location' template, it will automatically link to [this Airtable](https://airtable.com/invite/l?inviteId=invF76GY9tGp3hGyz\&inviteToken=224dcd7cbf041e3e39f7caefbbe6798f4dc4f5ef1643586d2a1a5cbcb286f1f3\&utm_source=email). Feel free to use it for testing, but make sure to replace it once you start using the bot for your own organisation!

For more information on how to integrate Airtable into your bot, check out [this tutorial](https://docs.chatlayer.ai/integrations/code-action/airtable).

{% hint style="info" %}
Managing your branch locations in another database? You can link any type of database to this bot, as long as it has an API. Read more about our API integrations [here](/integrateandcode/custom-back-end-integrations/integrations-101).
{% endhint %}

Below is an overview of the key blocks in each flow of the bot. Here we will walk you through how to configure the connection with the Airtable and Google Maps APIs, as well as some other tips to customise this template for your business.

### Flow: General

#### Block: Ask address

In this block, the bot asks the user for their address and saves the response as a variable: `user_address`.

#### Block: Locator

To make this template work, your bot needs to be able to access the location data of your branch locations (in Airtable) and look up the user’s address (using the Google Maps API).

This block uses a Code Action to call both the Airtable API and the Google Maps API with the Javascript code shown below. This code may look a bit intimidating, but don’t worry, you only have to change a few pieces of information!

```javascript
const allStations = await fetch(`https://api.airtable.com/v0/(YOUR_BASE_ID)/(YOUR_TABLE_NAME)`, { 
headers: {
Authorization: `Bearer (YOUR_AIRTABLE_API_KEY)`
}
}).then(r => r.json());
let re = / /g; 

const currLoc = args.user_address.replace(re, '+');
let minDistance = Number.MAX_SAFE_INTEGER; 
let nearestShop;
const chatlayer = ChatlayerResponseBuilder(); chatlayer.addSessionVariable('currLoc', currLoc); 
const addressFromMaps = await fetch(`https://maps.googleapis.com/maps/api/place/findplacefromtext/json?input=${currLoc}&inputtype=textquery&fields=geometry&key=(YOUR_GOOGLEMAPS_API_KEY)`).then(r=> r.json()); 
const geoLocation2 = { 
Latitude: addressFromMaps.candidates[0].geometry.location.lat, 
Longitude: addressFromMaps.candidates[0].geometry.location.lng, 
} 
//const geoLocation2 = {Latitude : "52.5001278", Longitude : "13.3121555"}; allStations.records.forEach(station=>{ 
const geoLocation1 = station.fields;
const lat = geoLocation1.Latitude - geoLocation2.Latitude; 
const lon = geoLocation1.Longitude - geoLocation2.Longitude; 
 
const val = Math.sqrt(Math.pow(lat, 2) + Math.pow(lon, 2)); if(minDistance>val){ 
minDistance = val; 
closestLocation = geoLocation1;
}
});

closestLocation.Address = closestLocation.Address.replace(/ /g, ' ');
chatlayer.addSessionVariable('closestLocation', closestLocation);
chatlayer.addSessionVariable('addressFromMaps', addressFromMaps); chatlayer.send();----------------------------------
```

In this piece of code, you should customise the following three things:

1. **The Airtable link**\
   In the url on line 1 of the code block, replace `(YOUR_BASE_ID)` with the ID of your own Airtable base and `(YOUR_TABLE_NAME)` with the name or ID of the table that contains your location data. You can find your Airtable's base and table IDs [here](https://airtable.com/api), or in the URL of your table view.
2. **The Airtable API key**\
   In the url on line 3, replace `(YOUR_AIRTABLE_API_KEY)` with your own Airtable API key. You can find the API key on your [Airtable account page](https://airtable.com/account).
3. **The Google Maps API key**\
   On line 13, replace `(YOUR_GOOGLEMAPS_API_KEY)` with your own Google API key.

#### Block: Give address

In this block, the bot shows the name and address of the closest location found in the database. The name is stored in the `closestLocation.Name` variable and the address in `closestLocation.Address`.

#### Block: Show location on map

In this block the bot shows the closest branch location on a map, within an iFrame. In the Source Field of the iFrame action, also replace `(YOUR_GOOGLEMAPS_API_KEY)` with your own Google API key.

![The Show location on map block with the part of the source URL to change highlighted in red](https://2786867680-files.gitbook.io/~/files/v0/b/gitbook-x-prod.appspot.com/o/spaces%2F-LLTwFwbOqJj4dDhg8Ju%2Fuploads%2Fmzkidqk2qSMKONpq8O5S%2FScreenshot%202022-07-19%20at%2011.07.45.png?alt=media\&token=057096d9-de76-4e1d-9f45-de89dec8659f)

#### Block: Clear user address

Finally, in this block the bot clears the variable `user_address` so the user can start the flow again and use another address.

### Connect the flow to other flows

Now that you've added this new flow, make sure it connects to other flows. For example, if this is an important use case for your bot, make sure to mention it in the introduction.

####

That's it, now your bot can find locations nearest to the user's address! 👏


# GPT

Template overview

This bot template is integrated with GPT to generate responses on retail use-cases, to make jokes or just to improvise on anything!

{% hint style="info" %}
This template was made so that you can get an overview of some possible use-cases of a chatbot that uses the [GPT integration](/integrateandcode/app-integrations/openai-gpt-3-chatgpt-and-gpt-4). We recommend you to play with it, explore and make it your own!
{% endhint %}

To get more context for the conversation, the bot will ask the user to pretend they bought something on an online shop.

All blocks reside in the `General` flow and the user will get a these options by clicking the buttons:

* Retail example
  * Track package
  * Complain on delivery
  * Tell me a joke
* Ask anything

{% hint style="info" %}
To be able to use this template, you will learn to set up your GPT integration. Learn how to do this [here](https://docs.chatlayer.ai/integrations/app-integrations/gpt-3-beta#how-to-set-up-your-gpt-3-integration).
{% endhint %}

## How to set up this bot

To be able to use this bot, you will need:

1. To set up your GPT integration. Please follow how to do this [here](https://docs.chatlayer.ai/integrations/app-integrations/gpt-3-beta#how-to-set-up-your-gpt-3-integration).
2. Fill in the action fiels in the blocks that use GPT, as we will explain below 👇

### Block: Generate tracking message

This block takes the previous context into account to generate a package tracking message with GPT.

Connect it to your [GPT account](https://www.youtube.com/watch?v=3DxTlIVh-og) and fill the action fields as below:

<figure><img src="https://2786867680-files.gitbook.io/~/files/v0/b/gitbook-x-prod.appspot.com/o/spaces%2F-LLTwFwbOqJj4dDhg8Ju%2Fuploads%2FmeWmzcYXueojFLRZudpO%2FScreenshot%202023-03-08%20at%2012.03.47.png?alt=media&amp;token=9685bb5f-4047-4d07-bf25-0ccf01b04206" alt=""><figcaption></figcaption></figure>

### Block: Generate apology message

This block takes the previous context into account to generate an apology message to a customer who is complaining for his parcel is late for delivery.

Connect it to your [GPT account](https://www.youtube.com/watch?v=3DxTlIVh-og) and fill the action fields as below:

<figure><img src="https://2786867680-files.gitbook.io/~/files/v0/b/gitbook-x-prod.appspot.com/o/spaces%2F-LLTwFwbOqJj4dDhg8Ju%2Fuploads%2FI13aEUVd4O0etZmBLa88%2FScreenshot%202023-03-08%20at%2012.05.16.png?alt=media&amp;token=442b5aa2-2184-456c-923b-72abb2651b95" alt=""><figcaption></figcaption></figure>

### Block: Generate joke

This block takes the previous context into account to generate a joke based on the item that the customer purchased.

Connect it to your [GPT account](https://www.youtube.com/watch?v=3DxTlIVh-og) and fill the action fields as below:

<figure><img src="https://2786867680-files.gitbook.io/~/files/v0/b/gitbook-x-prod.appspot.com/o/spaces%2F-LLTwFwbOqJj4dDhg8Ju%2Fuploads%2FE6KB8KXWV8PmtOeU2L6j%2FScreenshot%202023-03-08%20at%2012.06.34.png?alt=media&amp;token=d73b2911-4b1b-4f33-8ad4-b0ced540c434" alt=""><figcaption></figcaption></figure>

### Block: Generate response to anything

This block is triggered by the Not Understood block. It generates a GPT response based on what was asked by the customer.

Connect it to your [GPT account](https://www.youtube.com/watch?v=3DxTlIVh-og) and fill the action fields as below:

<figure><img src="https://2786867680-files.gitbook.io/~/files/v0/b/gitbook-x-prod.appspot.com/o/spaces%2F-LLTwFwbOqJj4dDhg8Ju%2Fuploads%2FXUnWtdnFCtMSr8pOV7ee%2FScreenshot%202023-03-08%20at%2012.08.16.png?alt=media&amp;token=a37ec017-607c-49a4-ab1c-0edf9a835f72" alt=""><figcaption></figcaption></figure>

## See also

Our documentation page on the GPT integration:

{% content-ref url="/pages/Mt9WVzPRMl5sG3q8noui" %}
[OpenAI: GPT-3, ChatGPT and GPT-4](/integrateandcode/app-integrations/openai-gpt-3-chatgpt-and-gpt-4)
{% endcontent-ref %}


# Gym

This bilingual booking assistant helps your customers to schedule their gym sessions. It offers a free trial for new joiners, books and cancels classes using Tables.

This template is a gym bot that books and cancels classes for you using [Tables](#tables).

<figure><img src="https://2786867680-files.gitbook.io/~/files/v0/b/gitbook-x-prod.appspot.com/o/spaces%2F-LLTwFwbOqJj4dDhg8Ju%2Fuploads%2FAyDR3tfu6uaqdj0qG5w7%2FScreenshot%202024-04-10%20at%2016.12.46.png?alt=media&amp;token=25cb4130-7936-4a50-803c-c7e9c8a32c3f" alt="" width="268"><figcaption><p>Ollie the gym template bot.</p></figcaption></figure>

{% hint style="warning" %}
Make sure to always [update the NLP](https://docs.chatlayer.ai/understanding-users/natural-language-processing-nlp#updating-the-nlp) after loading a template!
{% endhint %}

## Tables

This chatbot uses 3 tables that are accessible under the [**Tables**](#tables) tab on the left-hand menu:

* **Lead generation**: a table that gathers the new user details uncovered in the conversation.
* **Group classes EN**: a list of gym classes in English
* **Group classes DE**: a list of gym classes in German

<figure><img src="https://2786867680-files.gitbook.io/~/files/v0/b/gitbook-x-prod.appspot.com/o/spaces%2F-LLTwFwbOqJj4dDhg8Ju%2Fuploads%2FiQIumrIE1yma5fK7RXX3%2FScreenshot%202024-04-03%20at%2017.25.18.png?alt=media&amp;token=eeddc06b-5562-4b25-a6c4-3d283513e374" alt=""><figcaption><p>The Group classes EN table.</p></figcaption></figure>

## Flow: General

### Block: Choose language

When the conversation starts, the user is first asked which language they would like. This bot is bilingual as it exists in both English and German. The **Choose language** block is triggered when the chat starts. The chosen language will be set as value for the `preferredLanguage` variable.

{% hint style="success" %}
Read more about multilingual bots [here](https://docs.chatlayer.ai/understanding-users/multilanguage-bots).
{% endhint %}

### Block: Introduction

The **Introduction** block sets up the 3 main use cases, into 3 Quick Reply buttons. You can see that as the "main menu":

* `I'm new` leads to the Lead Generation flow,
* `Bookings` leads to the Book class and Cancel class flows
* `FAQ` leads to the FAQ flow

### Block: Start again

This Action block clears all the variables of the conversation so that the chat can start again. This is useful for testing but also if the conversation is left and then restarted. It is triggered whenever users greet the bot, by using the `chitchat.greeting` intent.

## Flow: Lead generation

This is the flow triggered by clicking on the "I'm new" button in the **Introduction** message, or by the `i_am_new` intent. The bot offers a free trial to the user, then their details are asked before they get suggested to book a class right away.

## Flows: Classes

This is where conversations on booking or cancelling a class happen. Each of them is triggered by either the `book_class` or `cancel_class` intent.

#### Blocks: Which language?

The data fetched by the bot is influenced by the `preferredLanguage` variable set during the **Choose Language** phase at the conversation's onset. This adjustment is crucial as the representation of dates, times, and locations varies between languages such as German and English. The Condition blocks act as routers to ascertain the specific data to fetch, based on the user's language preference.

#### Blocks: Clear booked class and Clear cancelled class

The **Clear booked class** and **Clear cancelled class** Action blocks reset the variables defining the class to be booked or cancelled. This ensures that if users repeat a flow, the bot does not assume the same class is intended, prompting the user to specify the class again.

## Flow: FAQ

In this flow are grouped some of the frequently asked questions and their answers. We focused on 2 different topics: covid rules and prices.

{% hint style="info" %}
To discover how you can upgrade your FAQ flows, try out our [Knowledge Base AI ](/start-quickly/bot-templates/knowledge-base-ai-template)template.
{% endhint %}


# Job applications

## Template overview

With this template job candidates can easily look up and apply for job openings at your company. It is optimised for use on WhatsApp, Messenger and our web widget.

Job candidates can either browse through the list of job openings or directly ask about an opening for specific position. After selecting the job they are interested in, the bot will ask them a few questions (including contact details, motivation and resume) to complete their application. If they don't see any job they are interested in, job hunters can also do a spontaneous application.

## How to customise this template

{% hint style="info" %}
Make sure to always [update the NLP](https://docs.chatlayer.ai/understanding-users/natural-language-processing-nlp#updating-the-nlp) after loading a template!
{% endhint %}

### Flow: General

#### Block: Introduction, We're hiring

Modify the text in these block so it reflects the branding of your own business. Replace *Sinch* with the name of your own company.

### Flow: Job application

Users can access this flow by clicking on the *See open positions* button in the *We're hiring* block or by triggering the *Find\_job* intent.

#### Block: Route job

When the user's message matches the *Find\_job* intent, this Go To block will steer the conversation in the right direction. If the user's message specifies the role they are interested the bot will detect this as the `@job` entity and store in a variable of the same name. There are 3 scenarios:

1. If the user doesn't mention any specific job in their message (e.g. *Show me your job openings*) they are redirected to the list of job openings.
2. If they do specify the job they want to apply for (e.g. *Are you hiring a full stack developer?*) the user is immediately redirected to the relevant job description.
3. If the user asks about a job for which there is no vacancy they will see the *No open jobs* block.

For scenario 2 you will need to add two conditions for every vacancy that you want to advertise. The first condition redirects the user to the relevant job description if they are on WhatsApp; the second one redirects the user to the relevant job description if they are on another channel.<br>

<figure><img src="https://2786867680-files.gitbook.io/~/files/v0/b/gitbook-x-prod.appspot.com/o/spaces%2F-LLTwFwbOqJj4dDhg8Ju%2Fuploads%2F7cKVNVr3jWAWKhz3igFe%2Fimage.png?alt=media&amp;token=857f7f61-0423-45cc-b473-2d76a1ad0dd2" alt=""><figcaption></figcaption></figure>

#### Block: Route channel - Open positions

If the user clicks on the *See open positions* button or by their message matches *Find\_job* without mentioning a specific job, this block will redirect them to either a list menu (on WhatsApp) or carousel (on other channels) with the vacancies.

#### Block: Open positions WA

For users on WhatsApp this block shows all vacancies in a WhatsApp list menu. Add a Go To button for each of the jobs you want to advertise.

#### Block: Open positions

For users on other channels this block shows all vacancies in a carousel. Add a carousel item for each of the jobs you want to advertise.

#### Job description blocks

For every vacancy that you want to advertise in the bot you will need two blocks with a job description, one for WhatsApp and one for other channels.

In addition to the description itself, each block should include an *Apply now* and *Not now thanks* Go To button. In the non WhatsApp blocks you can also include a URL button to the full job description on your company's website. As URL buttons aren't available in WhatsApp you can put the full URL in a separate text message in the WhatsApp blocks.

#### Block: Route channel - file upload

This block redirects the user to the *Ask for resume* block if are on the web channel and to *Upload resume Input Validation* if on another channel.

#### Block: Upload resume

For users on the web channel this block uses Chatlayer's [file upload](/buildabot/flow-logic/dialog-state/message-components#file-upload) functionality to let the user upload their resume. If the upload is successful the bot goes to the *Set var candidate\_resume to {uploadedFileUrl}* block where the link to the file is assigned to a new variable. If the upload fails the user is redirected to the *Failed uploading resume* block and asked to try again.

#### Block: *Upload resume Input validation*

For users not on the web channel, this block uses an input validation with the input format set to image to allow them to send their resume. The image format works for checking if the user's response matches [any file format](/buildabot/flow-logic/dialog-state/user-input-bot-dialog#image) (not just images) rather just a text message. The link to the file is saved in the *candidate\_resume* variable.

#### Block: Send to Airtable

After the user has answered all questions, this block sends all the candidate's information stored in the bot's session variables to an external database so it can be accessed later. By default, this template sends the information to an Airtable using the Create Record function of our Airtable integration.

You can read more about Chatlayer’s Airtable integration [here](/integrateandcode/app-integrations/airtable).

{% hint style="info" %}
Not using Airtable within your organisation? You can link any type of database to this bot, as long as it has an API. Read more about integrations [here](https://docs.chatlayer.ai/integrations/integrations-101).
{% endhint %}

You will need to customise this block by connecting it to your own Airtable account and your own Airtable base. However, when you have newly imported the Job Applications template, it will be linked to [this Airtable base](https://airtable.com/invite/l?inviteId=invOL9FZVbuyIxupU\&inviteToken=dd8042801df9ff4f8a9748e5b2ed938de043455296836c32dbb7beb8d1ce41d5\&utm_medium=email\&utm_source=product_team\&utm_content=transactional-alerts). Feel free to use it as an example of what the data in your own Airtable should look like, but make sure to replace it once you start using the bot for your own organisation.<br>

<figure><img src="https://2786867680-files.gitbook.io/~/files/v0/b/gitbook-x-prod.appspot.com/o/spaces%2F-LLTwFwbOqJj4dDhg8Ju%2Fuploads%2FiOJboAOzfwkPWLj7bOSr%2Fimage.png?alt=media&amp;token=819d9780-14a1-4b7b-b174-f1f9028693f2" alt=""><figcaption><p>The Candidates table in the sample Airtable base</p></figcaption></figure>

If you do not yet have an Airtable account set up in Chatlayer, you can do so by clicking *Connect new account* and following the steps in the pop-up window. You will need your Airtable API key for this, which you can find on your [Airtable account page](https://airtable.com/account).

<figure><img src="https://2786867680-files.gitbook.io/~/files/v0/b/gitbook-x-prod.appspot.com/o/spaces%2F-LLTwFwbOqJj4dDhg8Ju%2Fuploads%2Ff6JAeyigCAsYKjndYfEo%2Fimage.png?alt=media&amp;token=454ad21d-0292-4bac-bd74-fa22b90b17ed" alt=""><figcaption></figcaption></figure>

Once you have set up your own Airtable base, head back to the block in Chatlayer. In the *Base* field replace the ID of the example Airtable base with the ID of your own Airtable base. In the *Table* field replace the example ID with the ID or name of the table in your own Airtable base where you store the candidate data. You can find your Airtable's base ID and table IDs [here](https://airtable.com/api), or in the URL of your table view.

### Flow: FAQ

This flow can answer some of the basic questions candidates might have about the application process. Each type of question is corresponds to an intent. When a user asks a question that matches that intent the block with the relevant answer is triggered.

If you want to add a question to this FAQ section, you can simply create a new intent in your bot's NLP section, add some expressions with variant phrasings of the question (at least around 20) and link this intent to a new block containing the answer to the question. If one of the questions isn't necessary for your bot, you can simply delete the intent and the block that is linked to it.

Make sure that all of the built-in answers in the blocks are in line with your company's hiring policy.

### NLP

In addition to changing the flows, you will also need to make some changes to the entities in the NLP section of your bot. The contextual entity `@job` captures the job the candidate is interested in. You will need to replace the example values by the vacancies at your own company. Adding synonyms for the entity values ensures that the correct job will still be detected even if the user phrases it in a different way, e.g. *ML engineer* vs. *machine learning engineer*.


# Knowledge base AI template

Use AI to scrape your data and generate an answer. All of this, in a ready-to-go template bot.

## Template overview

This template uses our latest [Knowledge base AI](/navigation/knowledge-base-ai) feature to generate answers based on your own documentation.

{% hint style="warning" %}
You can use the Knowledge base AI for free if you ask it under 50 questions per month. If you would like to use more than that, please [contact us](https://forms.office.com/pages/responsepage.aspx?id=ropROyGJe0qEl2GddWziDpBKj7if3UFHrttkAY_OzkZURUM1Wk4yRFZHM1pJRlJXWjFBWDg1VE0wSS4u).
{% endhint %}

## How to customize this template

To customize this template:

1. [Add your content ](https://docs.chatlayer.ai/bot-answers/knowledge-base-ai/set-up-your-faq-flow-using-a-generative-knowledge-base-ai#add-content)under the **Knowledge Base AI** tab.
2. Test your bot by asking anything.
3. You're good to go! Every time you'll ask a question, the bot will trigger the **Not Understood** block which will then scrape your knowledge base to generate an answer.

<figure><img src="https://2786867680-files.gitbook.io/~/files/v0/b/gitbook-x-prod.appspot.com/o/spaces%2F-LLTwFwbOqJj4dDhg8Ju%2Fuploads%2FQ2W7Ekf9YGuLyEBraYqg%2FScreenshot%202023-10-17%20at%2010.57.32.png?alt=media&amp;token=6ea64ba8-844c-45a4-89cf-1e5d2216bba6" alt=""><figcaption><p>Example of use of the knowledge base AI feature.</p></figcaption></figure>

## Block: Source router

The Source router is a Condition block that checks if the source of the answer was a document or a URL. If the source was a URL, the response will be given together with a link to the source. If the source was a document, the response wouldn't give a link with it.

<figure><img src="https://2786867680-files.gitbook.io/~/files/v0/b/gitbook-x-prod.appspot.com/o/spaces%2F-LLTwFwbOqJj4dDhg8Ju%2Fuploads%2FeFNOJO9YLmlL7elyoyr2%2FScreenshot%202024-04-03%20at%2017.35.32.png?alt=media&amp;token=8c919d7c-da79-4f00-8f72-9322af2868aa" alt=""><figcaption><p>The Source router blocks checks the source of the generated answer before displaying it.</p></figcaption></figure>

## Learn more

Learn all about how the Knowledge Base AI feature works under this documentation page:

{% content-ref url="/pages/v6Cuhc3NAXayTCwVjBeA" %}
[Knowledge base AI](/navigation/knowledge-base-ai)
{% endcontent-ref %}


# Lead generation

This is a short template for lead generation: your customers get a free trial if they give in their details. A flow easy to adapt to any chatbot!

{% hint style="info" %}
Make sure to always [update the NLP](https://docs.chatlayer.ai/understanding-users/natural-language-processing-nlp#updating-the-nlp) after loading a template!
{% endhint %}

## Flow: Lead Generation

The Lead Generation blocks have their own flow. More general blocks like Introduction and Goodbye are in the General flow.

User details are asked through input validation blocks and kept under the variables `{userName}`, `{userEmail}` and `{userPhoneNumber}`. In the Thanks block, users get the opportunity to change their details in case they make a mistake.

The block named \[API Call] is a placeholder for the Action block where you would implement your API call to keep your customer's data.

{% hint style="info" %}
There are several ways for you to keep the customer details. Some ways to do that could be using [Airtable](https://docs.chatlayer.ai/integrations/app-integrations/airtable-app-integration) or creating your own [API custom integration](https://docs.chatlayer.ai/integrations/custom-back-end-integrations).
{% endhint %}

Make sure you adapt the flow to the user details that you need and that you give to your customers the opportunity to modify those details.

Happy bot building!


# NPS

The Net Promoter Score®  template gathers feedback from your customers and saves it in a Table.

<figure><img src="https://2786867680-files.gitbook.io/~/files/v0/b/gitbook-x-prod.appspot.com/o/spaces%2F-LLTwFwbOqJj4dDhg8Ju%2Fuploads%2F079VjAOkeZ3LSbCL7uxn%2FScreenshot%202024-05-30%20at%2015.52.02.png?alt=media&amp;token=51a4feab-87f8-4f1f-8579-8f3349e561b0" alt="" width="281"><figcaption><p>The NPS template bot.</p></figcaption></figure>

## Template overview

Use this template to gather valuable feedback about your business using the NPS score system. Users will be asked about their satisfaction with your services, their likelihood to recommend you to others, and suggestions for improvement. Based on their ratings, a Net Promoter Score (NPS) will be calculated.

{% hint style="info" %}
Learn more about the NPS system [here](https://www.netpromoter.com/know/).
{% endhint %}

Keep reading to learn how you can customize this template for yourself!

## How to customize this template

{% hint style="info" %}
Make sure to always [update the NLP](https://docs.chatlayer.ai/understanding-users/natural-language-processing-nlp#updating-the-nlp) after loading a template!
{% endhint %}

To save your users' ratings and feedback, this chatbot uses [Tables](/navigation/tables) to store the NPS ratings.

<figure><img src="https://2786867680-files.gitbook.io/~/files/v0/b/gitbook-x-prod.appspot.com/o/spaces%2F-LLTwFwbOqJj4dDhg8Ju%2Fuploads%2FRr6pebM4xk8YO1SpPliS%2FScreenshot%202024-05-30%20at%2015.57.04.png?alt=media&amp;token=91d50373-9e76-4b09-8dd2-f9b7712d73a7" alt=""><figcaption><p>The Table to store NPS ratings.</p></figcaption></figure>

### Flow: NPS

#### Block: Check rating

This block checks the rating a user gives, after which it is stored as the variable `{nps}`. If they give a rating of 9 or higher, the user will be classified as a 'promoter' in the variable {`respondent}` and redirected to the *Promoter response* block asking them why they like your services (response stored as the `{positive_feedback}` variable.

If they gave a rating from 7 to 8, they will be classified as 'passive'; if they gave a rating lower than 7, they are classified as 'detractor'. Both passives and detractors will be redirected to the *Improvement Feedback* block. There the bot asks them what can improved (response stored as `{negative_feedback}`).

#### Block: Add record to Table

<figure><img src="https://2786867680-files.gitbook.io/~/files/v0/b/gitbook-x-prod.appspot.com/o/spaces%2F-LLTwFwbOqJj4dDhg8Ju%2Fuploads%2FHLUTNtgVcLc6YEwWgsfc%2FScreenshot%202024-05-30%20at%2016.00.26.png?alt=media&amp;token=af1b4aaf-2973-497e-868b-aabc116778d3" alt="" width="323"><figcaption><p>Add record to Table block.</p></figcaption></figure>

This Action block adds the gathered values to the ratings table.

***

That's it, now your bot can easily collect NPS ratings and feedback from your users!

{% hint style="success" %}
Once you have collected ratings from enough users you can use these to calculate your business' overall Net Promoter Score. You can learn how to calculate this score [here](https://customergauge.com/blog/how-to-calculate-the-net-promoter-score).
{% endhint %}


# Restaurant

## Template overview

This chatbot template can be adapted for your own restaurant. With this bot, your users can see the latest menu, order food online for delivery or pick-up, and book a table.

Keep reading to learn how you can customise this template for yourself!

## How to customise this template

To manage orders and reservations, this chatbot uses Airtable. If you also plan to use Airtable for this you'll need an Airtable account and base, and connect to it in the Action blocks where the bot makes the API calls.

{% hint style="info" %}
Already tracking orders and bookings with another service? You can link any type of CRM or order management software to this bot, as long as it has an API. Read more about our API integrations [here](/integrateandcode/custom-back-end-integrations/integrations-101).
{% endhint %}

Below is an overview of all blocks you need to edit to customise this template for your own restaurant.

Let's get started!

### Flow: General

#### Block: Introduction

In the Introduction block, replace the image with that of your own restaurant. You can also delete it if you prefer. In the text, make sure to change *The Taco Shop* and *Sal* with the names of your own restaurant and bot.

### Flow: See the menu

**Block: Show menu**

Change the image of the taco menu in this block to an image of your own restaurant’s menu.

{% hint style="info" %}
You can use [Canva](https://www.canva.com) to create a free menu and any other visuals needed.
{% endhint %}

### Flow: Book a table

This flow allows users to make a reservation at your restaurant. The bot will first ask the user on what date they want to make a reservation, and for how many people, and then look up the availabilities for that day in an external database. It then shows these options to the user.

#### Block: Search availability in Airtable

This Action block will look up available reservation times in an external database. By default, this bot will look up the available time slots in an Airtable base, using the Search Record function of Chatlayer’s [Airtable integration](/integrateandcode/app-integrations/airtable).

{% hint style="info" %}
You can connect your own database or order management system to this bot, as long as this software can make an API call. Read more about these type of integrations [here](https://docs.chatlayer.ai/integrations/integrations-101).
{% endhint %}

You will need to customise this block by connecting it to your own Airtable account and your own Airtable base. However, when you just imported the Restaurant template, it will be linked to [this Airtable](https://airtable.com/invite/l?inviteId=inv4z7FlKMiMCJZC0\&inviteToken=c391841a94cbae63af44e7d8ae26c5700909a42e4adf95007f313badadfb8cfb\&utm_source=email).

![The reservations table in the Airtable base](https://2786867680-files.gitbook.io/~/files/v0/b/gitbook-x-prod.appspot.com/o/spaces%2F-LLTwFwbOqJj4dDhg8Ju%2Fuploads%2F3uqmOz0nimAwDMqbBGko%2Fimage.png?alt=media\&token=5a4dc7c6-d6cd-4fca-be84-8c7a51558544)

Feel free to use this as an example for testing but make sure to replace it with your own base once you start using the bot for your restaurant!

If you do not yet have an Airtable account set up yet, you can do so by clicking *Connect new account* and following the steps in the pop-up window. For this you will need your Airtable API key, which you can find on your [Airtable account page](https://airtable.com/account).

Like the template Airtable base, your own base should have a table with columns for reservation date, reservation time name, user email, special menu and number of people.

In the *Base* field, replace the example ID with the ID of your own Airtable base. In the *Table* field replace the example ID with the ID or name of the table in your own Airtable base where your reservations data is stored. You can find your Airtable's base and table IDs [here](https://airtable.com/api).

The *Search* field is the name of the field (column) in Airtable that we want to search in. In this case, that is the column with possible reservation dates. *Search* *value* is the value that will be searched for in that field, in this case the date the user said they want a reservation.

#### Block: Send reservation to Airtable

This Action block uses the [Update Record](/integrateandcode/app-integrations/airtable#update-record) functionality to modify the Airtable record of the reservation slot your customer has chosen with their reservation details (name, email, number of people and choice of special menu).

Just like the *Search availability in Airtable* block, you will need to customise this block by connecting it to your own Airtable account and your own Airtable base.

#### Block: Send reservation email

This Action block sends your customer an email with the confirmation of their reservation. Replace *The Taco Shop* by your own restaurant’s name and customise the email’s text to your own preference.

### Flow: Order online

This flow allows your customers to place an online order. The user will go through several options, step-by-step, choosing between main dishes (tacos in this template), extras, and desserts. After choosing, they will be given an overview of their complete order and the opportunity to make changes if they want. When their order is complete, the user is asked to choose between delivery or pickup, and at what time they want to receive their order. Finally, the user needs to choose a payment method, after which they will receive a confirmation by email.

#### Block: Order tacos

This block lets the customer choose main dishes, displayed in a carousel. This enhances the user experience because people like to see what the dish looks like, before deciding if they want it.

Replace all images, titles, and subtitles for each carousel item with the options available at your restaurant. If your restaurant offers more than three menu items, you can add an additional carousel item for every extra menu option needed.

In the button of each carousel item, replace the `name_of_taco` variable name with a name for your own restaurant. If your restaurant does not specialise in one food item, you can give this variable a generic name, like for example, `main_course`.

Replace the example values from the template (*carnitas*, *al pastor*, *barbacoa*) with the values corresponding to main courses at your restaurant. These variables and their values should correspond to the match entities you define in your bot’s NLP.

#### Block: Already ordered same taco?

This Condition block will check if the user already has the same taco in their order.

In the conditions, replace `name_of_taco` with the name of the variable you gave to your main courses in the Order tacos block. Replace `taco_order_nr_1`, `taco_order_nr_2` and `taco_order_nr_3` by the name of the variables you define in the block *Save taco order*. Add an additional condition for each main course item you added to the carousel in *Order tacos* and ad a Condition to a corresponding bot block.

#### Block: Number of tacos

Replace `name_of_taco` in the text with the menu items variable you defined in *Order tacos*, and also replace `number_of_tacos` with a variable name appropriate to your restaurant.

#### Block: Save taco order

This Condition block saves the menu item chosen by the customer to the correct variable. If the customer has not selected any items yet, their choice will be assigned to the first variable. If they already chose one previous item, the item will be stored in a second variable, etc.

You should add an extra Go to condition for any additional menu items you added to the carousel in the *Order tacos* block. Also replace the names of the variables `taco_order_nr_1`-`3` and `taco_order_nr_1`-`3_quantity` by variable names for your restaurant.

#### Block: Extras & Block: Dessert

Ordering extras and dessert operates in the same way as ordering tacos. You can customise the blocks below by applying the same steps as described above for taco ordering:

* *Order extras*
* *Order dessert*
* *Already ordered same extras/dessert?*
* *Number of extras*
* *Number of dessert*
* *Save extras*
* *Save dessert*

#### Block: Show final order

This block gives the customer an overview of their final order. Replace the order and order quantity variable names with the ones you defined for your own menu items above.

#### Block: Yes checkout

This block gives the customer the option to choose between pick up or delivery for their order.

In case your restaurant does not offer these options, you can change the text of this block to a general acknowledgement message and set either the *Delivery* or *Pick-up time* block as the Go to.

#### Block: Send order to Airtable

This Action block will store the customer’s order in an external database. By default, this template is set up to store this information in an Airtable using the Create Record function of Chatlayer’s Airtable integration.

{% hint style="info" %}
You can connect your own database or order management system to this bot, as long as this software can make an API call. Read more about these type of integrations [here](https://docs.chatlayer.ai/integrations/integrations-101).
{% endhint %}

Just like with the other Airtable integration blocks, you will need to customise this block by connecting it to your own Airtable account and your own Airtable base. The example Airtable the template is linked to by default also contains an orders table.

Your own orders table should contain a field for each menu item and the quantity of each item, as well as fields that specify delivery or pickup, delivery time, pick-up time, and the customer’s phone number and email address.

In the Action block, in the left column under Record, we add the names of all fields we want to fill in the new Airtable record, i.e. all menu item options and their quantities, pick-up or delivery details and the customer’s details; in the right column we specify the variables we want to put as values in those fields.

That's it, you've just customised your own Restaurant chatbot! 👏


# Retail

## Template overview

This template serves as a basis for building a chatbot for your own retail business. With this bot your users can track their orders, request a return, get shopping recommendations, locate the nearest branch of your business, and give feedback. Each of these use cases is contained in a separate flow.

Keep reading to learn how you can customise this template for your own organisation.

## How to customise this template

{% hint style="info" %}
Make sure to always [update the NLP](https://docs.chatlayer.ai/understanding-users/natural-language-processing-nlp#updating-the-nlp) after loading a template!
{% endhint %}

This template uses two third party services:

1. Airtable, as a database for customer orders
2. Google Maps API, for finding the nearest post office

To let your bot interact with these services you will need an API key for each and configure these in the Action blocks where the bot makes the API calls.

{% hint style="info" %}
Using another service to manage your customer orders? You can link any type of database to this bot, as long as it has an API. Read more about our API integrations [here](/integrateandcode/custom-back-end-integrations/integrations-101).
{% endhint %}

Below is an overview of all blocks you will need to customise in this template. It will walk you through how to configure the connection with the Airtable and Google Maps APIs, as well as some other tips to customise this template for your business.

Let's get started!

### Flow: General

#### Block: Introduction

This is the first message the user sees. Modify it to give your bot a custom welcome message that fits your business’ tone and style; also make sure to replace *Sneaky Trainers* with your own business’ name.

#### Block: Support topics

This block shows the topics the bot can help your users with.

If you add use cases to your bot you can add a button here to redirect to that flow.

#### Block: Not understood 1 & Not understood 2

These blocks use a counter to keep track of how many times it has not understood a user's message. If it’s the first the time the bot didn’t understand the message it will ask to rephrase the message; if it’s the second time the bot doesn’t understand it, the bot will ask the user if they would like to get in touch in another way.

For more information on the Not understood counter, check out the tutorial [here](https://docs.chatlayer.ai/tips-and-best-practices/not-understood-bot-dialog/not-understood-counter).

If you want to increase the number of times the bot asks the user to rephrase before offering the option to get in touch, you can increase the value of the `not_understood_counter` variable. That variable is set to 1 in the first condition in the *Not Understood* block. You can add additional not understood messages by adding a condition and linking a bot block to it

### Flow: Tracking

This flow allows your customers to check the delivery status of their order. The bot will look up the delivery date in an external database based on the order number. If the customer doesn’t know their order number, the bot will ask for their name and email address and use those to look up the order status.

#### Block: Search order number

If the user gives their order number, this Action block looks up the record that matches the order number in an external database. By default, this template is set up to look up the orders in an Airtable base using the Search Record function of Chatlayer’s [Airtable integration](/integrateandcode/app-integrations/airtable).

{% hint style="info" %}
Already using another service to to manage your orders? You can link any sort of database to this bot, as long as it has an API. Read more about integrations [here](https://docs.chatlayer.ai/integrations/integrations-101).
{% endhint %}

You will need to customise this block by connecting it to your own Airtable account and your own Airtable base, or another database of your choice. However, when you have newly imported the Returns template, it will be linked to [this Airtable](https://airtable.com/shrmwWUZNLMO79KCw). The order data is in the *customerorders* table.

![](https://2786867680-files.gitbook.io/~/files/v0/b/gitbook-x-prod.appspot.com/o/spaces%2F-LLTwFwbOqJj4dDhg8Ju%2Fuploads%2FcXP9u7dx1eAf7qfsrqUd%2Fimage.png?alt=media\&token=ffc3be5a-da97-4c26-84b7-0ce460656ecb)

Feel free to use this base as an example for testing, but make sure to connect your own database once you start using the bot for your own business.

If you do not yet have an Airtable account set up in Chatlayer, you can do so by clicking Connect new account and following the steps in the pop-up window. For this you will need your Airtable API key which you can find on your [Airtable account page](https://airtable.com/account).

![](https://2786867680-files.gitbook.io/~/files/v0/b/gitbook-x-prod.appspot.com/o/spaces%2F-LLTwFwbOqJj4dDhg8Ju%2Fuploads%2FErY05SvzP89LDeaDuL7o%2Fimage.png?alt=media\&token=7e28cb8d-a2c0-41c0-977e-ee3fc169a037)

Once you have set up your own Airtable base, head back to the block in Chatlayer. In the Base field replace the ID of the example Airtable base with the ID of your own Airtable base. In the Table field replace the example ID with the ID or name of the table in your own Airtable base where you store the order data. You can find your Airtable's base ID and table IDs [here](https://airtable.com/api).

If a record matching the order number is found in the Airtable, the matching record will be saved as an object in your chatbot’s session data. You can can call data from this object in your bot blocks with the following format:`{apps.airtable.read_record.(AIRTABLE_FIELD_NAME)}`. For example the *Status Delivery* block show the order’s delivery date using `{apps.airtable.read_record.DeliveryDate}`.

You can find more information on how to integrate Airtable into your chatbot [here](https://docs.chatlayer.ai/integrations/app-integrations/airtable-app-integration).

#### Block: Search email in database

This Action block is nearly identical to the Search order number in database block but instead uses the `email_address` variable to look in the Airtable’s *email* column to find the user’s record. You will need to customise the same fields as in the Search order number in database block.

### Flow: Returns

This flow allows your users to request to return an item they have ordered.

#### Block: Look up ordered items

After the user has given their name and email address, this Action block looks up the record in Airtable that matches their email address. Like in the *Tracking* flow you will need to customize this block by connecting it your own Airtable account and your own Airtable base.

#### Block: Select return item

This block shows the user the items they can return in a carousel. The names and images of the items are retrieved from the Airtable.

If you need to show your users more items to return you can add extra columns for items and links to their images in the Airtable and add more carousel items in the bot block.

### Flow: Feedback

With this flow users can give feedback on their experience using the bot. If the user indicates the bot was not able to help them the bot will ask what use case did not work for them and ask to describe in more detail exactly what went wrong.

#### Block: Feedback to Airtable

After the user has given their feedback, this Action block writes two variables, `feedback` and `detailed_feedback`, to Airtable.

In your Airtable base you will need a table with a column for each of the two variables.

In the Airtable account field, select your own Airtable account, or connect a new one if you do not have one yet. In the Base field replace the given ID with the ID of your own Airtable base. In the Table field replace the given ID with the ID or name of the table in your own Airtable base where you want to store the feedback data. If your own Airtable uses different column names you will also need to replace feedback and detailed\_feedback in the Record field by the column names in your own Airtable.

### Flow: Store locator

With this flow, your users can find which of your business’ retail stores is closest to them. The functionality of this flow is the same as the Find nearest location template. To find out how to customise this flow, you can consult the tutorial for that template [here](https://docs.chatlayer.ai/tips-and-best-practices/bot-templates/pre-built-flow-templates/template-find-nearest-location).

### Flow: Post office locator

From the Prepare return block in the Returns flow, the user can navigate to this flow. Like the Store locator flow, this flow works in the same way as the Find nearest location template. To find out how to customise this flow, you can consult the tutorial for that template [here](https://docs.chatlayer.ai/tips-and-best-practices/bot-templates/pre-built-flow-templates/template-find-nearest-location).


# Analytics

The Analytics tab is where you can check your bot performance.

<figure><img src="https://2786867680-files.gitbook.io/~/files/v0/b/gitbook-x-prod.appspot.com/o/spaces%2F-LLTwFwbOqJj4dDhg8Ju%2Fuploads%2Fog2pjc2RFlGvNH4LnNaX%2FScreenshot%202024-06-05%20at%2016.26.18.png?alt=media&amp;token=19cbd921-a49d-4bc0-80da-a62cca12d982" alt="" width="341"><figcaption></figcaption></figure>

<figure><img src="https://2786867680-files.gitbook.io/~/files/v0/b/gitbook-x-prod.appspot.com/o/spaces%2F-LLTwFwbOqJj4dDhg8Ju%2Fuploads%2FkfsbfXBiHIjzup1U68vW%2FScreenshot%202024-05-31%20at%2019.36.11.png?alt=media&amp;token=fad5b249-7a5f-4db8-9b42-4d75c05c939e" alt=""><figcaption><p>Analytics dashboard.</p></figcaption></figure>

{% hint style="info" %}
Not familiar with analytics? We recommend that you have a look at our [Analytics concepts](/bot-answers/definitions).
{% endhint %}

{% content-ref url="/pages/PokhZI0P2LOWB6O3vAQc" %}
[Dashboard](/navigation/analytics/dashboard)
{% endcontent-ref %}

{% content-ref url="/pages/OEhxV3SsasxAaqNc3c1M" %}
[Customers](/navigation/analytics/customers)
{% endcontent-ref %}

{% content-ref url="/pages/-McxBt4U7QYX5p8\_IRWn" %}
[Conversations](/navigation/analytics/conversations)
{% endcontent-ref %}

{% content-ref url="/pages/-LpgpIGv1zCEjb3fQKea" %}
[User flow](/navigation/analytics/user-flow)
{% endcontent-ref %}

{% content-ref url="/pages/-McxBxm6Ts0z-48rMFVH" %}
[Intents](/navigation/analytics/intents)
{% endcontent-ref %}

{% content-ref url="/pages/aiGm3rG6jmVi2f6n4jMm" %}
[Funnels \[Beta\]](/navigation/analytics/funnels-beta)
{% endcontent-ref %}


# Dashboard

The dashboard is the main page in our Analytics. It shows a lot of important information about your bot in a quick and simple overview.

If you don't see any data in the overview, you might be viewing the **DRAFT** data of your unpublished bot. Your customers are interacting with the [**LIVE** or published version](/publish/publishing-your-bot). Switch your filter to **LIVE** to see actual customer data.

{% hint style="info" %}
Not familiar with analytics? We recommend that you have a look at our [Analytics concepts](/bot-answers/definitions).
{% endhint %}

## Filtering

<figure><img src="https://2786867680-files.gitbook.io/~/files/v0/b/gitbook-x-prod.appspot.com/o/spaces%2F-LLTwFwbOqJj4dDhg8Ju%2Fuploads%2Fa2Ff58zGXxI86xYuRu0P%2FScreenshot%202024-06-04%20at%2010.50.53.png?alt=media&amp;token=607231a4-b003-4674-bf8e-f3a0371d0fc1" alt=""><figcaption><p>Filtering features for your Analytics dashboard.</p></figcaption></figure>

Use these filters to customize the dashboard view and create specific insights for your bot, helping you monitor its progress over time:

* **All channels** allows you to filter on specific channels.
* **All languages** shows information about your bot in different languages.

{% hint style="info" %}
The timestamp of the data you see in the analytics dashboard is based on the timezone of your browser.
{% endhint %}

## Analytics overview

### Customers

The [**Customers**](#customers) tab in Analytics allows you to check your new and returning customers.

<figure><img src="https://2786867680-files.gitbook.io/~/files/v0/b/gitbook-x-prod.appspot.com/o/spaces%2F-LLTwFwbOqJj4dDhg8Ju%2Fuploads%2FmwDEBrJWwKQEA2S6XZ7w%2FScreenshot%202024-06-04%20at%2011.08.00.png?alt=media&amp;token=532e2047-c5ba-4629-94bf-8fddf73522b0" alt="" width="375"><figcaption><p>Customers analytics.</p></figcaption></figure>

### Conversations

The [**Conversations**](/navigation/analytics/conversations) tab shows the distribution of bot conversations in all available languages.

{% hint style="info" %}
[Switching from **Languages** to **Channels** ](#filtering)will show the use of the bot over different channels (if these are used of course).
{% endhint %}

<figure><img src="https://2786867680-files.gitbook.io/~/files/v0/b/gitbook-x-prod.appspot.com/o/spaces%2F-LLTwFwbOqJj4dDhg8Ju%2Fuploads%2FGBtg8aD70A2ManlKnR1Q%2FScreenshot%202024-06-04%20at%2011.09.15.png?alt=media&amp;token=bbdb0ba6-5cab-4402-a931-86ead9dd1292" alt="" width="375"><figcaption><p>Conversations analytics.</p></figcaption></figure>

[**Conversations**](/navigation/analytics/conversations) also display the proportions of conversations with handover, average number of messages and time spend.

<figure><img src="https://2786867680-files.gitbook.io/~/files/v0/b/gitbook-x-prod.appspot.com/o/spaces%2F-LLTwFwbOqJj4dDhg8Ju%2Fuploads%2F3zrUrsOySgpSOh6wkLCF%2FScreenshot%202024-06-04%20at%2011.13.05.png?alt=media&amp;token=7c07b281-9ac6-488e-a854-926627b0165c" alt="" width="375"><figcaption><p>Conversations analytics.</p></figcaption></figure>

{% hint style="warning" %}
Is the number of conversations in the Dashboard different from the number of conversations in the conversation [**History**](/navigation/history)? That's because in **Analytics**, we show all conversations, whereas in the **History** overview, we only include conversations where the user actually replied.
{% endhint %}

### User messages

<figure><img src="https://2786867680-files.gitbook.io/~/files/v0/b/gitbook-x-prod.appspot.com/o/spaces%2F-LLTwFwbOqJj4dDhg8Ju%2Fuploads%2Fy4txBemBAfMC5kl9CJG6%2FScreenshot%202024-06-04%20at%2011.09.48.png?alt=media&amp;token=19aca7c2-8a5b-4b43-9031-7c0cb1051e95" alt="" width="375"><figcaption></figcaption></figure>

The **User messages** tab takes you to the [Conversations](/navigation/analytics/conversations) page with an overview of how many messages are understood, not understood, or clicked.

### Top intents

The top intents tab is showing the top 5 triggered intents most often, including the number of calls and their percentages. Clicking on **Details** in the right upper corner will bring you to the [**Intents** ](https://docs.chatlayer.ai/bot-answers/analytics/intents)page.

<figure><img src="https://2786867680-files.gitbook.io/~/files/v0/b/gitbook-x-prod.appspot.com/o/spaces%2F-LLTwFwbOqJj4dDhg8Ju%2Fuploads%2Fj4SrFvEHxgymm9jL55bo%2FScreenshot%202024-06-04%20at%2011.14.50.png?alt=media&amp;token=bc948f4e-1316-4741-ae74-5172e375b217" alt="" width="375"><figcaption><p>Top intents analytics.</p></figcaption></figure>

### Customers activity

Customers activity gives an idea of when your users are interacting the most with the bot throughout the day.

<figure><img src="https://2786867680-files.gitbook.io/~/files/v0/b/gitbook-x-prod.appspot.com/o/spaces%2F-LLTwFwbOqJj4dDhg8Ju%2Fuploads%2Faqu8CQGiGIfbOTNFcY09%2FScreenshot%202024-06-04%20at%2011.15.59.png?alt=media&amp;token=39e8ef07-3b69-4bb6-8d3c-51c3e6c974e3" alt="" width="375"><figcaption><p>Customers activity analytics.</p></figcaption></figure>

### Customer flow

The [**User flow**](/navigation/analytics/user-flow) tab gives an overview of the user journey through the bot.

<figure><img src="https://2786867680-files.gitbook.io/~/files/v0/b/gitbook-x-prod.appspot.com/o/spaces%2F-LLTwFwbOqJj4dDhg8Ju%2Fuploads%2FWHs6yxb8mc7k07nn2Dio%2FScreenshot%202024-06-04%20at%2011.27.53.png?alt=media&amp;token=bf4fa2b8-67e8-4d2d-8e0a-b2f580878c16" alt="" width="375"><figcaption><p>User flow analytics.</p></figcaption></figure>


# Customers

The Customers tab in Analytics allows you to check your new and returning users and their times of activity.

{% hint style="info" %}
Not familiar with analytics? We recommend that you have a look at our [Analytics concepts](/bot-answers/definitions).
{% endhint %}

## Customers

The **Customers** tab is shows a graph of the number of total customers, new and returning ones.

{% hint style="success" %}
A [user ](https://docs.chatlayer.ai/bot-answers/analytics/definitions#user)is someone who sends at least one message to the bot, while a [returning user](https://docs.chatlayer.ai/bot-answers/analytics/definitions#returning-user) is someone who has had a conversation with the bot before this time period as well as during this time period.
{% endhint %}

<figure><img src="https://2786867680-files.gitbook.io/~/files/v0/b/gitbook-x-prod.appspot.com/o/spaces%2F-LLTwFwbOqJj4dDhg8Ju%2Fuploads%2FRC3DX83l2OXgLjyMLZIT%2FScreenshot%202024-06-04%20at%2010.59.30.png?alt=media&amp;token=83d792f8-d613-4e3a-8d6f-5b62c8fc0f83" alt=""><figcaption><p>Customers tab.</p></figcaption></figure>

{% hint style="info" %}
Keep in mind that the amount of new and returning users are calculated based on `userId` (or `sessionId`). By default the web channel generates a random `sessionId`, but you could set a logical `sessionId` if you'd want to. Find out how in [this article.](https://docs.chatlayer.ai/channels/webwidget#sdk-options)
{% endhint %}

## Activity

The **Activity** tab shows first when during the day your customers are the most active.

<figure><img src="https://2786867680-files.gitbook.io/~/files/v0/b/gitbook-x-prod.appspot.com/o/spaces%2F-LLTwFwbOqJj4dDhg8Ju%2Fuploads%2FuGga2Kyp5sC83sV6x83M%2FScreenshot%202024-06-04%20at%2011.40.52.png?alt=media&amp;token=0463d4bd-1405-42c5-af98-d87da5907997" alt=""><figcaption><p>Activity tab per day.</p></figcaption></figure>

Another view shows when customers are the most active per hour.

<figure><img src="https://2786867680-files.gitbook.io/~/files/v0/b/gitbook-x-prod.appspot.com/o/spaces%2F-LLTwFwbOqJj4dDhg8Ju%2Fuploads%2FXjEkuhsTFCfoTnsY6Gs9%2FScreenshot%202024-06-04%20at%2011.42.18.png?alt=media&amp;token=ec5dfc1e-18b6-4712-8b5d-45d9f84367e0" alt=""><figcaption><p>Activity tab per hour.</p></figcaption></figure>


# Conversations

The Conversations tab provides insights into the interactions between your bot and the users, allowing you to assess the effectiveness and quality of those conversations.

{% hint style="info" %}
Not familiar with analytics? We recommend that you have a look at our [Analytics concepts](/bot-answers/definitions).
{% endhint %}

## Overview

The **Overview** tab is where the overall info on the conversations lies. It consists in:

* The total number of conversations.
* The number of conversations with human handover. A conversation is marked as a human handover when it includes a triggered [Offloading](/navigation/settings/offloading) action.
* An average of the number of messages per conversation.
* An average of the [conversation](https://docs.chatlayer.ai/bot-answers/definitions#definition-of-a-conversation) duration. This category represents the most occurring length of a conversation in number of minutes for interactions between your bot and its users

<figure><img src="https://2786867680-files.gitbook.io/~/files/v0/b/gitbook-x-prod.appspot.com/o/spaces%2F-LLTwFwbOqJj4dDhg8Ju%2Fuploads%2Fi2cVDYuRt8vv9K6SIY2f%2FScreenshot%202024-06-04%20at%2011.50.31.png?alt=media&amp;token=03f1b7bb-0215-4d52-bb85-0d2cdf923d35" alt=""><figcaption><p>Conversations Overview tab.</p></figcaption></figure>

{% hint style="success" %}
Monitor the efficiency of your conversations by looking at the average messages and duration per conversation to ensure quick user resolutions. An increase in these metrics indicates users are struggling. Compare with past effective performance, identify changes, and adjust the bot to enhance user experience.
{% endhint %}

## Customer messages

The **Customer messages** tab shows an overview of how many messages are:

* Understood: the user expression is recognized correctly and the corresponding intent was triggered.
* [Button clicks](https://docs.chatlayer.ai/bot-answers/analytics/intents): this shows how often users clicked on a button, carousel, quick reply etc.
* [Not understood](https://docs.chatlayer.ai/bot-answers/analytics/intents): the user expression is not understood, meaning it is below the NLP threshold, so the user saw the Not understood message.

<figure><img src="https://2786867680-files.gitbook.io/~/files/v0/b/gitbook-x-prod.appspot.com/o/spaces%2F-LLTwFwbOqJj4dDhg8Ju%2Fuploads%2FScxNcgP0Jopb5O9ZmnWH%2FScreenshot%202024-06-04%20at%2011.55.55.png?alt=media&amp;token=c7a3d278-13e9-4814-9ba5-db272de3a562" alt=""><figcaption><p>Customer messages tab.</p></figcaption></figure>

{% hint style="info" %}
Seeing a 'not understood' percentage of > 15%? You should look into which intents are not understood correctly and improve your NLP by using the [Train tab](https://docs.chatlayer.ai/understanding-users/natural-language-processing-nlp/tutorial-train-your-bot-based-on-actual-user-messages). Creating better[ Not understood messages](https://docs.chatlayer.ai/tips-and-best-practices/not-understood-bot-dialog) will also create a better user experience.
{% endhint %}

## Knowledge base AI

The **Knowledge base AI** tab displays analytics on the usage of your [Knowledge base AI flow](/navigation/knowledge-base-ai) if you've implemented one in your chatbot.

<figure><img src="https://2786867680-files.gitbook.io/~/files/v0/b/gitbook-x-prod.appspot.com/o/spaces%2F-LLTwFwbOqJj4dDhg8Ju%2Fuploads%2FUHV67lg2lxR7lbULUIxv%2FScreenshot%202024-03-13%20at%2011.04.36.png?alt=media&amp;token=ee8e2eea-42f7-44c9-a4c2-86f85d7400af" alt=""><figcaption><p>The Knowledge base AI tab in Conversations.</p></figcaption></figure>

{% hint style="info" %}
Chatlayer's AI knowledge base tool allows your bot to generate concise answers after scraping your content. Learn how to set it up [here](https://docs.chatlayer.ai/bot-answers/knowledge-base-ai).
{% endhint %}


# User flow

The User flow page gives detailed information about the user journey through the bot.

{% hint style="info" %}
Not familiar with analytics? We recommend that you have a look at our [Analytics concepts](/bot-answers/definitions).
{% endhint %}

## General user flow

Every time a user starts a new session, all of the blocks they run through are counted and summed up to form these analytics. You can also see where users dropped out of the chatbot flow.

<figure><img src="https://2786867680-files.gitbook.io/~/files/v0/b/gitbook-x-prod.appspot.com/o/spaces%2F-LLTwFwbOqJj4dDhg8Ju%2Fuploads%2Fv4JH1ipO2OQZMoTzWeOC%2FScreenshot%202024-06-04%20at%2012.00.39.png?alt=media&amp;token=203c1dc4-fe8d-473a-946b-6a74b6a65d56" alt=""><figcaption><p>User flow.</p></figcaption></figure>

{% hint style="info" %}
Use this information to improve your bot:

* Are users indeed taking the route you mapped out while building the bot? Are there any discrepancies? What is the cause of these differences?
* Is there a very high dropoff point at a certain block? See how you can improve this block, perhaps the information is not clear or the user is stuck.
  {% endhint %}

## Detailed block flow

This page shows how to user exactly arrived at that specific block, and which block they used afterwards.

<figure><img src="https://2786867680-files.gitbook.io/~/files/v0/b/gitbook-x-prod.appspot.com/o/spaces%2F-LLTwFwbOqJj4dDhg8Ju%2Fuploads%2FE1KRgllSwUicZOFcr9GT%2Fdownload.gif?alt=media&amp;token=cb5bab7a-021d-490c-aa71-c12257866931" alt=""><figcaption><p>Detailed block flow.</p></figcaption></figure>


# Intents

The Intents page in Analytics gives detailed information about the triggered intents.

{% hint style="info" %}
Not familiar with analytics? We recommend that you have a look at our [Analytics concepts](/bot-answers/definitions).
{% endhint %}

The **Intents** page shows the 10 most triggered intents. This means that these are the most used intents in your bot.

<figure><img src="https://2786867680-files.gitbook.io/~/files/v0/b/gitbook-x-prod.appspot.com/o/spaces%2F-LLTwFwbOqJj4dDhg8Ju%2Fuploads%2FzDxbguotT9nTL6pbvAeo%2FScreenshot%202024-06-04%20at%2013.23.00.png?alt=media&amp;token=e9d0688a-eb1e-4dca-bd4d-83ecca234691" alt=""><figcaption><p>The Intents page.</p></figcaption></figure>

{% hint style="success" %}
While maintaining and improving your intents and NLP model, focus on these intents first. These are most used by your users, so it is important they can trigger these intents easily with as many expressions as possible. Use the [train ](https://docs.chatlayer.ai/understanding-users/natural-language-processing-nlp/tutorial-train-your-bot-based-on-actual-user-messages)module to enhance these intents with actual user input.
{% endhint %}


# Funnels \[Beta]

Funnels provide insights into user interactions with your bot by revealing how they progress through predefined steps. Funnels help to shed light on conversion rates and drop-off points.

<figure><img src="https://2786867680-files.gitbook.io/~/files/v0/b/gitbook-x-prod.appspot.com/o/spaces%2F-LLTwFwbOqJj4dDhg8Ju%2Fuploads%2FlblhmfF8vJOTSfBMTiCf%2FScreenshot%202024-11-29%20at%2015.53.21.png?alt=media&amp;token=89ab6afe-13e8-4ee7-ad05-2d144fb22455" alt=""><figcaption></figcaption></figure>

{% hint style="success" %}
We're excited to introduce Funnels, currently in open beta, offering users an opportunity to explore its capabilities and provide valuable feedback. Your insights are crucial in refining and enhancing the feature for its official release. If you encounter any issues or have feedback to share, we encourage you to reach out to us at: <feedback.chatlayer@sinch.com>.
{% endhint %}

### **Add a funnel to your bot**

**To add a funnel to your bot:**

1. Navigate to the **Analytics** section.

{% hint style="info" %}
To ensure accurate analysis, make sure to choose the specific bot environment (DRAFT or LIVE) that you wish to analyze. Additionally, use filters located at the top right of the screen to narrow down your analysis based on date, channel, and language preferences.
{% endhint %}

2. Click on **Funnels**.
3. Next to **Type**, choose if you want to check **Bot flows** or **Tracking events**. Bot flows refer to [blocks](/navigation/bot-builder/flows) that users go through when navigating the flow, whereas [events mean either a variable that changed or a silence](/navigation/bot-builder/events).

<figure><img src="https://2786867680-files.gitbook.io/~/files/v0/b/gitbook-x-prod.appspot.com/o/spaces%2F-LLTwFwbOqJj4dDhg8Ju%2Fuploads%2F9JxAGqIXqUr0RUNkvlGJ%2FScreenshot%202024-11-29%20at%2015.55.57.png?alt=media&amp;token=ec4517fa-b031-4eb2-b9f8-fff878b3bea2" alt="" width="375"><figcaption><p>Track events or flows</p></figcaption></figure>

2. Click on **+ Add step.**

{% hint style="info" %}
Note that in the context of **Funnels**, a **step** means a stop or point in the conversation where you would like to check how many users went through. Steps in funnels shouldn't be confused with steps inside [**Message**](/buildabot/flow-logic/dialog-state/message-components) blocks.
{% endhint %}

4. Click on the dropdown under **Steps**.
5. Select a block as a step for your funnel. You can add up to 6 steps to construct a detailed user journey.
6. Repeat this until all your steps are configured.

<figure><img src="https://2786867680-files.gitbook.io/~/files/v0/b/gitbook-x-prod.appspot.com/o/spaces%2F-LLTwFwbOqJj4dDhg8Ju%2Fuploads%2FUGlMSEGYOrzLTFtcZhp3%2FScreenshot%202024-11-29%20at%2016.00.19.png?alt=media&amp;token=1fb1f801-0e5b-494f-9b30-16c1af96cd5d" alt=""><figcaption><p>Add steps to your funnel.</p></figcaption></figure>

{% hint style="info" %}
The filter per step feature is under development and will be available soon for enhanced customization.
{% endhint %}

7. Click on the **Compute** button to generate the funnel analysis.

<figure><img src="https://2786867680-files.gitbook.io/~/files/v0/b/gitbook-x-prod.appspot.com/o/spaces%2F-LLTwFwbOqJj4dDhg8Ju%2Fuploads%2FDOlvj65Mng1sNptEZe17%2FScreenshot%202024-01-18%20at%2010.22.21.png?alt=media&amp;token=c6baa26c-798a-4ed3-b81d-4802ff4a6385" alt=""><figcaption><p>Example of computed funnel</p></figcaption></figure>

7. **Analyze** the computed funnel. Here is insight that you can extract:
   * Identify drop-off points where users exit the funnel prematurely.
   * Analyze conversion rates to understand the effectiveness of each step in the user journey.

{% hint style="info" %}
Not familiar with analytics? We recommend that you have a look at our [Analytics concepts](/bot-answers/definitions).
{% endhint %}


# Bot builder

The bot builder is where you will create and manage your flows of conversation.

<figure><img src="https://2786867680-files.gitbook.io/~/files/v0/b/gitbook-x-prod.appspot.com/o/spaces%2F-LLTwFwbOqJj4dDhg8Ju%2Fuploads%2FaNarJYutAjCDKNOhcrsE%2FScreenshot%202024-06-05%20at%2016.27.07.png?alt=media&amp;token=581fe014-c581-483b-915a-e48f9cf836ac" alt="" width="347"><figcaption></figcaption></figure>

<figure><img src="https://2786867680-files.gitbook.io/~/files/v0/b/gitbook-x-prod.appspot.com/o/spaces%2F-LLTwFwbOqJj4dDhg8Ju%2Fuploads%2FOScNtYPihwv1Duhw7DwD%2FScreenshot%202024-05-31%20at%2018.45.10.png?alt=media&amp;token=b9ad244a-fc1d-4fa0-84e1-b479394f741e" alt=""><figcaption><p>Bot builder.</p></figcaption></figure>

{% content-ref url="/pages/9mZCxgyweB7Dpw1rYQwO" %}
[Flows](/navigation/bot-builder/flows)
{% endcontent-ref %}

{% content-ref url="/pages/f9DaxYqMIMsSfpLuWy8G" %}
[Bot dialogs view](/navigation/bot-builder/bot-dialogs-view)
{% endcontent-ref %}

{% content-ref url="/pages/-LLTwJAVCyfwUwBiTiC5" %}
[Translations](/navigation/bot-builder/translations)
{% endcontent-ref %}

{% content-ref url="/pages/-LzHkd5g63gNuU\_U\_BuJ" %}
[Events](/navigation/bot-builder/events)
{% endcontent-ref %}


# Flows

Your Flows view is where you build your bot logic on a flexible canvas, together with a view of the different flows of conversation.

<figure><img src="https://2786867680-files.gitbook.io/~/files/v0/b/gitbook-x-prod.appspot.com/o/spaces%2F-LLTwFwbOqJj4dDhg8Ju%2Fuploads%2F06RNYHG7BBRzw9m1YXhH%2FCanvas%20map.png?alt=media&amp;token=e85339ba-1f50-4272-8c98-594c3b0d265e" alt=""><figcaption></figcaption></figure>

1. **Flows sidebar**

Organize and manage your conversational flows seamlessly using 'Flows'

2. **Navigation**

Stay informed about your current flow location with a clear visual indicator. Additionally, seamlessly switch between subflows and main for smooth navigation

3. **Toolbar**

The toolbar consists of variety of tools and functions:

* **Build mode:** During the editing process of your flow, you will have the 'building mode' enabled.
* **Comment mode:** By **e**nabling comment mode, you’d be able to leave comment on the canvas.
* **Search:** Search for specific block types by simply clicking the icon button and typing the name of your desired block or intent block

4. **Blocks and intents**

Build your bot's conversation flow effortlessly by simply clicking and dragging the desired block or intent blocks onto the canvas.

5. **View options**

You have a number of options:

* **Zoom in:** zoom in to take a closer look
* **Zoom out:** zoom out to see the bigger picture
* **Auto-layout:** use the auto-layout functionality to work around your blocks appearing in piles

6. **Minimap**

Click and drag on the minimap to easily navigate the canvas without losing your place

7. **Test your bot**

To test how your bot will interact with end-customers, you can use this feature to test your bot.

8. **Auto-layout**

Use the auto-layout functionality to work around your blocks appearing in piles

## \[VIDEO] New canvas introduction

Prefer to watch a video? Check out our 3min video tutorial 👇

{% embed url="<https://vimeo.com/778093833>" %}

## Learn more

In the next articles, you will learn to:

{% content-ref url="/pages/OEPySqVDgqzuQmEWK9Kf" %}
[Canvas functionalities](/navigation/bot-builder/flows/canvas-functionalities)
{% endcontent-ref %}

{% content-ref url="/pages/yvL9OMOC4rgi27QWuZFF" %}
[Collaborate with team members](/navigation/bot-builder/flows/collaborate-with-team-members)
{% endcontent-ref %}

{% content-ref url="/pages/5MH58JdK5PFDBr60NwKU" %}
[Manage your flows](/navigation/bot-builder/flows/manage-your-flows)
{% endcontent-ref %}


# Canvas functionalities

Our flexible canvas offers multiple ways to make your bot building experience quick and easy.

🎥 Canvas video tutorial

Prefer to watch instead of read? In this tutorial, learn how to use the different canvas functionalities by building a quick and easy Pizza bot 👇

{% embed url="<https://vimeo.com/889422326?share=copy>" %}

If you prefer to read, we'll go through each special functionality of the canvas below 👇

## Auto layout

If you try out the canvas with an existing bot, your bot blocks will appear as overlapping. The Auto layout functionality is there to solve that.

To use Auto-layout:

1. From your canvas, click on the **Auto layout** button at the bottom right corner of your screen.

<figure><img src="https://2786867680-files.gitbook.io/~/files/v0/b/gitbook-x-prod.appspot.com/o/spaces%2F-LLTwFwbOqJj4dDhg8Ju%2Fuploads%2FltcZzbc2gwmNdmg47URc%2FScreenshot%202024-06-04%20at%2016.05.17.png?alt=media&amp;token=299ce554-ac94-4614-bfb3-9203b307c867" alt="" width="276"><figcaption><p>Auto layout button.</p></figcaption></figure>

2. Your blocks are now spread over the canvas in a non-overlapping fashion. Feel free now to drag and drop each block where you like it the best!

{% hint style="danger" %}
Note that once you tidied up your flow using Auto layout, you cannot go back to what your flow looked like before.
{% endhint %}

## Drag and drop

To add new blocks to your bot with the canvas, simply drag and drop them directly from the top-right corner to anywhere you like in the canvas.

<figure><img src="https://2786867680-files.gitbook.io/~/files/v0/b/gitbook-x-prod.appspot.com/o/spaces%2F-LLTwFwbOqJj4dDhg8Ju%2Fuploads%2FW8XyBGXRXgJuauMCGsCA%2FDesign%20sans%20titre%20(4).gif?alt=media&amp;token=61b0bd79-81d9-4764-a2e1-059ebf37baca" alt=""><figcaption><p>Drag and drop a block to your canvas.</p></figcaption></figure>

## 🆕 Duplicate blocks

To duplicate a block:

1. Select a block by clicking on it.
2. Click on the **Duplicate** icon above it.

<figure><img src="https://2786867680-files.gitbook.io/~/files/v0/b/gitbook-x-prod.appspot.com/o/spaces%2F-LLTwFwbOqJj4dDhg8Ju%2Fuploads%2FkZDF2FqNAeUkoECifrRN%2FScreenshot%202024-05-31%20at%2018.24.36.png?alt=media&amp;token=9596468b-ab2c-49d8-9611-d90ed6a48e10" alt="" width="375"><figcaption><p>Duplicate a block.</p></figcaption></figure>

3. A copy of this block appears on your canvas!

## Connections

There are 2 types of arrow connections on the canvas: Go-to's, and Parent connections.

### Go-to connections

The plain arrows represent the [Go-to connections](https://docs.chatlayer.ai/bot-answers/dialog-state/plugins#go-tos-within-dialog-types), i.e. an actual flow connection. This means that the blocked pointed to by the arrow happens right after the first one, guiding the conversation from one component to another.

<figure><img src="https://2786867680-files.gitbook.io/~/files/v0/b/gitbook-x-prod.appspot.com/o/spaces%2F-LLTwFwbOqJj4dDhg8Ju%2Fuploads%2FDcEXEBO67Va2GjHuQSPG%2FScreenshot%202022-12-30%20at%2017.09.33.png?alt=media&amp;token=bad47302-d086-4640-9253-0abb8ffcf0dd" alt=""><figcaption><p>Go-to dot from where you can draw connections</p></figcaption></figure>

To link 2 components with a Go-to:

1. Click and hold the **Go-to** dot at the bottom right corner of a node.
2. Connect it with any other existing block by drawing an arrow, or you can just create a new one if you don't have a block available yet.

<figure><img src="https://2786867680-files.gitbook.io/~/files/v0/b/gitbook-x-prod.appspot.com/o/spaces%2F-LLTwFwbOqJj4dDhg8Ju%2Fuploads%2F5kP0BQqnKj7rB2JhUzXc%2FGo%20to%20connection.gif?alt=media&amp;token=80212974-245a-4040-9c84-91f6978b063b" alt=""><figcaption><p>From the Go-to dots, draw connections between components.</p></figcaption></figure>

### Parent-child connections

The dotted arrows are [Parent-child connections](https://docs.chatlayer.ai/bot-answers/dialog-state#parent-bot-dialog), designed as a visual aid to help you organize your flows. While it doesn't create functional links between components, it offers a tool for visually structuring your block in a coherent manner.

To add a parent-child connection:

1. Open your [block](/buildabot/flow-logic/dialog-state).
2. Go to its **Settings**.
3. Under **Parent**, define a parent block.
4. Click **Save**.

{% hint style="info" %}
For instance, Parent-child connections are especially useful when you're using [context](/nlp/natural-language-processing-nlp/using-context).
{% endhint %}

<figure><img src="https://2786867680-files.gitbook.io/~/files/v0/b/gitbook-x-prod.appspot.com/o/spaces%2F-LLTwFwbOqJj4dDhg8Ju%2Fuploads%2Fed2d6ufGlxQXDc1l14Dv%2FScreenshot%202023-06-06%20at%2021.14%201.png?alt=media&amp;token=81a72af2-e03a-4f5f-82fe-a6971ffaea39" alt=""><figcaption><p>Parent-child connection enhances visualization.</p></figcaption></figure>

### Connection settings

#### **Delete arrows**

Both Go-to and Parent-child arrows can be deleted by hovering over them and clicking the trash icon.

<figure><img src="https://2786867680-files.gitbook.io/~/files/v0/b/gitbook-x-prod.appspot.com/o/spaces%2F-LLTwFwbOqJj4dDhg8Ju%2Fuploads%2FqUo7eLZ15Abl6RFsuw5A%2FDelete%20connection.gif?alt=media&amp;token=ba6faaae-fedd-48db-b12d-2c3cc33e25c8" alt=""><figcaption><p>Click on the trash icon from an arrow to delete a flow connection</p></figcaption></figure>

#### Arrows position and color

You have the flexibility to move arrows back and forth at your convenience to achieve the perfect positioning. Additionally, you are able to modify their colours to suit your preferences.

<figure><img src="https://2786867680-files.gitbook.io/~/files/v0/b/gitbook-x-prod.appspot.com/o/spaces%2F-LLTwFwbOqJj4dDhg8Ju%2Fuploads%2FxHM6cYhZY5WvQikk48L6%2FConnection%20settings.gif?alt=media&amp;token=37b9adee-e2c0-4a31-bafb-36e16d592e56" alt=""><figcaption><p>Change the arrow color and placement.</p></figcaption></figure>

Should you ever want to revert to the previous arrow design, a simple reset option allows you to restore the original arrows instantly.

<figure><img src="https://2786867680-files.gitbook.io/~/files/v0/b/gitbook-x-prod.appspot.com/o/spaces%2F-LLTwFwbOqJj4dDhg8Ju%2Fuploads%2F6VcYd0c6qpBEZPHnz2n2%2FCopy%20of%20Connection%20settings.gif?alt=media&amp;token=56013c9e-5ee4-4021-bc34-9311e3b49f07" alt=""><figcaption><p>Restet the arrow to its previous state.</p></figcaption></figure>


# Collaborate with team members

Enhance your project collaboration with synchronicity! Dive into the world of seamless teamwork within Chatlayer.

Share access to the same bot

You can get access to the same bot for different team members.

{% hint style="info" %}
Learn all about [identity and access for team members](/support/access-control).
{% endhint %}

## Comments

Comments are a powerful tool for providing feedback and fostering collaboration. By using comments you can take your collaboration to the next level.

### Add comments

To add a comment.

1. Navigate to the screen you’d like to comment on.
2. Click on the **Comment** **mode** icon in the top right menu of the screen.

<figure><img src="https://2786867680-files.gitbook.io/~/files/v0/b/gitbook-x-prod.appspot.com/o/spaces%2F-LLTwFwbOqJj4dDhg8Ju%2Fuploads%2F4npRUpAMVzKDQVkU4Ds7%2FScreenshot%202024-06-04%20at%2013.39.53.png?alt=media&amp;token=077d522e-1041-4714-9571-2c82df4857f6" alt="" width="319"><figcaption></figcaption></figure>

{% hint style="info" %}
Note that while you’re in comment mode, you won’t be able to add or edit any block. For this you need to go back to the [Build mode](#go-back-to-the-build-mode).
{% endhint %}

3. The Comment mode is now turned on. Choose the specific location on your canvas, then right-click on your cursor to add a comment.
4. Type your comments in the comment field provided.
5. Press the **Submit** button to submit your comment.

<figure><img src="https://2786867680-files.gitbook.io/~/files/v0/b/gitbook-x-prod.appspot.com/o/spaces%2F-LLTwFwbOqJj4dDhg8Ju%2Fuploads%2F92EUEQgfEpFFUDxo2gta%2FDesign%20sans%20titre%20(2).gif?alt=media&amp;token=7720f632-a014-4d57-bb87-b56f8944df5a" alt=""><figcaption><p>Add a comment to your canvas.</p></figcaption></figure>

### Reply to comments

To reply to comments:

1. Click on the comment you want to view.
2. Click on the **Reply** field below the comment to add your response
3. Press the Enter key on your keyboard to submit your reply to the comment.
4. To resolve a thread, click the **Resolve** button on the top right of the comment thread.

<figure><img src="https://2786867680-files.gitbook.io/~/files/v0/b/gitbook-x-prod.appspot.com/o/spaces%2F-LLTwFwbOqJj4dDhg8Ju%2Fuploads%2F4AquorzPp3Qd7OCZEuT4%2FDesign%20sans%20titre%20(3).gif?alt=media&amp;token=b6f0c174-c9d4-46bd-8d50-609832c780de" alt=""><figcaption><p>Respond to coments.</p></figcaption></figure>

### Delete comments

1. Make sure that you’re in Comment mode by clicking the **Comment** icon on the right top menu.
2. Choose the comment that you want to delete by clicking on it. This will highlight the comment for deletion.
3. Press the Delete key on your keyboard to delete the selected comment.

### Tag a team member

To mention a team member in the comment field:

1. Type the “@” symbol.
2. As you start typing your team member’s name or email address, the platform will suggest collaborators. You can select your desired collaborator from the list.
3. Once you click on your team member’s name in the list, indicating that they have been successfully mentioned. You can then complete the rest of your message and click **Send** icon to post your comment.

<figure><img src="https://2786867680-files.gitbook.io/~/files/v0/b/gitbook-x-prod.appspot.com/o/spaces%2F-LLTwFwbOqJj4dDhg8Ju%2Fuploads%2FSkwyuyhlFaz10R6e5INB%2Ftagging.png?alt=media&amp;token=d69fc11f-04b2-47d7-b5e4-905b940f6922" alt=""><figcaption><p>Tag team members in comments</p></figcaption></figure>

### Go back to the Build mode

If you want to go back to the **Build mode** after adding comments:

Click on the **Build mode** icon located next to the 'comment' icon in the top right menu. This will take you back to the building mode again.

<figure><img src="https://2786867680-files.gitbook.io/~/files/v0/b/gitbook-x-prod.appspot.com/o/spaces%2F-LLTwFwbOqJj4dDhg8Ju%2Fuploads%2FUpsra7WIxYsYqScvWqvF%2FScreenshot%202024-06-04%20at%2013.52.21.png?alt=media&amp;token=1afbbebd-b54a-4964-9575-e0997024bcc8" alt="" width="314"><figcaption><p>Go back to the Build mode.</p></figcaption></figure>


# Manage your flows

Learn how to add flows, subflows, move them, and organize them.

In Chatlayer, you organize your bot logic in flows and subflows. They function just like folders where you would organize your conversation logic.

## Add flows

<figure><img src="https://2786867680-files.gitbook.io/~/files/v0/b/gitbook-x-prod.appspot.com/o/spaces%2F-LLTwFwbOqJj4dDhg8Ju%2Fuploads%2FOsoXs3fN5247y4TCtI3e%2FScreenshot%202024-06-04%20at%2016.23.31.png?alt=media&amp;token=3449c823-df2b-4eda-962e-5dcb7e7a804a" alt="" width="375"><figcaption><p>Flows and subflows example.</p></figcaption></figure>

### Add a parent flow

To add a new flow:

1. Click the **+** button at the top left side bar of the canvas.

<figure><img src="https://2786867680-files.gitbook.io/~/files/v0/b/gitbook-x-prod.appspot.com/o/spaces%2F-LLTwFwbOqJj4dDhg8Ju%2Fuploads%2F3dDxglyjWaKJLap3BPUa%2FCopy%20of%20Copy%20of%20add%20channel%20(1).gif?alt=media&amp;token=87715f73-2e7d-4ac1-a72b-4e8e8edc7a54" alt=""><figcaption><p>Create a new flow.</p></figcaption></figure>

2. Enter the name of your new flow.
3. Click on **Create**.

You can also create subflows allowing you to implement more logic in the flows overview.

{% hint style="info" %}
Remember, an orange connection on the canvas indicates that the conversation will jump to a block from a different flow.
{% endhint %}

### Add a subflow

To enhance readability, you have the option to create subflows and break up a large flow into smaller, more manageable parts. By doing so, you can improve the overall flow structure and make it easier for fellow botbuilders to follow and understand the conversational flow.

To add a subflow:

1. Click the **three dots** icon next to your main flow title.
2. Click on **Add subflow**.
3. Fill in the **Name**.
4. Click **Save**.

<figure><img src="https://2786867680-files.gitbook.io/~/files/v0/b/gitbook-x-prod.appspot.com/o/spaces%2F-LLTwFwbOqJj4dDhg8Ju%2Fuploads%2FN7PKGR6bXDZrI0lmhPFA%2FConversation_Conversation%20list%20(1).gif?alt=media&amp;token=98788094-38fd-48d7-bbc8-822763b1e5a0" alt=""><figcaption><p>Add a subflow.</p></figcaption></figure>

## Reorder your flows

You can easily change the order of your flows and the blocks inside of them.

### 🆕 Drag and drop your flows

To drag and drop a flow:

1. Hold your mouse as you click on a flow from you list.
2. Drop it either underneath a subflow, or inside a parent flow.

<figure><img src="https://2786867680-files.gitbook.io/~/files/v0/b/gitbook-x-prod.appspot.com/o/spaces%2F-LLTwFwbOqJj4dDhg8Ju%2Fuploads%2FG1dS44V70BG4sBewCVSJ%2FDesign%20sans%20titre.gif?alt=media&amp;token=f3c88992-7162-4b8d-908e-fc5acb3b2ef8" alt=""><figcaption><p>Reorder your flows by dragging and dropping them.</p></figcaption></figure>

### Move multiple blocks <a href="#parent-child-connection" id="parent-child-connection"></a>

If you have a bot with complex flows, you may find it necessary to move certain blocks from one flow to another.

To move a block from one flow to another:

1\. Select the blocks that you want to move.

{% hint style="info" %}
You can select multiple blocks in two ways: holding the CMD key (or CTRL key on Windows) to individually click and select, or holding the shift key to create a rectangular selection of multiple nodes
{% endhint %}

2. Click on the **Move to flow** icon in the top left corner of the toolbar.

<figure><img src="https://2786867680-files.gitbook.io/~/files/v0/b/gitbook-x-prod.appspot.com/o/spaces%2F-LLTwFwbOqJj4dDhg8Ju%2Fuploads%2F6CvimNfotAExheqXmvtk%2FCopy%20of%20Flow%20and%20subflows.gif?alt=media&amp;token=aacc8e0d-62e1-4d2f-80e2-ed6e30dc7b29" alt=""><figcaption><p>Move multiple blocks to another flow at the same time.</p></figcaption></figure>

3. Create or choose the flow or subflow where you want to move the selected blocks.
4. Click **Move** to complete the process.

<figure><img src="https://2786867680-files.gitbook.io/~/files/v0/b/gitbook-x-prod.appspot.com/o/spaces%2F-LLTwFwbOqJj4dDhg8Ju%2Fuploads%2FJ1IKUXV7fXis5vE6H47I%2FCopy%20of%20Copy%20of%20add%20channel.gif?alt=media&amp;token=1f9201dc-985a-4ca1-94ac-d75f99e8ae8e" alt=""><figcaption><p>Move blocks to a new subflow.</p></figcaption></figure>

## Tips of flow management

Are you encountering difficulties when organizing your flows because of all the overlapping path connections and blocks?

One way to make your life easier is to structure your canvas in flows, i.e. different topics:

* Make smaller, manageable flows that gather a piece of conversation about the same 'topic'.
* Bear in mind that an orange representation on the canvas means that your conversation will jump to something that lies in a different flow.
* Use subflows to break up a large flow into smaller, manageable conversations.
* Move selected block or intent blocks to organize your flows.


# \[Beta] Export and import flows

Chatlayer offers the possibility to now export and import flows across bots.

<figure><img src="https://2786867680-files.gitbook.io/~/files/v0/b/gitbook-x-prod.appspot.com/o/spaces%2F-LLTwFwbOqJj4dDhg8Ju%2Fuploads%2F9qowNRyP3wEjOwth6eZ1%2FScreenshot%202024-08-08%20at%2010.59.43.png?alt=media&amp;token=645dcd9c-16a5-4779-b68e-5fe03595eb4b" alt=""><figcaption></figcaption></figure>

In this example, we will import a flow from Bot A to Bot B.

## Export a flow

To export a flow:

1. Open your Bot A [canvas](/navigation/bot-builder/flows).
2. Find the flow that you would like to export.
3. Next to the flow's name, click on the **3 dots**.

<figure><img src="https://2786867680-files.gitbook.io/~/files/v0/b/gitbook-x-prod.appspot.com/o/spaces%2F-LLTwFwbOqJj4dDhg8Ju%2Fuploads%2FInOFi35fxxbiRXDT4av2%2FScreenshot%202024-08-08%20at%2010.12.07.png?alt=media&amp;token=77c45533-73d0-4481-b95d-5b1849f95f48" alt="" width="375"><figcaption><p>Export a flow from your canvas.</p></figcaption></figure>

4. Click on **Export**.
5. A modal appears. Make sure you read it before clicking on **Export**.

<figure><img src="https://2786867680-files.gitbook.io/~/files/v0/b/gitbook-x-prod.appspot.com/o/spaces%2F-LLTwFwbOqJj4dDhg8Ju%2Fuploads%2FZQVYoZOMyiEE0dPqv1gA%2FScreenshot%202024-08-08%20at%2010.18.58.png?alt=media&amp;token=76d013f6-116b-4812-96ce-92a8026918c9" alt="" width="375"><figcaption><p>Export a flow.</p></figcaption></figure>

{% hint style="warning" %}
Note that intents, entities and variables used in the flow will be exported as well to the new bot.
{% endhint %}

6. The export starts. You receive a green notification on the bottom-right side of your screen.

<figure><img src="https://2786867680-files.gitbook.io/~/files/v0/b/gitbook-x-prod.appspot.com/o/spaces%2F-LLTwFwbOqJj4dDhg8Ju%2Fuploads%2FaJ6GU1NLzFlmrJPnWocC%2FScreenshot%202024-08-08%20at%2010.20.44.png?alt=media&amp;token=89dede31-3f74-47d6-9a80-8e02dd9096a9" alt="" width="375"><figcaption><p>The flow export starts.</p></figcaption></figure>

7. When the export is ready, you will receive an email to download the flow. This will be send on the email that you use to log in on Chatlayer.

<figure><img src="https://2786867680-files.gitbook.io/~/files/v0/b/gitbook-x-prod.appspot.com/o/spaces%2F-LLTwFwbOqJj4dDhg8Ju%2Fuploads%2F09zKjwq17ocoLRJjHN39%2FScreenshot%202024-08-08%20at%2010.23.43.png?alt=media&amp;token=5eed0f96-754f-488b-a387-7f0ada5f447b" alt="" width="375"><figcaption><p>You receive an email to download your exported flow.</p></figcaption></figure>

8. Click on the email **Download** button to download the flow .zip file.

You now have your exported flow on your desktop.

## Import a flow

To import a flow to a bot:

1. Open Bot B's [canvas](/navigation/bot-builder/flows).
2. Under your **Flows**, click on the **+** button.

<figure><img src="https://2786867680-files.gitbook.io/~/files/v0/b/gitbook-x-prod.appspot.com/o/spaces%2F-LLTwFwbOqJj4dDhg8Ju%2Fuploads%2FzlMK93t4o97SY8I0H4W1%2FScreenshot%202024-08-08%20at%2010.26.16.png?alt=media&amp;token=e0300690-0f37-4c9b-a73d-18743914ac27" alt="" width="375"><figcaption><p>Import a flow to your bot.</p></figcaption></figure>

3. Click on **Import flow.**
4. Under **Name**, give a name to your new flow. For this example, it will be a 'KBAI flow'.

<figure><img src="https://2786867680-files.gitbook.io/~/files/v0/b/gitbook-x-prod.appspot.com/o/spaces%2F-LLTwFwbOqJj4dDhg8Ju%2Fuploads%2FFNWJjQJsuE1coGwBbDRi%2FScreenshot%202024-08-08%20at%2010.27.28.png?alt=media&amp;token=60f3a055-ae8f-44d5-8c8f-51824c43b3ff" alt="" width="375"><figcaption><p>Name your new flow.</p></figcaption></figure>

5. **Drag and drop** or **Choose a file** to upload your new flow from your desktop.

<figure><img src="https://2786867680-files.gitbook.io/~/files/v0/b/gitbook-x-prod.appspot.com/o/spaces%2F-LLTwFwbOqJj4dDhg8Ju%2Fuploads%2FPxVvC9IP0JhKbjQML66A%2FScreenshot%202024-08-08%20at%2010.28.24.png?alt=media&amp;token=bb6a3373-ce4e-4e22-88f9-c1090dfbda22" alt="" width="375"><figcaption></figcaption></figure>

6. Click on **Import**.

Your new flow is now added to your flows list!

## 💬 Feedback

The export/import of flows is a feature in Beta. Therefore, your feedback is very much appreciated! Please[ reach out](https://tickets.sinch.com/plugins/servlet/samlsso?redirectTo=%2Fservicedesk%2Fcustomer%2Fplugins%2Fservlet%2Fdesk%2Fportal%2F3) if you're having any feedback or concerns.


# Bot dialogs view

The Bot dialogs view allows you to access your blocks in a table view for an easy access.

To open the Bot dialogs view:

1. Go to the **Bot builder** tab by hovering on it.
2. Click on **Bot dialogs**.

<figure><img src="https://2786867680-files.gitbook.io/~/files/v0/b/gitbook-x-prod.appspot.com/o/spaces%2F-LLTwFwbOqJj4dDhg8Ju%2Fuploads%2FGb6abat0a1NsDQuZdOLJ%2FScreenshot%202024-05-31%20at%2018.49.46.png?alt=media&amp;token=5fe4434d-df6e-4668-9126-23d092a71400" alt=""><figcaption><p>The Bot dialogs view.</p></figcaption></figure>

To filter out your blocks:

1. Click on the **Filter** icon at the top right corner of the **Bot dialogs** view.
2. Define the filters that you would like.
3. Click on **Apply**.

<figure><img src="https://2786867680-files.gitbook.io/~/files/v0/b/gitbook-x-prod.appspot.com/o/spaces%2F-LLTwFwbOqJj4dDhg8Ju%2Fuploads%2FxFypRiz1DWovTAeQOi5N%2FDesign%20sans%20titre%20(1).gif?alt=media&amp;token=643f2883-6351-49af-b249-45c18ce882c4" alt=""><figcaption><p>Filter out the blocks that you would like to see in the Bot dialogs view.</p></figcaption></figure>


# Translations

The Translations tab is where you manage translations for multilingual bots.

The **Translations** tab gathers strings that have to be translated or are language-dependent in other ways, like URLs. This includes all messages, random messages, button labels, carousel titles subtitles, URLs etc.

<figure><img src="https://2786867680-files.gitbook.io/~/files/v0/b/gitbook-x-prod.appspot.com/o/spaces%2F-LLTwFwbOqJj4dDhg8Ju%2Fuploads%2F0JyJMzMSu0cRsptUdmeH%2FScreenshot%202024-09-17%20at%2011.05.20.png?alt=media&amp;token=3a4bdfc3-dffc-4c82-b290-67ca048f7869" alt=""><figcaption><p>Translations tab.</p></figcaption></figure>

## Translate your blocks

You can add translations to all your blocks by either typing them directly on the platform or exporting and importing them.

{% hint style="info" %}
The lines where translations are missing appear with a red icon next to them.
{% endhint %}

### 🆕 Auto-translate

1. Click on the line that you'd like to change.
2. On the bottom-right corner, click on the **Auto-translate** button.
3. Click **Save.**

<figure><img src="https://2786867680-files.gitbook.io/~/files/v0/b/gitbook-x-prod.appspot.com/o/spaces%2F-LLTwFwbOqJj4dDhg8Ju%2Fuploads%2FCDXs5J9tBuCjNDaTWyH5%2FDesign%20sans%20titre.gif?alt=media&amp;token=3be88b4e-40c2-4883-a7a9-e2848311bc30" alt=""><figcaption><p>Auto-translate your blocks.</p></figcaption></figure>

### Type or correct your translations

To type translations directly on Chatlayer:

1. Click on the line that you'd like to change.
2. A panel with all the languages opens on the side. Make your changes.
3. Click **Save**.

### By export and import

By clicking the export button in the top, you will receive an email containing a csv file of your translations.

<figure><img src="https://2786867680-files.gitbook.io/~/files/v0/b/gitbook-x-prod.appspot.com/o/spaces%2F-LLTwFwbOqJj4dDhg8Ju%2Fuploads%2FALX6z1CJ2y0dvGb6VyEx%2FScreenshot%202024-06-04%20at%2016.44.07.png?alt=media&amp;token=669c3c0c-8abc-419e-83d6-75fee05a4dbf" alt="" width="265"><figcaption></figcaption></figure>

In this CSV, you will find:

* Flow id.
* Block id.
* Block name.
* The component type, each separate component (such as different buttons) has a new row.
* The translation for all of the languages of your bot.

{% hint style="danger" %}
2 things to remember:

* Don't use this export to create new blocks, just to change the translations of existing messages.
* The translations of rich text messages will not be included in the export, use the interface to edit those.
  {% endhint %}

#### Good practices

It is recommend to use this export file as a basis for importing the translations. That way you have the correct format and all the ids needed for the import.

The recommended steps for importing translations are:

1. Click on **Export** to export translations in the right upper corner.
2. Open de file received per email.
3. Add the translations in the correct column, for example: for Dutch use 'value\_nl' column.
4. Leave the other columns as they are, those are needed for correct processing of the translations and save the file.
5. Use the **Import** button to import these translations, and choose the correct language in the pop-up.
6. Once imported, you will see a pending indicator whilst the import is still running.
7. When this indicator is gone, the import is completed. You can immediately see the translations in the **Translations** tab and you do not need to update the NLP.

{% hint style="danger" %}
Importing / exporting translations will only work in the same bot. To get translations from bot A to bot B, look into importing and exporting [the entire bot](https://docs.chatlayer.ai/bot-answers/settings#bot-import-export).
{% endhint %}


# Events

Events are used to trigger a flow based on an event that happens in a certain conversation. Multiple types of events allow for widely varying use cases.

**Events** are a versatile way to trigger a flow whenever either:

* a variable changed
* a silence was detected

{% hint style="info" %}
Note that Events are not the same as [Track events,](/bot-answers/track-events-for-analytics) which are used for analytics purposes.
{% endhint %}

## Variables Changed event

Using a **Variables Changed event** will allow you to trigger a block whenever a variable value is changed. This can happen for example within a [Condition](/buildabot/flow-logic/dialog-state/plugins) block, a [button](https://docs.chatlayer.ai/bot-answers/dialog-state/message-components#next-bot-dialog), or even when an [entity](https://docs.chatlayer.ai/understanding-users/natural-language-processing-nlp/synonym-entities) is detected. In other words, the bot will continue to the next block set to happen when this change of variable was detected.

To add an Variables Changed event to your bot:

1. Open the **Events** page under the **Bot builder** tab, on the left-hand side of the screen.
2. Click on **Create event.**
3. Fill in the event with the features that you would like. In this example, we want to trigger the block called Variable changed whenever the `test_variable` changed.
4. Click on **Create.**

{% hint style="info" %}
Please note that if you want to create an event triggered when a variable changed, that variable needs to be created beforehand, otherwise you won't find it in the dropdown menu.
{% endhint %}

<figure><img src="https://2786867680-files.gitbook.io/~/files/v0/b/gitbook-x-prod.appspot.com/o/spaces%2F-LLTwFwbOqJj4dDhg8Ju%2Fuploads%2FIPGu9wyvPDUMN9pJSbh1%2FScreenshot%202023-10-13%20at%2016.43.49.png?alt=media&amp;token=6a71f3f1-9bb9-45e0-9e99-0185cfbf48ba" alt="" width="274"><figcaption><p>Create a Variables changed event</p></figcaption></figure>

This results in the following flow:

<figure><img src="https://2786867680-files.gitbook.io/~/files/v0/b/gitbook-x-prod.appspot.com/o/spaces%2F-LLTwFwbOqJj4dDhg8Ju%2Fuploads%2F6PdUvF1zaSgEVilfcZRI%2FScreenshot%202023-10-13%20at%2016.46.46.png?alt=media&amp;token=16628471-ff1a-4931-8103-eeb3f679ad4a" alt=""><figcaption><p>A flow example where a Variables Changed event takes place.</p></figcaption></figure>

And this flow will result in this type of conversation:

<figure><img src="https://2786867680-files.gitbook.io/~/files/v0/b/gitbook-x-prod.appspot.com/o/spaces%2F-LLTwFwbOqJj4dDhg8Ju%2Fuploads%2Fe9sE9d4mHkpJZTIP0RDs%2FScreenshot%202023-10-13%20at%2016.48.15.png?alt=media&amp;token=30a50995-d584-49e4-b9a2-95e3521fa63d" alt=""><figcaption><p>An example of conversation using a Variables changed event.</p></figcaption></figure>

The changed variables are also stored in the user session, from your **Debugger** tab, where you can access them in the `events.variablesChanged` array.

![Access the changed variables from your Debugger tab.](https://2786867680-files.gitbook.io/~/files/v0/b/gitbook-legacy-files/o/assets%2F-LLTwFwbOqJj4dDhg8Ju%2F-M0bNdk-aEhqurz6mg5T%2F-M0bQiQqeNniGa3Sgll7%2Fimage.png?alt=media\&token=2cf5a36e-0f5b-4101-9cc9-475fa294365a)

{% hint style="success" %}
Customers often use Variables Changed events to perfrom an API request through an [API action](/integrateandcode/custom-back-end-integrations).
{% endhint %}

## Silence Detected event

**Silence Detected events** allow you to steer the conversation to a new block when the user doesn't respond for a defined period of time. The duration of silence can range from 1 minute to a maximum of 1440 minutes (24 hours).

{% hint style="info" %}
Silence Detected events are not the same as Delays, which are a way to wait before the bot goes to the next block. Learn more about Delays [here](https://docs.chatlayer.ai/bot-answers/dialog-state/action-bot-dialog#delay).
{% endhint %}

To add a Silence Detected event to your bot:

1. Open the **Events** page under the **Bot builder** tab, on the left-hand side of the screen.
2. Click on **Create event**.
3. Fill in the name, trigger and duration (in minutes) that you would like to wait before the next block. In this example, we trigger the block called Next block after 1 minute.
4. Click on **Create**.

<figure><img src="https://2786867680-files.gitbook.io/~/files/v0/b/gitbook-x-prod.appspot.com/o/spaces%2F-LLTwFwbOqJj4dDhg8Ju%2Fuploads%2F7bOmjqNgRZ0D3i6w2zlc%2FScreenshot%202023-10-13%20at%2017.08.40.png?alt=media&amp;token=c5c75c58-d4d3-4d24-a148-437409754987" alt=""><figcaption><p>Create a Silence Detected event.</p></figcaption></figure>

{% hint style="info" %}
You can create **multiple Silence Detected events** within one bot. All of them will start counting at the same time, i.e. your bot will prompt the user at several intervals. It's best practice to not create multiple Silence Detected events with the same duration so that users aren't spammed with multiple messages in a row.
{% endhint %}

## Whatsapp Flow Completed event

**Whatsapp Flow Completed** events allow you to handle the events created by whatsapp when a user completes a [whatsapp flow](https://business.whatsapp.com/products/whatsapp-flows) . To add a Whatsapp Flow Completed event to your bot:<br>

1. Open the **Events** page under the **Bot builder** tab, on the left-hand side of the screen.
2. Click on **Create event**. And choose **Whatsapp flow completed** as trigger
3. Fill in the name, destination variable and bot dialog to visit
4. Click on **Create**.

<figure><img src="https://2786867680-files.gitbook.io/~/files/v0/b/gitbook-x-prod.appspot.com/o/spaces%2F-LLTwFwbOqJj4dDhg8Ju%2Fuploads%2FdVmxmHpvbFK3rUhZShWg%2FScreenshot%202026-04-01%20at%2015.51.14.png?alt=media&amp;token=58f67c91-7696-495b-86ea-e15e6baef33e" alt=""><figcaption></figcaption></figure>

The data the user provided when completing the flow will be saved in the chosen **destination variable** and the bot will continue from the dialog chosen in the **Bot dialog to visit** field.<br>

<figure><img src="https://2786867680-files.gitbook.io/~/files/v0/b/gitbook-x-prod.appspot.com/o/spaces%2F-LLTwFwbOqJj4dDhg8Ju%2Fuploads%2F8I9JJy93JAOgncWJ7TWd%2FScreenshot%202026-04-01%20at%2016.11.32.png?alt=media&amp;token=4a6f2f15-fbbd-46e7-b7ab-5ecefb7c19ed" alt=""><figcaption></figcaption></figure>

{% hint style="info" %}
You can only define **one** Whatsapp Flow Completed event **per bot version.** If your conversation includes multiple whatsapp flows you should make sure to handle the possible differences in the destination bot dialog
{% endhint %}


# NLP

The NLP (Natural Language Processing) tab is all about how your bot is set up to understand its users.

<figure><img src="https://2786867680-files.gitbook.io/~/files/v0/b/gitbook-x-prod.appspot.com/o/spaces%2F-LLTwFwbOqJj4dDhg8Ju%2Fuploads%2FMQCmqA4y3rfxjffAgeCj%2FScreenshot%202024-06-05%20at%2016.35.19.png?alt=media&amp;token=53b8b64f-feae-4d00-aa07-e72472928ed5" alt="" width="339"><figcaption></figcaption></figure>

{% hint style="info" %}
You're new to the concepts of NLP? Make sure you have a read at our [Natural language processing deep dive](/nlp/natural-language-processing-nlp).
{% endhint %}

<figure><img src="https://2786867680-files.gitbook.io/~/files/v0/b/gitbook-x-prod.appspot.com/o/spaces%2F-LLTwFwbOqJj4dDhg8Ju%2Fuploads%2FINyF0ma6XUDU0b72GGWg%2FScreenshot%202024-06-04%20at%2017.07.48.png?alt=media&amp;token=b843d21a-1436-4f3e-880d-13d2c90aac8b" alt=""><figcaption><p>The NLP Intents page.</p></figcaption></figure>

{% content-ref url="/pages/fk2Y0Ch4ffPJuOeWwGZz" %}
[Dashboard](/navigation/natural-language-processing-nlp/dashboard)
{% endcontent-ref %}

{% content-ref url="/pages/AeMkT81FoAUHUZn3TRDA" %}
[Intents](/navigation/natural-language-processing-nlp/intents)
{% endcontent-ref %}

{% content-ref url="/pages/ngoUCaq6G0wtCA7Jgtmf" %}
[Expressions](/navigation/natural-language-processing-nlp/expressions)
{% endcontent-ref %}

{% content-ref url="/pages/-Lv6NaRJSdAIIIPeAmNt" %}
[Entities](/navigation/natural-language-processing-nlp/synonym-entities)
{% endcontent-ref %}

{% content-ref url="/pages/-LLTwJABaSfX4YSWlllx" %}
[Train](/navigation/natural-language-processing-nlp/tutorial-train-your-bot-based-on-actual-user-messages)
{% endcontent-ref %}

{% content-ref url="/pages/-LLTwJAM0ByKmUn\_16kN" %}
[Broken mention](broken://pages/-LLTwJAM0ByKmUn_16kN)
{% endcontent-ref %}

{% content-ref url="/pages/-LuCwEg7W3FA3n4Ab9kr" %}
[Broken mention](broken://pages/-LuCwEg7W3FA3n4Ab9kr)
{% endcontent-ref %}


# Dashboard

The NLP dashboard (and the tab 'improve') give you an overview of the quality of your NLP model. It automatically detects any overlap between intents, which is especially useful if you are building a larger NLP model, or if multiple team members work on it.

## **NLP Dashboard**

The NLP dashboard lets you know how well you are doing for each language. Based on how you have trained your NLP, it gives you an overall model score, ranging from 0% to 100%. The overall model score is calculated based on the amount of intents with too few expressions and the amount of intents with misclassified expressions.

<figure><img src="https://2786867680-files.gitbook.io/~/files/v0/b/gitbook-x-prod.appspot.com/o/spaces%2F-LLTwFwbOqJj4dDhg8Ju%2Fuploads%2FaCglFIpdpESLxlif1SYg%2FScreenshot%202023-08-29%20at%2016.54.51.png?alt=media&amp;token=2751625d-a220-4942-92c1-de0e900958d5" alt=""><figcaption></figcaption></figure>

* On the left side of the dashboard you will find a general summary of your model
* Below you can see your training history which shows how you're doing so far and whether or not you are improving over time
* On the right side, you find an overview of all the intents with know issues. The blue number between brackets indicates how your score has changed since your last training

### Training status

When training an NLP model, there are four possible statuses:

* **Ready**: This means that your NLP model is active and ready to make predictions.
* **Unloaded**: This means that the model is inactive and has not made any predictions or has been trained in the 3 months. Note: for DRAFT version unload happens in 8 days.
* **Cancelled**: This means that the training process has been cancelled. This status can only be set by the Chatlayer internal team.
* **Failed**: This means that the training process has failed and the model is not available for use.

### **Not enough expressions**

A first metric our platform measures is the amount of **expressions**. To train your model as best as possible, we advise to create at least 20 expressions per intent. Ideally you'd have around 50 expressions per intent. The more, the better, and the more accurate your bot will be able to interact with the user.

### **Misclassified expressions**

Just like us humans, no AI or NLP system is absolutely perfect. And because our brain works different from the Chatlayer.ai NLP, it is hard to predict where mistakes can and might happen.

To guarantee the best possible outcome for your bot, we do an advanced analysis of all the expressions. This recognizes the expressions that the NLP might have a hard time with. For example, it might have difficulties differentiating between sentences like: “I see on my bill that I have the wrong subscription” and “My bill seems wrong if I look at my subscription”. Both sentences mean a different thing. So the second metric we take into account is the number of intents that have a risk for misclassified expressions like these.

In the intent list on the right side of the NLP Dashboard, you can click on the wrench icon to improve your set of expressions and thus to better differentiate between intents.


# Intents

Create intents so that your bot get smarter at understanding what users say.

The **Intents** page is a crucial part of your chatbot's configuration, allowing you to enhance its natural language understanding by defining intents.

{% hint style="info" %}
NLP sound unfamiliar to you? Make sure you have a look at our detailed [Natural language processing ](/nlp/natural-language-processing-nlp)page.
{% endhint %}

<figure><img src="https://2786867680-files.gitbook.io/~/files/v0/b/gitbook-x-prod.appspot.com/o/spaces%2F-LLTwFwbOqJj4dDhg8Ju%2Fuploads%2F614FyvxnBxsdz72ibZzM%2FScreenshot%202024-06-05%20at%2013.57.04.png?alt=media&amp;token=d065b66d-463e-40a6-b553-75f183b18fc1" alt=""><figcaption><p>The Intents page.</p></figcaption></figure>

## Add a new intent

### From scratch

To add a new intent:

1. Go to **Intents** page and click ‘+’ button to add a new intent.

<figure><img src="https://2786867680-files.gitbook.io/~/files/v0/b/gitbook-x-prod.appspot.com/o/spaces%2F-LLTwFwbOqJj4dDhg8Ju%2Fuploads%2Fc2vHng5OcHpucgjULI9b%2FScreenshot%202023-10-24%20at%2017.33.45.png?alt=media&amp;token=3b460ec7-71a7-406f-ab32-3635c7236daa" alt=""><figcaption></figcaption></figure>

2. Define your intent with a brief description. This step is optional.

### From prebuilt intents

We've created a few intent packs so you can quickly get started and train your NLP model.

To add a prebuilt intent to your bot:

1. Go to your **Intents** page.
2. [Add a new intent](#add-a-new-intent).
3. Click on **Prebuilt intents** at the bottom left.
4. Select the intent that you would like to add to your bot.
5. Click **Save**.

<figure><img src="https://2786867680-files.gitbook.io/~/files/v0/b/gitbook-x-prod.appspot.com/o/spaces%2F-LLTwFwbOqJj4dDhg8Ju%2Fuploads%2F97QYcWnYxrnkKl05Cszb%2FScreenshot%202024-06-05%20at%2013.49.57.png?alt=media&amp;token=e5090e1a-e40b-4bc1-ac46-4cf76d1427c9" alt="" width="375"><figcaption><p>Add prebuilt intents to your bot.</p></figcaption></figure>

## Sort your intents

You might run into situations where you need to sort your intents. You can sort your intents by:

* **Creation Date**: this helps you track when the intents were created.
* **Total expressions**: gain insights into the number of expressions associated with each intent.
* **Name**: alphabetical sorting by intent name for easier organization.

<figure><img src="https://2786867680-files.gitbook.io/~/files/v0/b/gitbook-x-prod.appspot.com/o/spaces%2F-LLTwFwbOqJj4dDhg8Ju%2Fuploads%2FAg9ANqaJZKZ1sCgs8chM%2FCopy%20of%20Copy%20of%20Copy%20of%20Copy%20of%20Copy%20of%20Copy%20of%20Copy%20of%20Copy%20of%20Copy%20of%20Copy%20of%20Copy%20of%20Copy%20of%20Copy%20of%20Copy%20of%20Copy%20of%20Copy%20of%20Copy%20of%20Copy%20of%20Copy%20of%20Copy%20of%20Copy%20of%20Copy%20of%20Copy%20of%20Copy%20of%20Copy.gif?alt=media&amp;token=70552dcc-8e13-4d88-8e77-3d55499fd28d" alt=""><figcaption><p>Sort intents based on different features.</p></figcaption></figure>

\
Test your NLP
-------------

To test your NLP from the **Intents** tab:

1. Click on the **Test** button at the top right corner of the screen.
2. Enter a sentence for testing.
3. Click on **Evaluate**.
4. Check the result. You will see how much your expression is scoring for each intent.

<figure><img src="https://2786867680-files.gitbook.io/~/files/v0/b/gitbook-x-prod.appspot.com/o/spaces%2F-LLTwFwbOqJj4dDhg8Ju%2Fuploads%2F23fZTgnKDeMQ4UzTWIVp%2FDesign%20sans%20titre.gif?alt=media&amp;token=4d66463d-5379-475a-b15c-60c3c9330d1c" alt=""><figcaption><p>Test your NLP from the Intents tab.</p></figcaption></figure>

{% hint style="success" %}
You have a small bot, with less than 2000 expressions? The [AI Intent Booster](/nlp/natural-language-processing-nlp/ai-intent-booster) is specifically crafted to boost the performance of your NLP. Make sure you check it out!
{% endhint %}


# Expressions

Your Expressions tab is where you can see all your expressions and which intent is labelled to each of them.

{% hint style="info" %}
NLP sound unfamiliar to you? Make sure you have a look at our detailed [Natural language processing ](/nlp/natural-language-processing-nlp)page.
{% endhint %}

<figure><img src="https://2786867680-files.gitbook.io/~/files/v0/b/gitbook-x-prod.appspot.com/o/spaces%2F-LLTwFwbOqJj4dDhg8Ju%2Fuploads%2FvyMNHDpNrJmBjsdYmPf4%2FScreenshot%202024-05-31%20at%2019.10.27.png?alt=media&amp;token=4e47ae0e-4e5d-4de0-9965-b876c60b06a7" alt=""><figcaption><p>The Expressions tab.</p></figcaption></figure>

## Add expressions

**Expressions** are the sentences or phrases that customers use to communicate their intent to the chatbot. There are two methods to add expressions to your intents:

### Manual entry

1. Go to your **Intent** tab.
2. Enter a new expression on the input filed.
3. Click **enter** or **+**.

<figure><img src="https://2786867680-files.gitbook.io/~/files/v0/b/gitbook-x-prod.appspot.com/o/spaces%2F-LLTwFwbOqJj4dDhg8Ju%2Fuploads%2FlJLzdzlRpVLFxKD557CP%2FCopy%20of%20Copy%20of%20Copy%20of%20Copy%20of%20Copy%20of%20Copy%20of%20Copy%20of%20Copy%20of%20Copy%20of%20Copy%20of%20Copy%20of%20Copy%20of%20Copy%20of%20Copy%20of%20Copy%20of%20Copy%20of%20Copy%20of%20Copy%20of%20Copy%20of%20Copy%20of%20Copy%20of%20Copy%20of%20Copy%20of%20Copy%20of%20Copy%20(5).gif?alt=media&amp;token=79ee90b2-c727-4d36-944b-a22ee47cbd9f" alt=""><figcaption></figcaption></figure>

### Generate expressions

If you'd like to accelerate the process, you can make the most of Large Language Models (LLM) to generate expressions automatically.

To generate expressions using AI:

1. Access the intent you've created. If there are no existing expressions, the name and description of the intent will be used as a prompt for expression generation.
2. Click **Generate Expressions**. The chatbot will provide you with up to 5 suggested expressions based on the provided prompt.
3. Select the ones that you want to keep.
4. Click **Add Selected**.

<figure><img src="https://2786867680-files.gitbook.io/~/files/v0/b/gitbook-x-prod.appspot.com/o/spaces%2F-LLTwFwbOqJj4dDhg8Ju%2Fuploads%2F16G8pNKjbexdkRqB5LZI%2Fintent%20page.gif?alt=media&amp;token=a0c9bcb3-ccdb-44c9-a520-1b519f52d342" alt=""><figcaption></figcaption></figure>

## Add contextual entities to your expressions

To add [contextual entities](/nlp/natural-language-processing-nlp/detect-information-with-entities/contextual-entities) to your expressions:

1. As you write expressions, use the '@' symbol to indicate the presence of an entity.
2. You can either create a new contextual entity tag on the spot or select from existing contextual entity tags, depending on your chatbot's predefined contextual entities.

<figure><img src="https://2786867680-files.gitbook.io/~/files/v0/b/gitbook-x-prod.appspot.com/o/spaces%2F-LLTwFwbOqJj4dDhg8Ju%2Fuploads%2FTGpDKv497Lek51ZBFZgx%2FScreenshot%202023-09-05%20at%2010.57.23.png?alt=media&amp;token=2e7f87a1-3f65-4a7e-af86-276a2d821960" alt=""><figcaption></figcaption></figure>

3. To add values to your selected entity, simply click on the entity tag. This will open a modal where you can view or add new values associated with that entity.

<figure><img src="https://2786867680-files.gitbook.io/~/files/v0/b/gitbook-x-prod.appspot.com/o/spaces%2F-LLTwFwbOqJj4dDhg8Ju%2Fuploads%2F7APiNryUmkRIuVYyJ79H%2FCopy%20of%20Copy%20of%20Copy%20of%20Copy%20of%20Copy%20of%20Copy%20of%20Copy%20of%20Copy%20of%20Copy%20of%20Copy%20of%20Copy%20of%20Copy%20of%20Copy%20of%20Copy%20of%20Copy%20of%20Copy%20of%20Copy%20of%20Copy%20of%20Copy%20of%20Copy%20of%20Copy%20of%20Copy%20of%20Copy%20of%20Copy%20of%20add%20.gif?alt=media&amp;token=784e5ada-226f-48a4-8dcf-a346b8de66e7" alt=""><figcaption><p>Add entities to your expressions.</p></figcaption></figure>


# Entities

The Entities page gathers all the entities used in your bot.

The **Entities** page is where you can manage and edit all your entities.

{% hint style="info" %}
NLP sound unfamiliar to you? Make sure you have a look at our detailed [Natural language processing ](/nlp/natural-language-processing-nlp)page.
{% endhint %}

<figure><img src="https://2786867680-files.gitbook.io/~/files/v0/b/gitbook-x-prod.appspot.com/o/spaces%2F-LLTwFwbOqJj4dDhg8Ju%2Fuploads%2FCEJdg8G2QAm4yq96vfKg%2FScreenshot%202024-06-05%20at%2015.39.42.png?alt=media&amp;token=e5d5b4d6-e338-49cf-a2b3-827009cb0ed6" alt=""><figcaption><p>The Entities page.</p></figcaption></figure>

{% content-ref url="/pages/o2r8OqFQjF5BTH9Er3kf" %}
[Detect information with entities](/nlp/natural-language-processing-nlp/detect-information-with-entities)
{% endcontent-ref %}


# Train

The NLP Train tab is where you can train your NLP model using real incoming user expressions.

After you [published](/publish/publishing-your-bot) your bot, you want to keep training the NLP model with real user input. By doing so, your bot becomes smarter over time and can support more diverse expressions too. To do so, you can use the NLP **Train** tab to add real user expressions to your NLP model.

{% hint style="info" %}
NLP terms and concepts seem unfamiliar to you? Make sure to read our detailed [Natural language processing (NLP) ](/nlp/natural-language-processing-nlp)page.
{% endhint %}

<figure><img src="https://2786867680-files.gitbook.io/~/files/v0/b/gitbook-x-prod.appspot.com/o/spaces%2F-LLTwFwbOqJj4dDhg8Ju%2Fuploads%2FdBzOGznVpJldycaSLvKR%2FScreenshot%202024-05-31%20at%2019.22.32.png?alt=media&amp;token=e84fc8b2-1eb2-479d-b9ac-d45619e119fa" alt=""><figcaption><p>The NLP train tab.</p></figcaption></figure>

## How the Train page works

{% hint style="warning" %}
To be able to use the Train tab, your bot needs to be [published](/publish/publishing-your-bot) first.
{% endhint %}

All user messages are labeled by the NLP model. Each message gets a suggested intent and a confidence score so that you can evaluate these messages. The NLP also identifies possible entities and values.

### Expressions not included

* Expressions from the [Emulator](/support/solving-bot-issues#emulator) window will not be included in the **Train** page.
* If two users use the exact same expression, it will only show up once in the **Train** page.
* If an expression from a user is an exact match with an expression already included in your model, it will not be included in the **Train** tab.
* In the **Score** column you will see the score of the NLP model at the time the expression was said. This might differ from the score that the current NLP model gives this expression

### Add customer expressions to your model

To add a user expression to your NLP model:

1. Find the line of the expression.
2. There are 2 possibilities:
   * If you're satisfied with the expression and intent suggested, click on **+**.
   * If you're not satisfied with the expression and intent, you can edit them by clicking on the **Edit** button before adding that expression to your model.

{% hint style="warning" %}
In the draft environment, you can see expressions from both the [DRAFT and LIVE ](/publish/publishing-your-bot)environment. Make sure you add the expressions to your DRAFT environment so that the next published version on the LIVE environment contains these new expressions as well.
{% endhint %}

## Good practices before adding expressions

The image below summarizes the good practice to have when using the **Train** page and adding user expressions to your NLP expressions.

![Train page best practices (click on the image to enlarge it).](https://2786867680-files.gitbook.io/~/files/v0/b/gitbook-legacy-files/o/assets%2F-LLTwFwbOqJj4dDhg8Ju%2F-Mk6khcUHMtJVZmS89Qb%2F-Mk6lOvhkhtSLfWE7x3T%2Fimage.png?alt=media\&token=190fb5be-c1da-4238-b8b3-24844a579927)

### Check that the labelled intent is correct

Before you add an expression, you need to make sure that it's a relevant one. Not all things said by a user are qualitative enough for the bot to train on.

For example, consider the following expression, said by a user to your bot:

![Example of incoming user expression.](https://2786867680-files.gitbook.io/~/files/v0/b/gitbook-legacy-files/o/assets%2F-LLTwFwbOqJj4dDhg8Ju%2F-Mk6bihaxZOuO2Lt00w3%2F-Mk6ee1AmLhtKFs-0w_Y%2Fimage.png?alt=media\&token=44238617-8095-4001-8002-c63c14fd3ebc)

Even though our NLP is really smart, it doesn't always suggest the correct intent. In this case, the bot did not contain an intent referring to the date or time, which is why the NLP classified the expression under a wrong intent. This is why you should always check an expression before adding it to the NLP.

{% hint style="danger" %}
Never add all suggested expressions without checking them as this can confuse your bot and mess up its training.
{% endhint %}

### Scope the expressions

We also recommend scoping expressions in case they contain unnecessary information. Let's look at the following example:

![Example of incoming user expression.](https://2786867680-files.gitbook.io/~/files/v0/b/gitbook-legacy-files/o/assets%2F-LLTwFwbOqJj4dDhg8Ju%2F-Mk6bihaxZOuO2Lt00w3%2F-Mk6fvefrwFMLQcYY7FE%2Fimage.png?alt=media\&token=ed575574-91d8-4b76-9b5e-8126d73e08da)

In this case, the NLP did find the correct intent, but the confidence score is rather low because the expression contains a lot of unnecessary information. It's best practice to delete this information from the expression before adding it to the intent, so that the bot trains on relevant info only.

{% hint style="danger" %}
Delete the unnecessary information in an expression before adding it to your NLP.
{% endhint %}


# Conversation insights \[Beta]

Our brand-new features to help you understand what users really want to say.

<figure><img src="https://2786867680-files.gitbook.io/~/files/v0/b/gitbook-x-prod.appspot.com/o/spaces%2F-LLTwFwbOqJj4dDhg8Ju%2Fuploads%2FRTXAXwafkaAFRMiPXQEO%2FScreenshot%202026-01-13%20at%2016.44.54.png?alt=media&amp;token=43049741-c2a4-423c-acbb-88730fe9127f" alt="" width="563"><figcaption></figcaption></figure>

## What are Conversation insights

**Conversation insights** help you understand how people actually interact with your bot. They show real messages from users, so that you get suggested intents and new intents.

Think of **Conversation insights** as clues that help you fine-tune your bot without guessing.

{% hint style="warning" %}
**Conversation insights** are available after 5K of [**Not understood**](/buildabot/flow-logic/dialog-state#default-blocks) blocks were triggered in conversations between your customers and your bot. Once insights are available for a language, you'll get notified by an email and a banner on the platform.
{% endhint %}

{% hint style="info" %}
For now, **Conversation insights** are only available as closed Beta. If you'd like to test it, please [contact us](#questions-feedback).
{% endhint %}

## How to enable Conversation insights

{% stepper %}
{% step %}

### Go to Bot settings.

Under your **Settings** tab.
{% endstep %}

{% step %}

### Toggle on Conversation insights.

Under the Generative AI settings.

<figure><img src="https://2786867680-files.gitbook.io/~/files/v0/b/gitbook-x-prod.appspot.com/o/spaces%2F-LLTwFwbOqJj4dDhg8Ju%2Fuploads%2FrFYeIbotPYPOWtCQqire%2FScreenshot%202026-01-13%20at%2016.03.09.png?alt=media&amp;token=c9cdfffe-f92c-4415-b32a-c14d497a8b6f" alt=""><figcaption></figcaption></figure>
{% endstep %}

{% step %}

### Click Save.

On the top-right corner of the modal.
{% endstep %}
{% endstepper %}

## How to review your insights

{% hint style="danger" %}
To make sure to keep control of your bot, always use Conversation insights in the [DRAFT](/publish/publishing-your-bot#understanding-the-draft-version) version of your bot. The changes you made after reviewing insights will be visible to your users once the bot is [published](/publish/publishing-your-bot).
{% endhint %}

{% stepper %}
{% step %}

### Go to the Conversation insights tab.

Under the **NLP** tab, go to **Conversation insights**. If your insights are ready, you will see a list of what users said for the corresponding language.\
\
If your bot is multilingual, you can check the insights language from the top-right dropdown.

<figure><img src="https://2786867680-files.gitbook.io/~/files/v0/b/gitbook-x-prod.appspot.com/o/spaces%2F-LLTwFwbOqJj4dDhg8Ju%2Fuploads%2FMUUqaNhpCWJG0kU4hNnU%2FScreenshot%202025-12-26%20at%2009.41.37.png?alt=media&amp;token=8b914dd5-53cb-4ee7-a29b-0c5a7c98586f" alt=""><figcaption></figcaption></figure>
{% endstep %}

{% step %}

### Click on an insight.

A panel will open on your right-hand side.

<figure><img src="https://2786867680-files.gitbook.io/~/files/v0/b/gitbook-x-prod.appspot.com/o/spaces%2F-LLTwFwbOqJj4dDhg8Ju%2Fuploads%2FmNJVRQbwaLixixdMQvVb%2FScreenshot%202025-12-26%20at%2009.45.43.png?alt=media&amp;token=91db541c-d127-4db3-86e8-a98ead251fc9" alt=""><figcaption></figcaption></figure>
{% endstep %}

{% step %}

### Check the intent that is suggested.

There are 2 possibilities here. Either the suggested intent is:

* An intent that is already in your NLP model. In this case, there is no label next to the intent.

<figure><img src="https://2786867680-files.gitbook.io/~/files/v0/b/gitbook-x-prod.appspot.com/o/spaces%2F-LLTwFwbOqJj4dDhg8Ju%2Fuploads%2F2IiymGk63ldMQDBrPWBI%2FScreenshot%202025-12-26%20at%2009.44.41.png?alt=media&amp;token=593195b0-5d3e-4e01-bd57-e1119b7beb7d" alt="" width="375"><figcaption></figcaption></figure>

* An new intent that is not part of your NLP yet. In this case, it will be labelled in green as 'new intent'.

<figure><img src="https://2786867680-files.gitbook.io/~/files/v0/b/gitbook-x-prod.appspot.com/o/spaces%2F-LLTwFwbOqJj4dDhg8Ju%2Fuploads%2FgRTmy5PkjlkOlk6bEuNC%2FScreenshot%202025-12-26%20at%2009.47.41.png?alt=media&amp;token=f463be92-1d87-4f8a-a2ec-6945f4df390c" alt="" width="375"><figcaption></figcaption></figure>
{% endstep %}

{% step %}

### Review the expressions.

Take your time to scroll down and read through every expression that is presented to you.

Make sure to unselect the expressions that do not see fit to your needs.

<figure><img src="https://2786867680-files.gitbook.io/~/files/v0/b/gitbook-x-prod.appspot.com/o/spaces%2F-LLTwFwbOqJj4dDhg8Ju%2Fuploads%2Fdd6DJnAPyJgHW3AGGymu%2FScreenshot%202025-12-26%20at%2009.48.37.png?alt=media&amp;token=42a2288d-db1f-4133-bc5a-d417cf6fa7e7" alt="" width="375"><figcaption></figcaption></figure>
{% endstep %}

{% step %}

### Decide in which intent to place the selected expressions.

Your cluster of expressions can now be added to the intent of your choice. There are 2 possibilities here. Either:

* You select an intent that's already part of your NLP.
* You type a new intent name on the field.

<figure><img src="https://2786867680-files.gitbook.io/~/files/v0/b/gitbook-x-prod.appspot.com/o/spaces%2F-LLTwFwbOqJj4dDhg8Ju%2Fuploads%2FeF6eF0RQzQKs3DZ6NldE%2FScreenshot%202025-12-26%20at%2009.49.34.png?alt=media&amp;token=8c1d8639-3186-45f8-a620-92e23232df7a" alt="" width="375"><figcaption></figcaption></figure>
{% endstep %}

{% step %}

### Click + Add to intent

By doing so, you're adding what's above to your NLP model and saving your changes.

Once this is done, the line of the insight that you just reviewed will disappear.
{% endstep %}

{% step %}

### Train your NLP

Once you're done with your insights review, make sure to [train your NLP](/nlp/natural-language-processing-nlp/train-your-nlp) to make sure that your NLP takes your changes into account.
{% endstep %}

{% step %}

### Publish your bot

Once you'd like your end-users to benefit from your changes, don't forget to [publish your bot](/publish/publishing-your-bot).

A new batch of insights will come your way once 5K Not understood threshold is reached again!
{% endstep %}
{% endstepper %}

## Questions, feedback?

* 💌 [Send feedback](/send-feedback).
* 📞 [Book a 45min call](https://outlook.office.com/book/ConversationinsightsBeta@clxgroup.onmicrosoft.com/?ismsaljsauthenabled) with us.

Happy bot building!


# Knowledge base AI

Chatlayer's Knowledge base AI (or KBAI) allows your bot to generate concise answers after scraping your content. Adding an FAQ flow to your bot was never easier!

<figure><img src="https://2786867680-files.gitbook.io/~/files/v0/b/gitbook-x-prod.appspot.com/o/spaces%2F-LLTwFwbOqJj4dDhg8Ju%2Fuploads%2FKOvwAQPLpItz5V7dRmIJ%2FScreenshot%202024-08-20%20at%2013.19.08.png?alt=media&amp;token=f782472e-4fbd-45d5-9d07-f0a718abc5a3" alt=""><figcaption></figcaption></figure>

A knowledge base is a store of information or data that is available to draw on. It can be constituted of different pieces of content (e.g. URLs, files).

It goes in two steps:

1. First, you [add the content](/navigation/knowledge-base-ai/add-content-to-your-kbai) that your bot will scrape to retrieve the answer to the customer's question.
2. Second, you [build a flow](/navigation/knowledge-base-ai/build-your-kbai-flow) to display that answer.

By using the Chatlayer Knowledge base AI's generative AI technology, your bot will be able to answer to questions based on your content and in context.

<figure><img src="https://2786867680-files.gitbook.io/~/files/v0/b/gitbook-x-prod.appspot.com/o/spaces%2F-LLTwFwbOqJj4dDhg8Ju%2Fuploads%2F08j6MoLjbJmlYBZxjSpg%2FScreenshot%202024-08-20%20at%2014.01.35.png?alt=media&amp;token=8dba5b34-1bbc-4afd-bfe1-adb221948158" alt="" width="329"><figcaption><p>Example of an FAQ flow using KBAI.</p></figcaption></figure>

{% hint style="warning" %}
You can use Knowledge base AI for free if you ask it under 50 questions per month. If you would like to use more than that, please [contact us](/support/get-in-touch).
{% endhint %}

<table data-view="cards"><thead><tr><th></th><th></th><th></th><th data-hidden data-card-cover data-type="files"></th><th data-hidden data-card-target data-type="content-ref"></th></tr></thead><tbody><tr><td><strong>KBAI template bot</strong></td><td>Make your KBAI flow with a ready-made bot.</td><td></td><td><a href="https://2786867680-files.gitbook.io/~/files/v0/b/gitbook-x-prod.appspot.com/o/spaces%2F-LLTwFwbOqJj4dDhg8Ju%2Fuploads%2FfiiE5haHAEsXAwCnnngD%2FScreenshot%202024-08-20%20at%2011.42.47.png?alt=media&amp;token=fdaf386d-847d-4642-bb20-639529c86a6a">Screenshot 2024-08-20 at 11.42.47.png</a></td><td><a href="/start-quickly/bot-templates#knowledge-base-ai">Templates</a></td></tr><tr><td><strong>Create your KBAI flow</strong></td><td>A step-by-step guide on how to make your FAQ flow using KBAI.</td><td></td><td><a href="https://2786867680-files.gitbook.io/~/files/v0/b/gitbook-x-prod.appspot.com/o/spaces%2F-LLTwFwbOqJj4dDhg8Ju%2Fuploads%2FxaKq6gk58YB79Xs1p9x7%2FScreenshot%202024-08-20%20at%2011.50.58.png?alt=media&amp;token=26ea8f31-952a-46d3-bb1c-9c22fcb331b5">Screenshot 2024-08-20 at 11.50.58.png</a></td><td><a href="/navigation/knowledge-base-ai/build-your-kbai-flow">Build your KBAI flow</a></td></tr><tr><td><strong>Use tags to limit your content</strong></td><td>Tell your bot where to look for an answer.</td><td></td><td><a href="https://2786867680-files.gitbook.io/~/files/v0/b/gitbook-x-prod.appspot.com/o/spaces%2F-LLTwFwbOqJj4dDhg8Ju%2Fuploads%2F7AaiOywoe8QFT2uTsCSE%2FScreenshot%202024-08-20%20at%2011.51.35.png?alt=media&amp;token=1233ccf5-9d41-46f3-b1db-2862315c104f">Screenshot 2024-08-20 at 11.51.35.png</a></td><td><a href="/navigation/knowledge-base-ai/use-tags-to-limit-your-kbai-content">Use tags to limit your KBAI content</a></td></tr><tr><td><strong>Manage handover</strong></td><td>Tips on how to manage human handover using KBAI.</td><td></td><td><a href="https://2786867680-files.gitbook.io/~/files/v0/b/gitbook-x-prod.appspot.com/o/spaces%2F-LLTwFwbOqJj4dDhg8Ju%2Fuploads%2FEKPtWXrZSRaWdmzXuHLE%2FScreenshot%202024-08-20%20at%2011.52.22.png?alt=media&amp;token=8f9f9db7-b3d9-4961-9bd8-04d0bf5dc497">Screenshot 2024-08-20 at 11.52.22.png</a></td><td><a href="/navigation/knowledge-base-ai/manage-handover-where-kbai-is-unsatisfactory">Manage handover where KBAI is unsatisfactory</a></td></tr><tr><td><strong>Analytics</strong></td><td>Track your KBAI performance.</td><td></td><td><a href="https://2786867680-files.gitbook.io/~/files/v0/b/gitbook-x-prod.appspot.com/o/spaces%2F-LLTwFwbOqJj4dDhg8Ju%2Fuploads%2Fe2gDhwbWvOBsGkxw9YGk%2FScreenshot%202024-08-20%20at%2011.53.36.png?alt=media&amp;token=1efc61fd-b5ea-4b95-a4c3-8d41f632f635">Screenshot 2024-08-20 at 11.53.36.png</a></td><td><a href="/navigation/analytics/conversations#knowledge-base-ai">Conversations</a></td></tr><tr><td><strong>Display your KBAI source URL in a button</strong></td><td>Display a "Read more" button.</td><td></td><td><a href="https://2786867680-files.gitbook.io/~/files/v0/b/gitbook-x-prod.appspot.com/o/spaces%2F-LLTwFwbOqJj4dDhg8Ju%2Fuploads%2FnrJZhRYmxnfippUqMq1u%2FScreenshot%202024-08-20%20at%2015.38.41.png?alt=media&amp;token=bc3b09d3-9bfe-45ad-9bf1-48aa10739e6a">Screenshot 2024-08-20 at 15.38.41.png</a></td><td><a href="/navigation/knowledge-base-ai/use-your-kbai-source-url-in-a-button">Use your KBAI source URL in a button</a></td></tr></tbody></table>

<details>

<summary>⭐️ How to make your KBAI non-generative</summary>

Setting up a non-generative knowledge base AI means that:

* your bot will not use any external LLM providers to generate answers
* you will only be able to give .csv files in a specific format as KBAI content
* your bot will be able to understand multiple sentences from your users (i.e. natural language understanding from the AI engine is taking place)
* but your bot will answer only the sentence that you defined as an answer (i.e. the bot answers are **not** generated)

To make your bot non-generative:

1. Go to your **Settings** tab.
2. Under **Generative AI**, turn off the **Turn on generative AI** features toggle.

![](https://2786867680-files.gitbook.io/~/files/v0/b/gitbook-x-prod.appspot.com/o/spaces%2F-LLTwFwbOqJj4dDhg8Ju%2Fuploads%2FC8HkZjxCVgX5bEPphY8T%2FScreenshot%202024-08-20%20at%2013.29.11.png?alt=media\&token=a32c271b-3a34-4f42-8c60-8f415fc71698)

3. Click **Save**.

</details>

## Build a powerful, hybrid bot

Bots can become really powerful if you use a mix of[ intents ](/navigation/natural-language-processing-nlp/intents)(answers designed by your team) and knowledge base (AI-driven answers). In this sense, your bot will be hybrid because it uses answers generated both by humans and machine.

* If you connect your **Knowledge base AI** Action block to your **Not Understood** block and add no other content to your bot, all questions from users will be answered directly by your knowledge base AI.
* If you have other intents in your bot, the intents will be triggered whenever there is a match with the expression from a user. Only when something is said by the user that isn't a match with any intent, the **Not Understood** block and thus knowledge base AI will be triggered. Get more inspiration on in our [handover with KBAI article](/navigation/knowledge-base-ai/manage-handover-where-kbai-is-unsatisfactory).


# Add content to your KBAI

Learn how to create a Knowledge base AI and add content to it.

## Create a KBAI

1. Open your **Knowledge Base AI** tab for the first time: a popup with the Generative AI terms and conditions appears.

<figure><img src="https://2786867680-files.gitbook.io/~/files/v0/b/gitbook-x-prod.appspot.com/o/spaces%2F-LLTwFwbOqJj4dDhg8Ju%2Fuploads%2FNnckrxpJqDam1y6K2Exy%2FScreenshot%202023-10-17%20at%2015.59.09.png?alt=media&amp;token=b1637b89-9a58-41f3-8c7d-c90c5174b0c2" alt="" width="338"><figcaption></figcaption></figure>

2. Click on **Accept**.

{% hint style="info" %}
If you click on Decline, your KBAI will be non-generative. Learn about it [here](/navigation/knowledge-base-ai#how-to-make-my-kbai-non-generative).
{% endhint %}

## Add content to your KBAI

To add content to your [KBAI](/navigation/knowledge-base-ai):

1. Go to your **Knowledge base AI** tab.
2. Click on **Add content** at the top right corner.

<figure><img src="https://2786867680-files.gitbook.io/~/files/v0/b/gitbook-x-prod.appspot.com/o/spaces%2F-LLTwFwbOqJj4dDhg8Ju%2Fuploads%2FPoKGjHKEuv2iVtClJHGf%2FScreenshot%202024-08-20%20at%2013.38.52.png?alt=media&amp;token=05faeaba-0ea9-4a70-97d1-c7eb6d8a45f3" alt="" width="375"><figcaption><p>Add content to your KBAI.</p></figcaption></figure>

3. From here, choose a piece of content that you would like to add:

{% tabs %}
{% tab title="Documents" %}
These are uploaded from your computer. They can be:

* .**csv** files: are the only ones supported for non-generative knowledge bases, using a specific format.

  * Make sure that your .csv file is UTF-8 encoded with 2 columns, one named *Question* and the other one named *Answer*.
  * To help you, we provide a .csv template file that you can download by clicking on **Download .csv template file**.

  <figure><img src="https://2786867680-files.gitbook.io/~/files/v0/b/gitbook-x-prod.appspot.com/o/spaces%2F-LLTwFwbOqJj4dDhg8Ju%2Fuploads%2FtU30CWclQHhEUg3Qx2F7%2FScreenshot%202024-08-20%20at%2013.56.00.png?alt=media&amp;token=1c344ace-01ff-4c38-a49d-318514a56c53" alt="" width="375"><figcaption><p>Example of question and answer format.</p></figcaption></figure>
* .**pdf** files: can be for example product descriptions, FAQ documents, training documentation, etc.
  {% endtab %}

{% tab title="URLs" %}
URLs are from publicly available websites.

There are 2 options when you add URLs:

* **Only this page**: only use the exact page that the URL links to.
* **Entire domain**: use the page the URL links to and all linked pages.

Once the answer is retrieved, you can [use your URL in an answer](/navigation/knowledge-base-ai/use-your-kbai-source-url-in-a-button).
{% endtab %}
{% endtabs %}

<details>

<summary>⭐️ Select relevant content for your KBAI</summary>

In order to get the best possible results from your KBAI, it's important to keep a few guidelines in mind:

* Only include data that is relevant to your users. If you have a PDF with 100 pages, of which only 1 is relevant for customers, extract that page, and upload it separately.
* In PDFs and URLs, complicated layouts might decrease the quality of the results.
* The KBAI isn't good at understanding data from a table. Don't use KBAI to upload database files.

Also, please keep in mind that:

* Currently, KBAI isn't able to process any images, video's or other media types
* If the URL has scraping protection activated, such as Incapsula, the webpage won't be able to be added to your KBAI.

</details>

{% hint style="info" %}
Optionally, you can also add [tags](/navigation/knowledge-base-ai/use-tags-to-limit-your-kbai-content) to your content at this stage.
{% endhint %}

4. Click on **Add**.
5. Your content is now available under the **Contents** table.

<figure><img src="https://2786867680-files.gitbook.io/~/files/v0/b/gitbook-x-prod.appspot.com/o/spaces%2F-LLTwFwbOqJj4dDhg8Ju%2Fuploads%2FhUdxXUjSwJLMlwKtOB0g%2FScreenshot%202024-08-20%20at%2013.51.45.png?alt=media&amp;token=8c24f057-750f-4228-b5ff-e20bafa7ef04" alt=""><figcaption><p>See your content from the Contents table.</p></figcaption></figure>


# Build your KBAI flow

Learn how to set up your own knowledge base AI and use it in a flow to cover any FAQ.

Once you [added content to your KBAI](/navigation/knowledge-base-ai/add-content-to-your-kbai), it's time to build a flow where your bot will know when to browse this knowledge base to provide an answer to your customer's question.

To create your KBAI flow you could either:

<table data-view="cards"><thead><tr><th></th><th></th><th></th><th data-hidden data-card-cover data-type="files"></th><th data-hidden data-card-target data-type="content-ref"></th></tr></thead><tbody><tr><td><strong>Use the KBAI template bot</strong></td><td>Make your KBAI flow with a ready-made bot.</td><td></td><td><a href="https://2786867680-files.gitbook.io/~/files/v0/b/gitbook-x-prod.appspot.com/o/spaces%2F-LLTwFwbOqJj4dDhg8Ju%2Fuploads%2FfiiE5haHAEsXAwCnnngD%2FScreenshot%202024-08-20%20at%2011.42.47.png?alt=media&amp;token=fdaf386d-847d-4642-bb20-639529c86a6a">Screenshot 2024-08-20 at 11.42.47.png</a></td><td><a href="/start-quickly/bot-templates#knowledge-base-ai">Templates</a></td></tr><tr><td><strong>Build your own KBAI flow</strong></td><td>A step-by-step guide on how to make your FAQ flow using KBAI.</td><td></td><td><a href="https://2786867680-files.gitbook.io/~/files/v0/b/gitbook-x-prod.appspot.com/o/spaces%2F-LLTwFwbOqJj4dDhg8Ju%2Fuploads%2FxaKq6gk58YB79Xs1p9x7%2FScreenshot%202024-08-20%20at%2011.50.58.png?alt=media&amp;token=26ea8f31-952a-46d3-bb1c-9c22fcb331b5">Screenshot 2024-08-20 at 11.50.58.png</a></td><td><a href="#build-a-knowledge-base-flow">#build-a-knowledge-base-flow</a></td></tr><tr><td></td><td></td><td></td><td></td><td></td></tr></tbody></table>

## Retrieve the KBAI answer

To retrieve an answer from the knowledge base:

1. Drop an [**Action**](/buildabot/flow-logic/dialog-state/action-bot-dialog) block in your canvas. For this example, we will name this block "Generate answer".

{% hint style="warning" %}
Many customers will preferably have their knowledge base flow happening after the bot did not understand what was asked, as a fallback option. To do this, go to your **Not Understood** block, change its block type to **Action**, and continue by following the steps below.
{% endhint %}

2. Click on **Knowledge base AI.**

<figure><img src="https://2786867680-files.gitbook.io/~/files/v0/b/gitbook-x-prod.appspot.com/o/spaces%2F-LLTwFwbOqJj4dDhg8Ju%2Fuploads%2FpNy6O1AUTZxbUbXN32im%2FScreenshot%202024-08-20%20at%2014.16.16.png?alt=media&amp;token=66528308-3e18-4338-b668-2b5aec75a397" alt="" width="375"><figcaption><p>Add a Knowledge base Action block to generate an answer.</p></figcaption></figure>

3. Fill in the fields accordingly. You can configure:
   * **Destination variable**: the answer from the knowledge base will be stored as a [variable](/navigation/settings/secure-variables-gdpr). In the first field, you can choose the name of that variable.
   * **On no findings:** if the question that the user asks cannot be answered by the knowledge base AI, a block will be triggered. You can select which block in this dropdown.
   * **On failure**: if there is a problem with the knowledge base AI, and it returns an error, you can select a block which the user will be led to. By default, users will be routed to the **Error Occurred** block.

<figure><img src="https://2786867680-files.gitbook.io/~/files/v0/b/gitbook-x-prod.appspot.com/o/spaces%2F-LLTwFwbOqJj4dDhg8Ju%2Fuploads%2FuNYtYLeuemHlekxdHArH%2Fimage.png?alt=media&amp;token=89c81fea-8210-4c47-b2b4-9233ca905a43" alt=""><figcaption><p>Set up how your bot retrieves an answer with KBAI.</p></figcaption></figure>

3. **Save** your changes.

You bot can now scrape the KBAI and retrieve an answer based on it. But it cannot yet display that answer. Let's see how to do that in the section below.

## Display the KBAI answer

To display the answer from the knowledge base:

1. Open the **Action** block that you just created.
2. At the bottom of the block, add a **Go-to** to a block that you can create from within the dropdown. In this example, we will call this block *KB result*.

<figure><img src="https://2786867680-files.gitbook.io/~/files/v0/b/gitbook-x-prod.appspot.com/o/spaces%2F-LLTwFwbOqJj4dDhg8Ju%2Fuploads%2Fky0Q3LHLCNdQ2pa2eSY8%2Fimage.png?alt=media&amp;token=ecaabb39-f9d3-4374-a452-9a8049ecc36b" alt=""><figcaption><p>Add a block that displays the generated answer.</p></figcaption></figure>

4. **Save** your changes.
5. Open the newly created "KB result" block.
6. Add a **Text message** that contains the variable you chose to save the knowledge base AI answer into. By default, this is `{knowledgebase.answer}.`

<figure><img src="https://2786867680-files.gitbook.io/~/files/v0/b/gitbook-x-prod.appspot.com/o/spaces%2F-LLTwFwbOqJj4dDhg8Ju%2Fuploads%2FPf2I8NlsHXrhEu2rZ6SA%2Fimage.png?alt=media&amp;token=21cf0d57-c596-4eb1-8edb-2ba53b33fd34" alt=""><figcaption></figcaption></figure>

4. **Save** your changes.

### Route your KBAI flow

There are multiple ways to route your KBAI flow.

You could route your KBAI flow based on the [session data](#kbai-session-data) inside the `knowledgebase` object.

<details>

<summary>KBAI session data</summary>

You can access your KBAI session data by using the [**Debugger**](/buildabot/emulator#debugger) tab inside the Emulator.

The `knowledgebase` object contains several fields:

* `answer`: the answer that can be used in a text message in your bot
* `retrieved`: an array of all the content that was used to formulate the answer. For each array item, the following data is stored:
  * `type`: type of the source: "URL" or "DOC"
  * `name`: filename of the document or link of the URL
  * `content`: snippet of the content that was used to generate the answer
  * `tags`: any [tags](/navigation/knowledge-base-ai/use-tags-to-limit-your-kbai-content) that were retrieved that are associated to the content source.
  * `contentType`: type of the source: "URL" or "DOC"
* `contentUrl`: URL of the source that was used. If a domain was scraped as content, this URL will refer to the specific page from which the answer was retrieved.

</details>

You might also want to use tags in your content to specify which content the bot should look at.

{% content-ref url="/pages/BrJ6tVwTiLSiZkvAzOMw" %}
[Use tags to limit your KBAI content](/navigation/knowledge-base-ai/use-tags-to-limit-your-kbai-content)
{% endcontent-ref %}


# Use your KBAI source URL in a button

Learn how to display the source of your KBAI answer inside a URL button.

When your bot [retrieves an answer](/navigation/knowledge-base-ai/build-your-kbai-flow#retrieve-the-answer) from your knowledge base, this answer exists within a variable that also contains a link to the source of this answer. This source is either a PDF name or link to an URL.

In the case of an URL source, this URL link can typically be used as a button within the bot conversation.

<figure><img src="https://2786867680-files.gitbook.io/~/files/v0/b/gitbook-x-prod.appspot.com/o/spaces%2F-LLTwFwbOqJj4dDhg8Ju%2Fuploads%2FVqYmuSqPHLExhIMhYpDr%2FScreenshot%202023-09-12%20at%2011.06.24.png?alt=media&amp;token=6b13765e-1448-4d23-859d-ee980dd020cf" alt="" width="368"><figcaption><p>Example of a knowledge base source URL used within a conversation as a button.</p></figcaption></figure>

To use the KBAI URL within an answer:

1. Create your **Text message**.
2. Add a button that displays the following variable: `{knowledgebase.contentUrl}`. Your bot message should look similar to this one:

<figure><img src="https://2786867680-files.gitbook.io/~/files/v0/b/gitbook-x-prod.appspot.com/o/spaces%2F-LLTwFwbOqJj4dDhg8Ju%2Fuploads%2FqiRuM9KR5aB82j30eDzm%2Fimage.png?alt=media&amp;token=dc410b4d-5df7-4b42-8388-2f1631159754" alt="" width="375"><figcaption></figcaption></figure>

Your final result should be similar to this:

<figure><img src="https://2786867680-files.gitbook.io/~/files/v0/b/gitbook-x-prod.appspot.com/o/spaces%2F-LLTwFwbOqJj4dDhg8Ju%2Fuploads%2FQSrkPu8qDQiFJFQ4iUVz%2FScreenshot%202023-09-12%20at%2011.05.49.png?alt=media&amp;token=7320fe91-1f01-4ef7-8d89-0873eb0b1d57" alt="" width="366"><figcaption><p>Example of a knowledge base source URL used as a button.</p></figcaption></figure>


# Use tags to limit your KBAI content

When using KBAI, it can be useful to tell your bot which content to scrape. Define different categories of content by using tags.

Once you've [added KBAI content](/navigation/knowledge-base-ai/add-content-to-your-kbai) and [build you flow,](/navigation/knowledge-base-ai/build-your-kbai-flow) it might be useful to tell your bot which content to scrape. For example, if a customer asks for something on topic X, it's better if your bot only looks for the content on topic X at that point in your conversation.

You can optionally define different categories of topics by using tags.

## Add tags to your content

To add tags to your content:

1. [**Add content**](/navigation/knowledge-base-ai/add-content-to-your-kbai) to your KBAI.
2. Add a tag under **Tag this source**. You can either:
   * Create a tag from this field
   * Select a tag that you already created
   * [Select a variable](#use-variables-as-kbai-tags)

<details>

<summary>Use variables as KBAI tags</summary>

You can use [variables](/navigation/settings/secure-variables-gdpr) as tags. This means that any variable captured in your flow (for instance under button click) can be used to define which part of your knowledge base should be searched.

In the example below, a variable is saved under a button click, then the variable is used to search only documents tagged with pizza in the knowledge base.

<img src="https://2786867680-files.gitbook.io/~/files/v0/b/gitbook-x-prod.appspot.com/o/spaces%2F-LLTwFwbOqJj4dDhg8Ju%2Fuploads%2FNKCe7utwKaO0A7X9gdO2%2FScreenshot%202024-08-20%20at%2015.24.43.png?alt=media&amp;token=a49b0d60-199c-4e7a-86cc-017fe6d87f5a" alt="" data-size="original">

</details>

<figure><img src="https://2786867680-files.gitbook.io/~/files/v0/b/gitbook-x-prod.appspot.com/o/spaces%2F-LLTwFwbOqJj4dDhg8Ju%2Fuploads%2FcYWvY36LhkDCJF9VAQFf%2Fimage.png?alt=media&amp;token=a042bd68-85c6-478a-9e08-011b912aae37" alt="" width="563"><figcaption><p>Tag your sources to differentiate them.</p></figcaption></figure>

3. Click **Save**.

## Edit tags

To edit your KBAI tags:

1. From your **Contents** page, click on the **3 dots** at the end of the line where your content is listed.
2. Click on **Edit**.

<figure><img src="https://2786867680-files.gitbook.io/~/files/v0/b/gitbook-x-prod.appspot.com/o/spaces%2F-LLTwFwbOqJj4dDhg8Ju%2Fuploads%2FKRh0P5JAMNdIfqIIZooS%2Fimage.png?alt=media&amp;token=b0ac4e76-d848-476d-be22-1ba5594e8623" alt="" width="259"><figcaption></figcaption></figure>

3. In the window that pops up, you can remove existing tags or add new tags.

<figure><img src="https://2786867680-files.gitbook.io/~/files/v0/b/gitbook-x-prod.appspot.com/o/spaces%2F-LLTwFwbOqJj4dDhg8Ju%2Fuploads%2FWQxMYJibxW8gY0LlDDnn%2FScreenshot%202024-08-20%20at%2015.29.46.png?alt=media&amp;token=0018a66b-52f3-4903-ab3b-153ada9be0d6" alt="" width="284"><figcaption><p>Update your content tags.</p></figcaption></figure>

4. Click Save.

## Use tags in your KBAI flow

To use tags in your KBAI flow:

1. [Build your flow](/navigation/knowledge-base-ai/build-your-kbai-flow).
2. Open your KBAI block where the bot [retrieves the answer](/navigation/knowledge-base-ai/build-your-kbai-flow#retrieve-the-answer).
3. Under **Limit your content**, choose the tags of the sources that you would like your bot to visit. Only content tagged with these tags will be searched by the bot.
4. **Save** your changes.

<figure><img src="https://2786867680-files.gitbook.io/~/files/v0/b/gitbook-x-prod.appspot.com/o/spaces%2F-LLTwFwbOqJj4dDhg8Ju%2Fuploads%2FAHeh0yy4a9uQlY18ewPO%2Fimage.png?alt=media&amp;token=6559e799-1d91-4384-a46b-81aad43a4f6b" alt="" width="563"><figcaption><p>Limit the content that your bot scrapes by using tags.</p></figcaption></figure>

## Example

An example use case would be a bot that has a lot of content uploaded to it from different sources, but needs to give a specific answers when it comes to questions about security.

The "security" intent that catches all questions related to security. When that intent is triggered, the bot answers through the Knowledge base AI content that is tagged with "security". Afterwards, the bot will provide a link where more security information can be found.

<figure><img src="https://2786867680-files.gitbook.io/~/files/v0/b/gitbook-x-prod.appspot.com/o/spaces%2F-LLTwFwbOqJj4dDhg8Ju%2Fuploads%2F7OjdQonoJG9uUKEOq7pi%2Fimage.png?alt=media&amp;token=0802f387-bd7a-4910-84ee-d3045f1e8916" alt=""><figcaption><p>Example of a flow where a bot scrapes only content related to security.</p></figcaption></figure>


# Use Tables to store your KBAI questions

You'd like to pull a list of what are your customers questions managed by your KBAI? You can set that up with our in-house Tables.

<figure><img src="https://2786867680-files.gitbook.io/~/files/v0/b/gitbook-x-prod.appspot.com/o/spaces%2F-LLTwFwbOqJj4dDhg8Ju%2Fuploads%2F8pbikA4UpG1L4jl5B842%2FScreenshot%202024-10-01%20at%2016.23.57.png?alt=media&amp;token=6151fbe3-eae1-422e-8575-41d94eb7212f" alt=""><figcaption><p>Collect what the user asked.</p></figcaption></figure>

## Collect your KBAI answers

To store your KBAI questions and answers with Tables:

1. [Create a KBAI flow](/navigation/knowledge-base-ai/build-your-kbai-flow) inside your bot or use the [KBAI template bot](/start-quickly/bot-templates#knowledge-base-ai).
2. Make sure to [add content to your KBAI](/navigation/knowledge-base-ai/add-content-to-your-kbai).
3. [Create a Table](/navigation/tables/create-a-table-with-records) called *QuestionCollection*, with 2 text columns:

   * *questionAsked*
   * *answerGiven*

   <figure><img src="https://2786867680-files.gitbook.io/~/files/v0/b/gitbook-x-prod.appspot.com/o/spaces%2F-LLTwFwbOqJj4dDhg8Ju%2Fuploads%2Fpbpwy2JWf9nYM2zsVg2N%2FScreenshot%202024-09-13%20at%2011.35.54.png?alt=media&amp;token=76ff9fbd-6777-47c3-a50e-f7c9f771f779" alt="" width="375"><figcaption><p>Create a table that collects your KBAI questions and answers.</p></figcaption></figure>
4. **Save**.
5. Go back to your [**Flows**](/navigation/bot-builder/flows).
6. Open the block where the KBAI search happens. In our case, it will be the **Not understood** block.
7. Add a **Go to** after this block that you'll call *Populate table*.

<figure><img src="https://2786867680-files.gitbook.io/~/files/v0/b/gitbook-x-prod.appspot.com/o/spaces%2F-LLTwFwbOqJj4dDhg8Ju%2Fuploads%2F3ztdFW2QNJLSlZTjIYpU%2FScreenshot%202024-09-13%20at%2011.45.40.png?alt=media&amp;token=778cc867-e871-48e2-a556-0b24f9907000" alt="" width="375"><figcaption><p>After the KBAI block, populate your table.</p></figcaption></figure>

7. **Save** this block.
8. Open the **Populate table** bloc&#x6B;**.**
9. Add a [**Table operations** ](/navigation/tables/operate-on-your-records#add-a-table-operation-to-your-flow)step.
10. Select **Insert record** to the ***QuestionCollection*** table.
11. Configure the operation so that:
    * `{internal.nlp.expression}` is added to the **questionAsked** column
    * `{knowledgebase.answer}` is added to the **answerGiven** column

<figure><img src="https://2786867680-files.gitbook.io/~/files/v0/b/gitbook-x-prod.appspot.com/o/spaces%2F-LLTwFwbOqJj4dDhg8Ju%2Fuploads%2F1zjOES3b6d4IhWVEP3Fm%2FScreenshot%202024-09-13%20at%2011.47.27.png?alt=media&amp;token=a566c88d-9ff6-4c03-87d0-45103b5ec4e4" alt="" width="360"><figcaption><p>Populate your table with the KBAI question and answer.</p></figcaption></figure>

You could also add a time stamp:

<details>

<summary>Add the timestamp to your Table</summary>

To add a timestamp to your Table:

1. Make sure your Table has a *timestamp* column with a [timestamp](/navigation/tables/column-types#timestamp) column type.
2. Open the block that happens just before the **Populate Table** block.
3. Add a [**Set variables**](/buildabot/flow-logic/dialog-state/action-bot-dialog#set-variables) step to it.
4. Set a `{timestamp}` variable as an expression for `NOW()`. You will need [expression syntax](/integrateandcode/expression-syntax) for this.

<img src="https://2786867680-files.gitbook.io/~/files/v0/b/gitbook-x-prod.appspot.com/o/spaces%2F-LLTwFwbOqJj4dDhg8Ju%2Fuploads%2F9balGrQEBNmoZNgc4uC2%2FScreenshot%202024-10-01%20at%2016.29.35.png?alt=media&amp;token=7a783347-ffad-4f9d-97c0-1c53e1697e50" alt="" data-size="original">

4. Click **Save**.
5. Open your **Populate Table** block.
6. Insert a `{timestamp}` record in the **timestamp** column.
7. Click **Save**.

The time stamp would appear like this in your Table:

</details>

12. **Save** your changes.

Now you should be able to see a list of your questions and answers from your Tables!

<figure><img src="https://2786867680-files.gitbook.io/~/files/v0/b/gitbook-x-prod.appspot.com/o/spaces%2F-LLTwFwbOqJj4dDhg8Ju%2Fuploads%2FjHTSsWu8ZF9o9wrBM0zx%2FScreenshot%202024-10-01%20at%2016.21.49.png?alt=media&amp;token=8f6e5aaf-4259-4907-adf2-c72c83c2b207" alt=""><figcaption><p>What your Table should look like after collection.</p></figcaption></figure>

## Collect questions where KBAI was unsatisfactory

It can be useful for you to store the places where your KBAI didn't answer to what the user said.

To collect variables where your KBAI was unsatisfactory:

1. Find the blocks where your KBAI goes when either an error occured or no result was found.
2. In each of them, pass on a variable that you'll call failure\_reason, and give it the value error occured or no result.
3. Make sure you have a column in your Table to store those.
4. When you populate your table, add those to the Table.


# Manage handover where KBAI is unsatisfactory

When your Knowledge base AI finds a responses that is unsatisfactory, doesn't find a response, or fails to find one, recognizing when to hand over to human support is key.

If your [**Knowledge base AI (KBAI)**](/navigation/knowledge-base-ai) cannot retrieve an appropriate answer to the user's question, it will result in "no finding." This behavior ensures that KBAI avoids providing unrelated answers or hallucinations.

To maintain a balance between efficiency and support, it's best practice to allow users to reformulate their questions and provide an option to connect with a human agent when the bot cannot assist effectively.

<figure><img src="https://2786867680-files.gitbook.io/~/files/v0/b/gitbook-x-prod.appspot.com/o/spaces%2F-LLTwFwbOqJj4dDhg8Ju%2Fuploads%2FC7sSBeAyE2IzOYuK7B3q%2FScreenshot%202024-08-07%20at%2013.30.20.png?alt=media&amp;token=89bf44c5-899e-4545-a3c4-e1f8fe98761d" alt="" width="331"><figcaption><p>Example of handover where the KBAI fails.</p></figcaption></figure>

This article presents a flow model that detects intents before using [Knowledge base AI (KBAI)](/navigation/knowledge-base-ai). The model will count the number of times where an answer was unsatisfactory before handing the user over to an agent.

The handover flow presented in this article follows this flowchart:

<figure><img src="https://2786867680-files.gitbook.io/~/files/v0/b/gitbook-x-prod.appspot.com/o/spaces%2F-LLTwFwbOqJj4dDhg8Ju%2Fuploads%2F2b3fnyGCD2SYuqIzaAr1%2Fimage.png?alt=media&amp;token=ce1a518d-27e0-4810-b388-74d890d831cb" alt=""><figcaption><p>KBAI handover flow model.</p></figcaption></figure>

Let's see step by step how this flow is working.

## 1. Provide built-in answers for crucial matters

When building your bot, there are typically some issues that would 100% of the times need the help of a human. To make sure these matters are tackled as early as possible, the best strategy is to catch them at the start of your flow by using [intents](/navigation/analytics/intents).

<figure><img src="https://2786867680-files.gitbook.io/~/files/v0/b/gitbook-x-prod.appspot.com/o/spaces%2F-LLTwFwbOqJj4dDhg8Ju%2Fuploads%2FfKXoTkTmhkwxIioH0SHz%2FScreenshot%202024-07-24%20at%2011.56.48.png?alt=media&amp;token=e6bcdd7c-4f3e-4306-abc0-0e9683483993" alt="" width="328"><figcaption><p>Provide built-in answers by building a strong NLP model.</p></figcaption></figure>

{% hint style="success" %}
Build your NLP model from your [**NLP**](/navigation/natural-language-processing-nlp) tab.
{% endhint %}

## 2. Use your KBAI for other questions

For any question that is not urgent or that doesn't need a built-in answer, use the KBAI. Your bot will then see if an answer can be found based on your documentation.

<figure><img src="https://2786867680-files.gitbook.io/~/files/v0/b/gitbook-x-prod.appspot.com/o/spaces%2F-LLTwFwbOqJj4dDhg8Ju%2Fuploads%2FMrTNK49J4wqZHmYNLExE%2FScreenshot%202024-07-24%20at%2011.59.20.png?alt=media&amp;token=110073d6-0c3d-4516-9838-73bbf5634fe6" alt="" width="563"><figcaption><p>Use KBAI to find an answer when the bot doesn't understand what the user said.</p></figcaption></figure>

{% hint style="success" %}
To use [Knowledge base AI ](/navigation/knowledge-base-ai)inside your bot, you'll need to [set up a KBAI flow](/navigation/knowledge-base-ai/build-your-kbai-flow) or start with our [KBAI bot template](/start-quickly/bot-templates/knowledge-base-ai-template).
{% endhint %}

## 3. Count the number of unsatisfactory answers

Count the number of times that your bot wasn't able to help the user by incrementing a `count` [variable](/navigation/settings/secure-variables-gdpr) with 1 each time you go through an unsatisfactory answer.

<figure><img src="https://2786867680-files.gitbook.io/~/files/v0/b/gitbook-x-prod.appspot.com/o/spaces%2F-LLTwFwbOqJj4dDhg8Ju%2Fuploads%2FjsQwcH8nmcZ07jtGF3M2%2FScreenshot%202024-07-24%20at%2012.01.09.png?alt=media&amp;token=2e83810c-e40b-4d6e-81fc-6ee24a076dae" alt="" width="563"><figcaption></figcaption></figure>

On Chatlayer, you can increment variables inside the [**Go to** ](/buildabot/flow-logic/go-to-connections)section inside a block.

<figure><img src="https://2786867680-files.gitbook.io/~/files/v0/b/gitbook-x-prod.appspot.com/o/spaces%2F-LLTwFwbOqJj4dDhg8Ju%2Fuploads%2FMGfIdjByoY9uswj09xGh%2FScreenshot%202024-07-24%20at%2012.03.22.png?alt=media&amp;token=4cbf834f-178b-4fa8-85a6-9ebb9e0420e6" alt=""><figcaption><p>Example: we pass on an incremented {count} variable to the next block.</p></figcaption></figure>

{% hint style="warning" %}
Please note that for this tutorial we are using the new [expression syntax](/integrateandcode/expression-syntax). If you're using the old expression syntax, you'll need to use the `{counter|increment}` syntax.
{% endhint %}

## 4. Transfer to agent after multiple unsatisfactory answers

After 2 unsatisfactory answers, the user is [handed over to an agent](/integrateandcode/human-offloading-live-chat).

<figure><img src="https://2786867680-files.gitbook.io/~/files/v0/b/gitbook-x-prod.appspot.com/o/spaces%2F-LLTwFwbOqJj4dDhg8Ju%2Fuploads%2Fc5iHvD17gGaEIYly1745%2FScreenshot%202024-07-24%20at%2012.07.48.png?alt=media&amp;token=6675d191-d50f-4fe7-a3b4-c701df7a5824" alt="" width="474"><figcaption><p>After 2 unsatisfactory answers, hand over the bot to an agent.</p></figcaption></figure>

***

This is what this handover flow looks like after it was build on Chatlayer:

<figure><img src="https://2786867680-files.gitbook.io/~/files/v0/b/gitbook-x-prod.appspot.com/o/spaces%2F-LLTwFwbOqJj4dDhg8Ju%2Fuploads%2FTJoIIuzuGkHxoG9GAmaq%2FScreenshot%202024-07-24%20at%2011.17.42.png?alt=media&amp;token=c8350978-3824-494d-8092-ef4ba3a2fd83" alt=""><figcaption><p>KBAI handover flow model build on Chatlayer.</p></figcaption></figure>


# History

The History tab is about conversation history, execution logs, and your bot versions.

<figure><img src="https://2786867680-files.gitbook.io/~/files/v0/b/gitbook-x-prod.appspot.com/o/spaces%2F-LLTwFwbOqJj4dDhg8Ju%2Fuploads%2FmYnPcMFrZcYVbfnjTaeU%2FScreenshot%202024-06-05%20at%2016.29.55.png?alt=media&amp;token=f58b108b-0518-47c4-a1ef-94df8f2a8f34" alt="" width="341"><figcaption></figcaption></figure>

{% hint style="warning" %}
Is the number of conversations in the [Dashboard](/navigation/analytics/dashboard) different from the number of conversations in the conversation [**History**](/navigation/history)? That's because in **Analytics**, we show all conversations, whereas in the **History** overview, we only include conversations where the user actually replied.
{% endhint %}

{% content-ref url="/pages/-LLTwJATl8mNFPrR132C" %}
[Conversations](/navigation/history/user-messages)
{% endcontent-ref %}

{% content-ref url="/pages/KrqpV4wle77vaMFtE5uz" %}
[Execution logs](/navigation/history/execution-logs)
{% endcontent-ref %}

{% content-ref url="/pages/vcA0aUcsfSc3mDys8ugM" %}
[Versions](/navigation/history/versions)
{% endcontent-ref %}


# Conversations

Analyzing conversation history reveals your chatbot's strengths and areas needing improvement.

The **Conversations** page fosters team collaboration through custom tags, simplifying organization and communication.

<figure><img src="https://2786867680-files.gitbook.io/~/files/v0/b/gitbook-x-prod.appspot.com/o/spaces%2F-LLTwFwbOqJj4dDhg8Ju%2Fuploads%2FPWYYIEKIsSjvXwT1Nqun%2FScreenshot%202024-06-05%20at%2016.47.22.png?alt=media&amp;token=0758830a-99e7-4e87-8fe7-56b4fc1625b8" alt=""><figcaption><p>The Conversations page.</p></figcaption></figure>

## Overview

Each item in the list corresponds to a conversation. It is possible for one user to have multiple conversations, and thus multiple items in that list.

{% hint style="warning" %}
**Conversations that will not be shown:**

* The test conversations you had with your bot in the **Test your bot** window will be shown in the conversations tab under emulator. These conversations don't count towards the number of conversations used in the pricing
* Empty conversations that do not contain any message from the user to the bot will not be shown in the conversations tab. These conversations will count towards the number of conversations used in the pricing.
  {% endhint %}

### Read transcripts

Explore all available transcripts in the by clicking one of conversation on the left hand list. Each transcript provides a turn-by-turn record of each user interaction and what intents they hit along the way. Click on triggered intents to navigate to the intent page for deeper insights.

<figure><img src="https://2786867680-files.gitbook.io/~/files/v0/b/gitbook-x-prod.appspot.com/o/spaces%2F-LLTwFwbOqJj4dDhg8Ju%2Fuploads%2F1W9pL5xZXyOL4ewmGhvQ%2FCopy%20of%20Copy%20of%20Copy%20of%20Copy%20of%20Copy%20of%20Copy%20of%20add%20channel%20(1).gif?alt=media&amp;token=2404ab14-614c-4a77-972e-c848ff7a205b" alt=""><figcaption><p>By clicking the triggered intent, you will be redirected to intent page</p></figcaption></figure>

On the right in the **Conversations** page you'll find the extension area. It is designed to quickly give you relevant context information of the current customer and conversation details, and it provides tools that can be useful when evaluating conversations. You can resize extensions for a personalized view.

<figure><img src="https://2786867680-files.gitbook.io/~/files/v0/b/gitbook-x-prod.appspot.com/o/spaces%2F-LLTwFwbOqJj4dDhg8Ju%2Fuploads%2FqUBoyTScregrRDt0Z3FN%2FCopy%20of%20Copy%20of%20Copy%20of%20Copy%20of%20Copy%20of%20add%20channel%20(1).gif?alt=media&amp;token=94857b7b-6b31-43b8-898d-4ed042b5242d" alt=""><figcaption><p>Extend the view of the transcript.</p></figcaption></figure>

### Voice recordings

Conversations through a voice channel will include both transcripts of the entire conversation and audio file, if your bot contains start/stop recording actions or if all conversations of that channel are being recorded. Read more about [voice bot recording here.](https://docs.chatlayer.ai/channels/phone-and-voice#call-recording)

{% hint style="warning" %}
If your voice bot is being recorded, please make sure you inform your user about this in your voice bot flow (if the user hasn't given their explicit consent yet) to obey privacy laws.
{% endhint %}

<figure><img src="https://2786867680-files.gitbook.io/~/files/v0/b/gitbook-x-prod.appspot.com/o/spaces%2F-LLTwFwbOqJj4dDhg8Ju%2Fuploads%2FqiIVL1bRgzryjhqhlNCK%2Fimage.png?alt=media&amp;token=9f609d72-5d93-40e0-9c98-bff46308c867" alt=""><figcaption><p>Conversations page for voice bots.</p></figcaption></figure>

### Automatic audio recording transcription

{% hint style="info" %}
This feature is currently only available for Wavy WhatsApp channel.
{% endhint %}

View audio recordings and their transcriptions in the conversation history.

### Filter conversations

Effortlessly filter conversations by customer ID, user name, external user ID, campaign ID, channel, and date range. Customize your reading experience for optimal insights!

<figure><img src="https://2786867680-files.gitbook.io/~/files/v0/b/gitbook-x-prod.appspot.com/o/spaces%2F-LLTwFwbOqJj4dDhg8Ju%2Fuploads%2FxPG7HGfzMSgP7ZmGMbfX%2FScreenshot%202024-06-05%20at%2016.49.28.png?alt=media&amp;token=e10c67f0-acc7-41da-8ebe-11018e1e3761" alt="" width="375"><figcaption><p>Filter the Conversations using the Filter button.</p></figcaption></figure>

### Delete conversations

When you delete a conversation, it will also be permanently removed from our backend systems.

<figure><img src="https://2786867680-files.gitbook.io/~/files/v0/b/gitbook-x-prod.appspot.com/o/spaces%2F-LLTwFwbOqJj4dDhg8Ju%2Fuploads%2FtgaL5U3pxKQsQWLKDBhs%2FCopy%20of%20Drag%20and%20drop.gif?alt=media&amp;token=fef14dd7-9461-4add-8cea-12e7a0f44bdf" alt=""><figcaption><p>Delete conversations</p></figcaption></figure>

## Tag conversations

Enhance collaboration with custom tags! Organize transcripts effortlessly in the Conversation Details. Click to add your own tags and find important conversations with ease!

<figure><img src="https://2786867680-files.gitbook.io/~/files/v0/b/gitbook-x-prod.appspot.com/o/spaces%2F-LLTwFwbOqJj4dDhg8Ju%2Fuploads%2Ftr6SBWSRBRj7FNkEYd4Y%2FCopy%20of%20Copy%20of%20Copy%20of%20Copy%20of%20Copy%20of%20Copy%20of%20add%20channel%20(2).gif?alt=media&amp;token=37926283-d4de-4dac-b3b4-145f45b01337" alt=""><figcaption><p>Tag conversations in the history.</p></figcaption></figure>

Use tags in your filter to work with your team.

<figure><img src="https://2786867680-files.gitbook.io/~/files/v0/b/gitbook-x-prod.appspot.com/o/spaces%2F-LLTwFwbOqJj4dDhg8Ju%2Fuploads%2FjQ7xynWPlSsyHpE94tx4%2FCopy%20of%20Copy%20of%20Copy%20of%20Copy%20of%20Copy%20of%20Copy%20of%20Copy%20of%20Copy%20of%20Copy%20of%20Copy%20of%20Copy%20of%20Copy%20of%20Copy%20of%20Copy%20of%20Copy%20of%20Copy%20of%20Copy%20of%20Copy%20of%20Copy%20of%20Copy%20of%20Copy%20of%20Copy%20of%20Copy%20of%20Copy%20of%20Copy%20(1).gif?alt=media&amp;token=aa810ee5-4def-4d93-ae9e-727458b3a648" alt=""><figcaption></figcaption></figure>

## 🆕 Conversation flow \[Beta]

Now, you can debug directly within conversation history, allowing you to effortlessly track responses and streamline the debugging process. This enhancement simplifies understanding and refining bot conversations.

<figure><img src="https://2786867680-files.gitbook.io/~/files/v0/b/gitbook-x-prod.appspot.com/o/spaces%2F-LLTwFwbOqJj4dDhg8Ju%2Fuploads%2FCj9eCsSoYH5JlsKxaQLI%2FScreenshot%202024-03-15%20at%2016.45.23.png?alt=media&amp;token=36938c16-6ed4-4170-87fb-38e14db2c781" alt=""><figcaption><p>Conversation flow in Conversation History.</p></figcaption></figure>


# Execution logs

Troubleshoot actions, integrations, analytics events, and voice STT failures.

## Execution logs

Execution logs help you monitor and troubleshoot actions, integrations, analytics events, and voice speech-to-text failures triggered by your bot.

Use this page to inspect failures, review inputs and outputs, and verify whether expected events or voice transcriptions were handled correctly.

This page is different from **Settings** → **Audit logs** and from portal or developer app execution logs.

### Open Execution logs

Go to **History** → **Execution logs**.

The page contains four tabs:

* **Code Actions & API**
* **Integrations**
* **Tracking Events**
* **Voice**

![](https://2786867680-files.gitbook.io/~/files/v0/b/gitbook-x-prod.appspot.com/o/spaces%2F-LLTwFwbOqJj4dDhg8Ju%2Fuploads%2FteoEEAHj0IReBqccEiZC%2Fimage.png?alt=media\&token=3405713e-2cd2-4865-8bb6-26f720ac7464)

### Code Actions & API

This tab shows failed **API Action** and code action executions.

Use it to debug custom API calls and code actions that did not complete successfully.

Keep in mind:

* This tab shows errors, not every successful execution.
* You can inspect the status code, request URL, error message, timestamp, related bot dialog, bot version, request details, and response details.
* A row opens an error details drawer.
* Code actions may appear with a Chatlayer internal URL such as `chatlayer://code-actions`.
* CSV export is available for API error logs.

#### Columns

* **Timestamp**
* **Request**, including HTTP method and URL
* **Status code**
* **Error message**
* **Bot dialog**
* **Version**, such as `Draft` or `Live`

#### Filters

* **Date range**
* **Status code range**, such as `2xx`, `3xx`, `4xx`, or `5xx`
* **HTTP method**, such as `GET`, `POST`, `PUT`, `PATCH`, or `DELETE`

This tab supports CSV export for API error logs.

{% hint style="info" %}
Retention follows the bot's data retention setting for error history.
{% endhint %}

### Integrations

This tab shows executions of **App Integration** actions triggered by bot dialogs.

Unlike **Code Actions & API**, this tab can show both successful and failed executions.

Use this tab to check whether an **App Integration** action ran successfully.

You can see which action ran, which bot dialog triggered it, which account was used, and when it happened.

You can open a row to inspect the action input and output.

Failed executions show error details in the output panel.

#### Columns

* **Timestamp**
* **Status**, such as `success` or `failed`
* **Bot dialog**
* **Action**
* **Account**

#### Filters

* **Action** or app/action search
* **Date range**
* **Status**: `failed`, `success`, or any status

#### Detail drawer

Open a row to view the detail drawer.

The drawer shows the integration action name and status.

It links back to the related bot dialog when available.

It has **Input** and **Output** tabs.

* **Input** shows the JSON payload sent to the integration.
* **Output** shows the returned data for successful runs or the error object for failed runs.

Logs in this tab are scoped to the current bot version, such as `Draft` or `Live`.

### Tracking Events

This tab shows custom analytics events fired by **Track Event** blocks.

Use this tab to verify that a **Track Event** block was triggered.

Event attributes are visible in the event payload.

This helps you troubleshoot analytics instrumentation and missing event data.

#### Columns

* **Timestamp**
* **Event name**
* **Conversation ID**
* **Channel type**

#### Filters

* **Date range**
* **Event name**
* **Event properties**, such as conversation ID, channel type, channel ID, campaign ID, and language

You can expand a tracking event row to inspect the full event payload, including custom attributes.

### Voice

This tab shows speech-to-text failures from voice calls.

Use it to troubleshoot cases where Chatlayer could not initialize, connect to, stream to, or receive transcription from the configured STT provider.

Keep in mind:

* The **Voice** tab shows STT errors, not full call transcripts or recordings.
* Each row represents an STT failure during a voice call.
* You can click a row to open **Voice error details**.
* The empty state explains that STT failures during voice calls will appear here.
* Pagination shows 50 STT errors per page.

{% hint style="info" %}
Retention follows the same bot error-history retention setting.
{% endhint %}

#### Columns

* **Timestamp**
* **Provider**
* **Mode**
* **Error code**
* **Conversation**
* **Message**
* **Version**

#### Filters

* **Date range**
* **Provider**: `Microsoft` or `Google`
* **Mode**: `Sync` or `Async`
* **Error code**

#### Error codes

* `TRANSCRIBE_FAILED` — speech could not be converted to text during the call.
* `INIT_FAILED` — the STT engine could not be initialized.
* `MAX_RETRIES_REACHED` — the provider stayed unavailable after retry attempts.
* `PROVIDER_CONNECT_FAILED` — Chatlayer could not connect to the STT provider.
* `STREAM_FAILED` — the live audio stream to the provider failed or was interrupted.

#### Voice error details

Open a row to inspect the voice error details drawer.

The drawer can include:

* **Error code**
* **Provider**
* **Model**, when available
* **Mode**
* **Version**
* **Channel ID**
* **Conversation ID**
* **Timestamp**
* **Error message**
* **Details payload**, when available

Use the **Conversation ID** to find the related context in [Conversations](/navigation/history/user-messages).

### Troubleshooting examples

* If an **API Action** fails, open **Code Actions & API** and inspect the request URL, status code, response body, and related bot dialog.
* If an **App Integration** behaves unexpectedly, open **Integrations**, filter by action, and compare the **Input** and **Output** payloads.
* If analytics data is missing, open **Tracking Events** and check whether the expected event fired with the right attributes.
* If a voice call has transcription issues, open **Voice**, filter by provider or error code, then inspect the error details and related **Conversation ID**.

### Related pages

* [Advanced API features](/integrateandcode/custom-back-end-integrations/advanced-api-integrations)
* [App integrations](/integrateandcode/app-integrations)
* [Track events for analytics](/bot-answers/track-events-for-analytics)
* [Voicebot speech-to-text](/voice/phone-and-voice/voicebot-speech-to-text-fine-tuning)
* [Conversations](/navigation/history/user-messages)


# Versions

Have you accidentally published a new version of your bot that contains a mistake? You can fix this by rolling back to a previous LIVE version of your bot.

{% hint style="info" %}
Learn more about LIVE and DRAFT environments [here](/publish/publishing-your-bot).
{% endhint %}

To go back to a previous LIVE version of your bot:

1. Open your bot and go to the "Publish" menu.

<figure><img src="https://2786867680-files.gitbook.io/~/files/v0/b/gitbook-x-prod.appspot.com/o/spaces%2F-LLTwFwbOqJj4dDhg8Ju%2Fuploads%2FjI6RyTNdCb8A83CmQADr%2Fimage.png?alt=media&amp;token=2c07221d-7c7a-45a0-b3e7-770b8e4d6460" alt=""><figcaption></figcaption></figure>

2. On the right hand side you can see all the LIVE versions you have published in the past.

{% hint style="info" %}
Need a refresher on what versions are and how they're used? Read more [here](/publish/publishing-your-bot).
{% endhint %}

If you want to restore an older version, simply click the restore button on that version; the window below will be shown:

<figure><img src="https://2786867680-files.gitbook.io/~/files/v0/b/gitbook-x-prod.appspot.com/o/spaces%2F-LLTwFwbOqJj4dDhg8Ju%2Fuploads%2F25M9qZ58msWWdsE1tOEw%2Fimage.png?alt=media&amp;token=c4c60d2f-f777-49cf-ab7c-666587f79e36" alt=""><figcaption></figcaption></figure>

3. You can choose if you either want to:

* make this older version of the bot the new LIVE version that your users will talk to. This will not affect the current DRAFT version.
* load the older version into your DRAFT version, so you can continue working on it. This will not affect the current LIVE version.

{% hint style="warning" %}
Restoring a version to DRAFT means overwriting your current DRAFT version. This cannot be undone.
{% endhint %}

Restoring your bot will:

* Revert the NLP model to the specific version, to ensure a working NLP model.
* Refresh the application so the right version of the blocks & NLP model is displayed to users.
* Not affect the conversation history, analytics & train tab.


# Channels

The Channels tab is where you manage where your bot lives.

<figure><img src="https://2786867680-files.gitbook.io/~/files/v0/b/gitbook-x-prod.appspot.com/o/spaces%2F-LLTwFwbOqJj4dDhg8Ju%2Fuploads%2F1huxBvET73OVYb43Mrlo%2FScreenshot%202024-06-05%20at%2016.30.30.png?alt=media&amp;token=178696fe-a8cb-41f9-b1d3-cd2601b0017e" alt="" width="375"><figcaption></figcaption></figure>

[Publishing](/publish/publishing-your-bot) your bot on a channel is quite easy if you follow our channel guides:

{% content-ref url="/pages/9JjXzp8RQyrOoYDemwrm" %}
[Broken mention](broken://pages/9JjXzp8RQyrOoYDemwrm)
{% endcontent-ref %}

{% content-ref url="/pages/-LLjUUDTRj\_A\_F8UrHUi" %}
[Facebook Messenger \[Deprecated soon\]](/channels/all-channels/facebook)
{% endcontent-ref %}

{% content-ref url="/pages/-LkU3qNHZZAh4zn7mP3Z" %}
[WhatsApp Business API](/channels/sinch-conversation-api-beta/whatsapp)
{% endcontent-ref %}

{% content-ref url="/pages/-LzgIgZoZL29KEBPLR8B" %}
[Google Assistant \[Deprecated soon\]](/channels/all-channels/google-assistant)
{% endcontent-ref %}

{% content-ref url="/pages/o4m44kD6Ul75DXcKxQpx" %}
[Web V2](/channels/all-channels/web/web-v2)
{% endcontent-ref %}

{% content-ref url="/pages/-M1UufcEW5Dli0NgTILc" %}
[Voicebots](/voice/phone-and-voice)
{% endcontent-ref %}

{% content-ref url="/pages/-LV3sg2PGpxUZWTt6mT-" %}
[Webhook](/channels/all-channels/webhook-api)
{% endcontent-ref %}

{% content-ref url="/pages/-MCveMtCyiPUbk0swMe9" %}
[Sinch Conversation API](/channels/sinch-conversation-api-beta)
{% endcontent-ref %}


# Tables

Chatlayer's new Tables feature offers you a convenient way to manage your data in the form of tables.

Chatlayer enables the integration of built-in databases resembling spreadsheets. These Tables can store diverse data as records, populating columns with respective values.

<figure><img src="https://2786867680-files.gitbook.io/~/files/v0/b/gitbook-x-prod.appspot.com/o/spaces%2F-LLTwFwbOqJj4dDhg8Ju%2Fuploads%2Flh2aRyIEsxJfx1DgmKVp%2FFrame%201.png?alt=media&amp;token=9538fcff-1d71-4a83-b97f-05daa85e0c1f" alt=""><figcaption></figcaption></figure>

{% hint style="danger" %}
Please note that Tables cannot be exported at[ bot export](/navigation/settings/import-export) yet.
{% endhint %}

## Start with Tables

<table data-view="cards"><thead><tr><th></th><th></th><th></th><th data-hidden data-card-target data-type="content-ref"></th><th data-hidden data-card-cover data-type="files"></th></tr></thead><tbody><tr><td><strong>Create a Table with records</strong></td><td>The basics to make your first table.</td><td></td><td><a href="/navigation/tables/create-a-table-with-records">Create a table with records</a></td><td><a href="https://2786867680-files.gitbook.io/~/files/v0/b/gitbook-x-prod.appspot.com/o/spaces%2F-LLTwFwbOqJj4dDhg8Ju%2Fuploads%2FytLMZZN8gLWIRfm1TaB9%2FScreenshot%202024-10-02%20at%2010.39.34.png?alt=media&amp;token=05d12b03-bf02-46b8-9205-b42792c0d6b9">Screenshot 2024-10-02 at 10.39.34.png</a></td></tr><tr><td><strong>Column types</strong></td><td>The different types of data that your Table can store.</td><td></td><td><a href="/navigation/tables/column-types">Column types</a></td><td><a href="https://2786867680-files.gitbook.io/~/files/v0/b/gitbook-x-prod.appspot.com/o/spaces%2F-LLTwFwbOqJj4dDhg8Ju%2Fuploads%2FYoCkZzwJ9wsZttnta6ux%2FScreenshot%202024-10-02%20at%2010.40.08.png?alt=media&amp;token=d1dd2dfc-d15e-4fdd-ba21-f0aeb9f2e56e">Screenshot 2024-10-02 at 10.40.08.png</a></td></tr><tr><td><strong>Gym bot template</strong></td><td>A bot template that uses Tables to store class information.</td><td></td><td><a href="/start-quickly/bot-templates#gym">Templates</a></td><td><a href="https://2786867680-files.gitbook.io/~/files/v0/b/gitbook-x-prod.appspot.com/o/spaces%2F-LLTwFwbOqJj4dDhg8Ju%2Fuploads%2Fqslbk83DOZE9ZH4op9TY%2FScreenshot%202024-10-02%20at%2010.52.20.png?alt=media&amp;token=012a3827-ab8e-4b49-9832-42ea203c3f43">Screenshot 2024-10-02 at 10.52.20.png</a></td></tr><tr><td><strong>Operate on your records</strong></td><td>Insert, update, delete, and retrieve data.</td><td></td><td><a href="/navigation/tables/operate-on-your-records">Operate on your records</a></td><td><a href="https://2786867680-files.gitbook.io/~/files/v0/b/gitbook-x-prod.appspot.com/o/spaces%2F-LLTwFwbOqJj4dDhg8Ju%2Fuploads%2FGPywZrxgwSp3MrbGQrl7%2FScreenshot%202024-10-02%20at%2010.41.00.png?alt=media&amp;token=e3c3b9cf-ca82-438d-8e52-5191a0be8868">Screenshot 2024-10-02 at 10.41.00.png</a></td></tr></tbody></table>

<details>

<summary>Best practices for Tables</summary>

Here are some best practices when managing your Tables:

* Plan your[ flow logic ](/buildabot/conversation-design/getting-started)first.
* Keep your data structure simple.
* Validate your data formats before insertion to avoid errors.
* Use unique IDs per record for an easy data retrieval.
* Optimize data retrieval by using precise queries to avoid fetching extra data.
* Implement error handling strategies.
* Regulary check and cleanse your data.
* Prioritize security and privacy.
* Test thoroughly before deployment.
* Monitor and iterate after deployment.

</details>

## Go further

<table data-view="cards"><thead><tr><th></th><th></th><th></th><th data-hidden data-card-target data-type="content-ref"></th><th data-hidden data-card-cover data-type="files"></th></tr></thead><tbody><tr><td><strong>API</strong></td><td>Connect your Table to your API.</td><td></td><td><a href="/navigation/tables/api">API</a></td><td><a href="https://2786867680-files.gitbook.io/~/files/v0/b/gitbook-x-prod.appspot.com/o/spaces%2F-LLTwFwbOqJj4dDhg8Ju%2Fuploads%2FMmStkwM1R1bMrECzJHfu%2FScreenshot%202024-10-02%20at%2010.41.54.png?alt=media&amp;token=3c8ef69d-2d6f-4722-bc53-da4ec46213b3">Screenshot 2024-10-02 at 10.41.54.png</a></td></tr><tr><td></td><td><strong>Use Tables to store your KBAI questions</strong></td><td>Keep and eye on how your KBAI is performing.</td><td><a href="/navigation/knowledge-base-ai/use-tables-to-store-your-kbai-questions">Use Tables to store your KBAI questions</a></td><td><a href="https://2786867680-files.gitbook.io/~/files/v0/b/gitbook-x-prod.appspot.com/o/spaces%2F-LLTwFwbOqJj4dDhg8Ju%2Fuploads%2FYYuYneLSgrKzXSp6viq9%2FScreenshot%202024-10-01%20at%2016.33.43.png?alt=media&amp;token=009359a7-50f3-4d8c-9b38-741e2e8ec70c">Screenshot 2024-10-01 at 16.33.43.png</a></td></tr><tr><td></td><td></td><td></td><td></td><td></td></tr></tbody></table>


# Create a table with records

Learn how to create your table and add records to it.

{% hint style="info" %}
Changes to the tables, such as adding or deleting a table, will be applied to both the live and draft environments. However, any data added to the tables will only be reflected in the environment where the data was originally added.

If you wish to populate data from one environment to another, the best approach is to export the data from the source environment and then import it into the target environment.
{% endhint %}

{% hint style="danger" %}
Please note that Tables cannot be exported at[ bot export](/navigation/settings/import-export) yet.
{% endhint %}

\
Let's imagine a scenario where a bot is helping users book their favorite yoga or Zumba class. You want to use table to check available class and then help customers to book their favourite class. Follow these steps to get started using Table.

## Create a table

To add a table to your Tables:

1. Navigate to the **Tables** section in the main menu.

<figure><img src="https://2786867680-files.gitbook.io/~/files/v0/b/gitbook-x-prod.appspot.com/o/spaces%2F-LLTwFwbOqJj4dDhg8Ju%2Fuploads%2FUOShkF7DsoXIDsha7jUj%2FScreenshot%202024-03-13%20at%2017.20.40.png?alt=media&amp;token=603db601-a610-4218-99d3-0b6dc1de3c77" alt="" width="122"><figcaption><p>Tables on the side bar menu</p></figcaption></figure>

2. Click the **+** button at the top of the screen.
3. Give the table a descriptive name and provide a brief explanation of its purpose. In this example, our table serves to store info about the dates, names and times of a yoga/zumba class booking system.
4. Define your table columns. Specify the name of each column and select the appropriate [type of variable for your column](/navigation/tables/column-types). For this example, we'll only have text columns for:
   * `className`
   * `classDay`
   * `classTime`
   * `classTeacher`
   * `isBooked`

<figure><img src="https://2786867680-files.gitbook.io/~/files/v0/b/gitbook-x-prod.appspot.com/o/spaces%2F-LLTwFwbOqJj4dDhg8Ju%2Fuploads%2Fipdp7pYJgOEaLgnmB9XM%2FScreenshot%202024-03-13%20at%2017.33.54.png?alt=media&amp;token=f84ca106-a180-4360-92a0-033fdbe2778e" alt="" width="375"><figcaption><p>Create a Table and give it columns.</p></figcaption></figure>

5. Click **Create**.

Learn more about the columns types in the dedicated article 👇

{% content-ref url="/pages/5UP88IHHsXprtXiyGddv" %}
[Column types](/navigation/tables/column-types)
{% endcontent-ref %}

You've successfully created a table! For now, it's still empty.

<figure><img src="https://2786867680-files.gitbook.io/~/files/v0/b/gitbook-x-prod.appspot.com/o/spaces%2F-LLTwFwbOqJj4dDhg8Ju%2Fuploads%2FiBXM8ABvfXC0OfpYCC1c%2FScreenshot%202024-03-13%20at%2017.52.36.png?alt=media&amp;token=732438a3-66b9-4a79-90c1-2f1d3d979df1" alt=""><figcaption><p>Created empty Table.</p></figcaption></figure>

## Delete a table

1. Click the three dots button

<figure><img src="https://2786867680-files.gitbook.io/~/files/v0/b/gitbook-x-prod.appspot.com/o/spaces%2F-LLTwFwbOqJj4dDhg8Ju%2Fuploads%2FLACKk7hDu6LTAqKvPRjq%2FScreenshot%202024-07-01%20at%2022.06.11.png?alt=media&amp;token=7324089c-2806-416a-bf82-2514763a5db3" alt="" width="375"><figcaption><p>Select delete</p></figcaption></figure>

2. Select **Delete**
3. Confirm **Delete**<br>

<figure><img src="https://2786867680-files.gitbook.io/~/files/v0/b/gitbook-x-prod.appspot.com/o/spaces%2F-LLTwFwbOqJj4dDhg8Ju%2Fuploads%2FitzqxcNOS7ZxIDOPxA4m%2FScreenshot%202024-07-01%20at%2022.07.19.png?alt=media&amp;token=ea7f6128-a895-41b9-b54b-24e977b41f5f" alt=""><figcaption><p>Modal confirmation before deleting a table</p></figcaption></figure>

\
\
Let's now add records to the Table.

## Create a new record

A record is a line of data on your table.

To populate your table with data, you can either:

* [Insert record manually](#insert-record-manually).
* [Import data](#import-record) that already lives somewhere else.

### Add a new record manually

1. From your table, click on **Insert record** at the top-right corner of your screen.
2. Fill the value for each column.

<figure><img src="https://2786867680-files.gitbook.io/~/files/v0/b/gitbook-x-prod.appspot.com/o/spaces%2F-LLTwFwbOqJj4dDhg8Ju%2Fuploads%2F2Ic4IygRWXuxP6byJTIE%2FScreenshot%202024-03-13%20at%2017.55.05.png?alt=media&amp;token=6c01c884-7265-4e3a-83c8-df8a97d3aee4" alt="" width="375"><figcaption><p>Insert a record to your table manually.</p></figcaption></figure>

3. Click **Add**.

You can now see your record inside the table!

<figure><img src="https://2786867680-files.gitbook.io/~/files/v0/b/gitbook-x-prod.appspot.com/o/spaces%2F-LLTwFwbOqJj4dDhg8Ju%2Fuploads%2FLZm2PeDkZekXqMZI7iU5%2FScreenshot%202024-03-13%20at%2017.58.29.png?alt=media&amp;token=d724f935-a5e1-495a-90fb-7c990660e172" alt=""><figcaption><p>Table filled with one record.</p></figcaption></figure>

### Edit record

1. Click the three dots button on the left side of the table
2. Select **Edit**
3. Edit records<br>

<figure><img src="https://2786867680-files.gitbook.io/~/files/v0/b/gitbook-x-prod.appspot.com/o/spaces%2F-LLTwFwbOqJj4dDhg8Ju%2Fuploads%2FmY9E2j77H7XEQo3N71K4%2FScreenshot%202024-07-01%20at%2022.03.46.png?alt=media&amp;token=6ba127a5-c47c-427a-bbeb-726ea5afbd16" alt=""><figcaption><p>Edit records</p></figcaption></figure>

4. Click **Save**

### Import a record

{% hint style="info" %}
For importing more than 100 records, using an API is recommended over manual data import. Find the documentation [here](/navigation/tables/api).
{% endhint %}

1. From your table, click on the arrow next to the **Insert record** button.
2. Select **Import data**.

<figure><img src="https://2786867680-files.gitbook.io/~/files/v0/b/gitbook-x-prod.appspot.com/o/spaces%2F-LLTwFwbOqJj4dDhg8Ju%2Fuploads%2FR0EJw8e0GwznDF4BZvAv%2FScreenshot%202024-03-13%20at%2018.02.29.png?alt=media&amp;token=cdd165b6-4e0d-4230-a57e-4a875c674435" alt="" width="296"><figcaption><p>Import data button</p></figcaption></figure>

3. Drag and drop a CSV file.
4. If your data is incompatible, you will get a red alert next to **Preview data to be imported**. Click on this section.

<figure><img src="https://2786867680-files.gitbook.io/~/files/v0/b/gitbook-x-prod.appspot.com/o/spaces%2F-LLTwFwbOqJj4dDhg8Ju%2Fuploads%2FnyreoFl09HBxuRfRsXtf%2FScreenshot%202024-03-13%20at%2018.05.44.png?alt=media&amp;token=2bb2e186-e0df-4750-a543-90f7ffe13ad1" alt="" width="375"><figcaption><p>Check that your data is valid before importing records to your table.</p></figcaption></figure>

5. The details unfold so that you can review the issues that need to be solved. In this example, the problem is that we have some columns headers incompatibilities.

<figure><img src="https://2786867680-files.gitbook.io/~/files/v0/b/gitbook-x-prod.appspot.com/o/spaces%2F-LLTwFwbOqJj4dDhg8Ju%2Fuploads%2FaJJcYIO70AmIIdJUIVM2%2FScreenshot%202024-03-13%20at%2018.07.50.png?alt=media&amp;token=be62f0d7-c848-42f7-8dc3-bcf592cbe52e" alt="" width="375"><figcaption><p>Review data before it's imported to your table.</p></figcaption></figure>

6. After figuring out all the issues, go to **Configure import data** to solve thos&#x65;**.** In this example, as it mentioned that some columns are not present in the table, deselect the columns that shouldn't be imported.

{% hint style="info" %}
The columns selected in green will be imported, whereas the white ones won't be imported.
{% endhint %}

<figure><img src="https://2786867680-files.gitbook.io/~/files/v0/b/gitbook-x-prod.appspot.com/o/spaces%2F-LLTwFwbOqJj4dDhg8Ju%2Fuploads%2FOuQQOO4LhOH8odOCf08I%2FScreenshot%202024-03-13%20at%2018.11.58.png?alt=media&amp;token=ae38543d-a7c1-44d6-b9e3-8e9edecc8fc4" alt="" width="375"><figcaption><p>Deselecting columns to be imported</p></figcaption></figure>

7. Once you have resolved the issues, the **Data incompatible** tag will disappear, indicating that the data is now ready for import.
8. Click **Import** as the last step.

Your table is now filled with the data that was in your .csv file!

<figure><img src="https://2786867680-files.gitbook.io/~/files/v0/b/gitbook-x-prod.appspot.com/o/spaces%2F-LLTwFwbOqJj4dDhg8Ju%2Fuploads%2FH55MmCvtYq62rVpPTk1y%2FScreenshot%202024-03-13%20at%2018.14.04.png?alt=media&amp;token=b91339b7-b144-4519-b45c-8d651dc4f569" alt=""><figcaption><p>Table filled with a CSV importation.</p></figcaption></figure>

***

{% hint style="success" %}
Looking for a quick and easy bot template to play with Tables? The [Gym bot](/start-quickly/bot-templates/gym) is a representative use case.
{% endhint %}


# Column types

Each column type in your Tables serves specific data storage needs, and choosing the right type is crucial for optimizing performance, storage efficiency, and query capabilities of your table.

<figure><img src="https://2786867680-files.gitbook.io/~/files/v0/b/gitbook-x-prod.appspot.com/o/spaces%2F-LLTwFwbOqJj4dDhg8Ju%2Fuploads%2FFu1aNNockcm0wKgAbib8%2FScreenshot%202024-03-14%20at%2013.56.27.png?alt=media&amp;token=a6ca15f3-2ad0-4002-8d7f-ba38c869bd4b" alt=""><figcaption><p>The list of the table column types.</p></figcaption></figure>

{% hint style="danger" %}
Please note that Tables cannot be exported at[ bot export](/navigation/settings/import-export) yet.
{% endhint %}

## **Integer**

An integer (`int`) is a data type used to store whole numbers (both positive and negative) without decimals.

**Use cases**: It is commonly used for counting or indexing purposes, such as storing the quantity of items, age, or any other countable measure.

## **Boolean**

A boolean (`bool`) is a binary data type that can hold one of two possible values: **`true`** or **`false`**.

**Use cases**: It is ideal for storing simple flags or status information, such as whether an account is active or if a user has accepted terms and conditions.

## Timestamp

A timestamp is a data type used to store date and time information. It can include both the date and the time of day, and it is often stored with time zone information.

**Use cases:** It is commonly used for recording events, such as creation or modification times of records, logging user activities, or scheduling tasks.

## **Text**

The text (`text`) data type is used for storing any kind of textual data, potentially of unlimited length.

**Use cases**: Perfect for storing names, descriptions, or even whole articles. It accommodates characters, including letters, numbers, symbols, and spaces.

## **UUID**

A Universally Unique Identifier (`uuid`) is a 128-bit number used to uniquely identify information in computer systems.

**Use cases**: Its primary use is in databases as a unique identifier for each record, ensuring that each entry is distinct, even across different databases or tables.

## **Numeric**

Numeric (`numeric`) is a data type that stores numbers with a lot of precision. It can handle numbers with a large number of digits before and after the decimal point.

**Use cases**: It is used for storing exact values, such as financial data (e.g., prices, costs), scientific measurements, or any other field where precision is crucial.

## **JSONB (JSON Binary)**

JSONB (`jsonb`) is a format for storing JSON (JavaScript Object Notation) data in a binary format.

**Use cases**: This type is useful for storing and querying structured, but schema-less data. It's ideal for flexible or evolving data models, such as user profiles, configurations, or any scenario where the data structure may vary or expand over time.

***

{% hint style="success" %}
Looking for a quick and easy bot template to play with Tables? The [Gym bot](/start-quickly/bot-templates/gym) is a representative use case.
{% endhint %}


# Operate on your records

From interactions with your bot, learn how to dynamically integrate table operations (insert, update, retrieve, delete) for data management.

Operating actions on your table records means that you will be able to change your [table records](/navigation/tables) depending on what happens inside the conversation between your user and the chatbot.

{% hint style="danger" %}
Please note that Tables cannot be exported at[ bot export](/navigation/settings/import-export) yet.
{% endhint %}

<figure><img src="https://2786867680-files.gitbook.io/~/files/v0/b/gitbook-x-prod.appspot.com/o/spaces%2F-LLTwFwbOqJj4dDhg8Ju%2Fuploads%2FWnUtpM1ECS54jyvMXiKN%2FScreenshot%202024-06-12%20at%2010.13.05.png?alt=media&amp;token=a41d4b02-06b0-49e2-acd6-2da1cfde2523" alt=""><figcaption><p>Table operation inside an NPS flow.</p></figcaption></figure>

{% hint style="success" %}
Looking for a quick and easy bot template to play with Tables? The [Gym bot](https://docs.chatlayer.ai/tutorials/bot-templates/gym) is a representative use case.
{% endhint %}

## Add a Table operation to your flow

To add a Table operation in your flow:

1. Add an **Action** step to your block.
2. Select **Table operation.**

<figure><img src="https://2786867680-files.gitbook.io/~/files/v0/b/gitbook-x-prod.appspot.com/o/spaces%2F-LLTwFwbOqJj4dDhg8Ju%2Fuploads%2F0TBl2qfc3A94J0I2kE8v%2FScreenshot%202024-03-13%20at%2018.22.18.png?alt=media&amp;token=c562b25e-b1aa-41e3-bf77-57223d2dcbdc" alt="" width="375"><figcaption><p>Table operation inside of Action step</p></figcaption></figure>

3. Choose the desired **Table operation** from the options.

<figure><img src="https://2786867680-files.gitbook.io/~/files/v0/b/gitbook-x-prod.appspot.com/o/spaces%2F-LLTwFwbOqJj4dDhg8Ju%2Fuploads%2FlM2ws9fKwXWkRnWV1c2Q%2FScreenshot%202024-03-12%20at%2017.37.14.png?alt=media&amp;token=bed1a5be-53b2-4f01-a71f-5804cc384712" alt="" width="375"><figcaption><p>Choose an operation to perform on your table.</p></figcaption></figure>

4. Depending on the operation that you chose, continue with the dedicated tutorial. There are 4 different kinds of operations that you can make on your table records:
   * [**Insert record**](/navigation/tables/operate-on-your-records/insert-record)**: u**se this operation to add new records to your table. It's perfect for the initial population of table data.
   * [**Update record**](/navigation/tables/operate-on-your-records/update-record)**: t**his operation allows you to modify existing data within your table. It's useful for keeping your table data current.
   * [**Retrieve record**](/navigation/tables/operate-on-your-records/retrieve-record)**: w**hen you need to fetch data from your table, use this operation. It enables you to access and use table data within your flow.
   * [**Delete record**](/navigation/tables/operate-on-your-records/delete-record)**: t**his operation should be used with caution, as it allows for the deletion of records from your table based on specific criteria.

***

{% hint style="success" %}
Looking for a quick and easy bot template to play with Tables? The [Gym bot](/start-quickly/bot-templates/gym) is a representative use case.
{% endhint %}


# Insert record

Learn how to use the insert record operation on your table by using a lead generation flow example.

Inserting a record on your table means that you will create a new row on your table.

This means that you'll go from this:

| FullName | Email |
| -------- | ----- |
|          |       |

To that:

| FullName   | Email                  |
| ---------- | ---------------------- |
| **Agatha** | **<agatha@email.com>** |

## Insert a record

To insert a record on your table:

1. Make sure that you created a table with the appropriate structure. For this example, we will use a lead generation table that captures:
   * **FullName:** Captures the lead's full name.
   * **Email:** Stores the lead's email address.

<figure><img src="https://2786867680-files.gitbook.io/~/files/v0/b/gitbook-x-prod.appspot.com/o/spaces%2F-LLTwFwbOqJj4dDhg8Ju%2Fuploads%2FVuz4WAtZVuDYTig8SYpl%2FScreenshot%202024-03-13%20at%2018.28.31.png?alt=media&amp;token=08f97c43-a634-43f8-8e00-e223f7593b19" alt=""><figcaption><p>An example of table for lead generation</p></figcaption></figure>

2. Make sure that you capture the relevant variables in your conversation. In our example, we capture the user name and email in [Collect input](/buildabot/flow-logic/dialog-state/user-input-bot-dialog) blocks. These are the variables that we want to add to our lead generation table, i.e. `customer_name` and `customer_email`.
3. [Add a Table operation](https://docs.chatlayer.ai/bot-answers/tables-beta/perform-operations-on-your-records#add-a-table-operation-to-your-flow) to your flow.

<figure><img src="https://2786867680-files.gitbook.io/~/files/v0/b/gitbook-x-prod.appspot.com/o/spaces%2F-LLTwFwbOqJj4dDhg8Ju%2Fuploads%2FvBIZBHMPVcKz0U9sbJNK%2FScreenshot%202024-03-13%20at%2018.29.56.png?alt=media&amp;token=c7a4c1e9-e681-44dc-9b06-3789745e0fb2" alt=""><figcaption><p>Add a Table operation to your flow.</p></figcaption></figure>

4. Select **Insert Record.**

<figure><img src="https://2786867680-files.gitbook.io/~/files/v0/b/gitbook-x-prod.appspot.com/o/spaces%2F-LLTwFwbOqJj4dDhg8Ju%2Fuploads%2FXi2mBcrnO2QG2n6Snwak%2FScreenshot%202024-03-12%20at%2021.17.29.png?alt=media&amp;token=e500a3c7-ffc4-47f0-b5cb-98dbeba02343" alt="" width="375"><figcaption><p>Select the Insert record table operation</p></figcaption></figure>

5. Select the table that you'd like to work on. For this example, we called our table **Lead generation**.

<figure><img src="https://2786867680-files.gitbook.io/~/files/v0/b/gitbook-x-prod.appspot.com/o/spaces%2F-LLTwFwbOqJj4dDhg8Ju%2Fuploads%2FxsReGIIKomUkqDqKJ6s6%2FScreenshot%202024-03-13%20at%2018.32.00.png?alt=media&amp;token=6ca04533-fd5b-4926-89af-18838c7bdf7f" alt="" width="375"><figcaption><p>Select your table.</p></figcaption></figure>

6. To recall, our example lead generation table has 2 columns: `FullName` and `Email`. Under **Operation Config**, link the **FullName** field to be populated with the variable {`customer_name}.`
7. Do the same for **Email** and {customer\_email}.

<figure><img src="https://2786867680-files.gitbook.io/~/files/v0/b/gitbook-x-prod.appspot.com/o/spaces%2F-LLTwFwbOqJj4dDhg8Ju%2Fuploads%2FwrMtzRIzhH4T7s57KrAv%2FScreenshot%202024-03-15%20at%2011.42.05.png?alt=media&amp;token=94bcdf91-b91d-499f-97c2-9e9f4cb41f92" alt=""><figcaption><p>Insert a record to your table.</p></figcaption></figure>

8. Click **Save**.
9. Test your bot in the emulator. Run through your bot flow within the emulator to simulate the user experience and trigger the **Insert record** action.

<figure><img src="https://2786867680-files.gitbook.io/~/files/v0/b/gitbook-x-prod.appspot.com/o/spaces%2F-LLTwFwbOqJj4dDhg8Ju%2Fuploads%2FEB0PZ6MMJ7ZKFMMJ4YUP%2FScreenshot%202024-03-18%20at%2012.16.21.png?alt=media&amp;token=6a9291b8-b7f2-4a06-842c-afd336e802fb" alt="" width="375"><figcaption></figcaption></figure>

10. After testing, navigate to your table to confirm that the lead's information has been accurately recorded and stored.

<figure><img src="https://2786867680-files.gitbook.io/~/files/v0/b/gitbook-x-prod.appspot.com/o/spaces%2F-LLTwFwbOqJj4dDhg8Ju%2Fuploads%2FiqDGVORDonGOGv19HHhl%2FScreenshot%202024-03-18%20at%2012.16.56.png?alt=media&amp;token=66d8cbaf-9d08-4df9-a2c2-703ab6eeebd1" alt=""><figcaption></figcaption></figure>

***

{% hint style="success" %}
Looking for a quick and easy bot template to play with Tables? The [Gym bot](/start-quickly/bot-templates/gym) is a representative use case.
{% endhint %}


# Update record

Learn how to use the update record operation on your table by using a gym bot example.

Updating a record from your table means that an already-existing record is updated on one of several of its cells.

To exemplify this, we will use a gym booking bot that uses a Table to store who is booked in a yoga class. By updating record, we will add the user as enrolled to the class.

This means that you'll go from this:

| className | classTeacher | isBooked |
| --------- | ------------ | -------- |
| Zumba     | Monday       | None     |

To this:

<table><thead><tr><th width="250">className</th><th>classTeacher</th><th>isBooked</th></tr></thead><tbody><tr><td>Zumba</td><td>Monday</td><td><strong>Agatha</strong></td></tr></tbody></table>

## Update a record

1. Make sure that you have a well-defined table. For this example, we'll use gym booking table with those fields:
   * **ClassName:** Name of the fitness class.
   * **ClassDay:** Date of the class, in a consistent format (e.g., YYYY-MM-DD).
   * **ClassTime:** Start time of the class, using a clear format (e.g., HH:MM AM/PM).
   * **ClassTeacher:** Name of the instructor leading the class.
   * **IsBooked:** Status field indicating whether the class is booked ('None' or 'Available' by default, updated to customer's name upon booking).

<figure><img src="https://2786867680-files.gitbook.io/~/files/v0/b/gitbook-x-prod.appspot.com/o/spaces%2F-LLTwFwbOqJj4dDhg8Ju%2Fuploads%2FawmlIYXnxplQYPAHdOXW%2F1.webp?alt=media&amp;token=ec8f89bc-30e2-4467-985f-a2b2529b3e37" alt=""><figcaption><p>A table that stores gym class bookings.</p></figcaption></figure>

2. In your bot flow, identify the point in the conversation where the customer chose a class and confirmed their booking.
3. [Add a Table operation](https://docs.chatlayer.ai/bot-answers/tables-beta/perform-operations-on-your-records#add-a-table-operation-to-your-flow) to your flow.
4. Choose **Update record** from the list of operations.
5. Select the table that you want to update. For this example, we'll select **Gym class booking**.

<figure><img src="https://2786867680-files.gitbook.io/~/files/v0/b/gitbook-x-prod.appspot.com/o/spaces%2F-LLTwFwbOqJj4dDhg8Ju%2Fuploads%2FJ2nwV8Kk2KfsLn2qO0iJ%2F2.webp?alt=media&amp;token=71dc8867-5bf0-4f03-9cb6-8faf79d8815e" alt="" width="375"><figcaption><p>Select the table that you'd like to update.</p></figcaption></figure>

6. Under **Operation Config**, under the isBooked column, add the variable holding the customer's name. In our example, this variable is called `{userName}`. This means that the isBooked column will be updated with `{userName}` as a new value.

<figure><img src="https://2786867680-files.gitbook.io/~/files/v0/b/gitbook-x-prod.appspot.com/o/spaces%2F-LLTwFwbOqJj4dDhg8Ju%2Fuploads%2FDVYZC4TSiyYHiQmf38ra%2F3.webp?alt=media&amp;token=8c9d4429-9600-4cd6-8998-efb8c6526371" alt="" width="375"><figcaption><p>Update the isBooked column with the {userName} value.</p></figcaption></figure>

7. Under **Define a selection criteria** **for the records to update**, click on **+ Add filter** to set the conditions to identify which record (or row on your table) should be updated. In our example, the conditions should match the class that the customer is booking. Therefore, we're going to check that `{className}`, `{classDay}`, `{classTeacher}`, and `{classTime}` are already specified.

<figure><img src="https://2786867680-files.gitbook.io/~/files/v0/b/gitbook-x-prod.appspot.com/o/spaces%2F-LLTwFwbOqJj4dDhg8Ju%2Fuploads%2F42rmUSu3ZoezP51H6CZd%2F4.webp?alt=media&amp;token=a04da9bd-adc5-40aa-a82b-3b606f0ef331" alt="" width="375"><figcaption><p>Define selection criteria to define which record (or row on your table) should be updated.</p></figcaption></figure>

8. Optionally, you can set up limits for the number of records to update, in the case where you would like to update more than 1.

<figure><img src="https://2786867680-files.gitbook.io/~/files/v0/b/gitbook-x-prod.appspot.com/o/spaces%2F-LLTwFwbOqJj4dDhg8Ju%2Fuploads%2Fh0q535GLx1sKusl8wH1a%2FScreenshot%202024-11-07%20at%2016.03.50.png?alt=media&amp;token=5a7ec2c2-0fc2-4a81-9d42-158b0ca651ae" alt="" width="367"><figcaption><p>Define how many records to update.</p></figcaption></figure>

9. Click **Save.**

<figure><img src="https://2786867680-files.gitbook.io/~/files/v0/b/gitbook-x-prod.appspot.com/o/spaces%2F-LLTwFwbOqJj4dDhg8Ju%2Fuploads%2FfD0fL7IGXp2Vq9VoCn8U%2F5.webp?alt=media&amp;token=0c125704-7cc0-4a47-8bbb-e9dd551879e7" alt=""><figcaption><p>Your Action block with the Table operation appears on your canvas.</p></figcaption></figure>

10. It's crucial to check the functionality of your **Update record** operation to ensure data is captured and stored correctly. Utilize the emulator to test the flow that you just build.

<figure><img src="https://2786867680-files.gitbook.io/~/files/v0/b/gitbook-x-prod.appspot.com/o/spaces%2F-LLTwFwbOqJj4dDhg8Ju%2Fuploads%2FffCuswpLjpWSRJwg7UBD%2F6.webp?alt=media&amp;token=391d8c9a-7d08-4c29-b403-d2f6c166d15a" alt="" width="375"><figcaption><p>Test your Update record flow.</p></figcaption></figure>

11. After completing the booking process in the test, navigate to the updated table (in this example, it's called Gym class booking) to verify the update. Ensure the **isBooked** field is filled with the customers booking the selected class are updated as expected.

<figure><img src="https://2786867680-files.gitbook.io/~/files/v0/b/gitbook-x-prod.appspot.com/o/spaces%2F-LLTwFwbOqJj4dDhg8Ju%2Fuploads%2FlgPtyZxXamIy7fP8tAij%2F7.webp?alt=media&amp;token=4f782ff2-3b1e-40f5-b470-d44f2b91cfc3" alt=""><figcaption><p>The Update record operation works on the table as expected.</p></figcaption></figure>

***

{% hint style="success" %}
Looking for a quick and easy bot template to play with Tables? The [Gym bot](/start-quickly/bot-templates/gym) is a representative use case.
{% endhint %}


# Retrieve record

Learn how to use the retrieve record operation on your table by using a gym bot example

Retrieving a record from your table means that it allows bot query and retrieve information from an existing record.

To exemplify this, we will use a gym booking bot that uses a Table to retrieve information about available gym classes from the table, enabling users to view and select classes to book.

This means that from a table like this, you'll be able to retrieve only specific records, e.g. only the Zumba classes:

| className | classTeacher | isBooked |
| --------- | ------------ | -------- |
| **Zumba** | **Jenny**    | **None** |
| Yoga      | Sergine      | None     |
| **Zumba** | **Chloé**    | **None** |

{% hint style="info" %}
Retrieve record is an operation which doesn't edit your table. It just filters out which records we're looking at inside a conversation. It's usually combined with another operation, e.g. retrieve a record then update a record.
{% endhint %}

## Retrieve record(s)

To retrieve a record:

1. Make sure that you have a well-defined [table](/navigation/tables/create-a-table-with-records). For this example, we'll use gym booking table with those fields:
   * **ClassName:** Name of the fitness class.
   * **ClassDay:** Date of the class, in a consistent format (e.g., YYYY-MM-DD).
   * **ClassTime:** Start time of the class, using a clear format (e.g., HH:MM AM/PM).
   * **ClassTeacher:** Name of the instructor leading the class.
   * **IsBooked:** Status field indicating whether the class is booked ('None' or 'Available' by default, updated to customer's name upon booking).

<figure><img src="https://2786867680-files.gitbook.io/~/files/v0/b/gitbook-x-prod.appspot.com/o/spaces%2F-LLTwFwbOqJj4dDhg8Ju%2Fuploads%2FIxWrNqlIBFSnXlhSQmO9%2FScreenshot%202024-04-09%20at%2021.29.38.png?alt=media&amp;token=1b06a2e5-44a2-4f6e-92a9-d3ab7b449ddc" alt=""><figcaption><p>A table that stores gym class bookings.</p></figcaption></figure>

2. Determine the point in your bot flow where users will request to view available classes. For this example, after users selected which class they want to book, a retrieve record operation will happen so that the bot finds that class in the table.
3. [Add a Table operation](https://docs.chatlayer.ai/bot-answers/tables-beta/perform-operations-on-your-records#add-a-table-operation-to-your-flow) to your flow at the point that you've defined.
4. Choose **Retrieve record** from the list of operations.
5. Select the table that you want to update. For this example, we'll select **Gym class booking**.<br>

<figure><img src="https://2786867680-files.gitbook.io/~/files/v0/b/gitbook-x-prod.appspot.com/o/spaces%2F-LLTwFwbOqJj4dDhg8Ju%2Fuploads%2FEfPJyTyz0lzPcsvcUzUa%2FScreenshot%202024-03-13%20at%2009.04.59.png?alt=media&amp;token=49530c28-eaa8-4eaa-866b-e9876876926d" alt="" width="375"><figcaption><p>Select the correct table.</p></figcaption></figure>

6. Under the **Operation config** section, click on **+ Add filter** to set up the query to filter records based on the value(s) or one or more column(s). For this example:
   * We filter out by looking at the **isBooked** column. If the **isBooked** cell equals **None**, it means that the class is available for bookings. It means that we'll only retrieve classes that are available.
   * Additionally, we incorporate a filter for **className** to match the user's selection, ensuring that the query returns classes that align with the user's preference. It means that if the user is interested in yoga classes, then we'll only retrieve yoga classes and not other ones.

<figure><img src="https://2786867680-files.gitbook.io/~/files/v0/b/gitbook-x-prod.appspot.com/o/spaces%2F-LLTwFwbOqJj4dDhg8Ju%2Fuploads%2FjM0fdAmO5WPrM5n39p0I%2FScreenshot%202024-03-13%20at%2009.12.33.png?alt=media&amp;token=f8a601ff-f474-4c8c-ba4a-6ee2f7433f7c" alt="" width="375"><figcaption><p>Define selection criteria to retrieve records from your table.</p></figcaption></figure>

7. Under **Limit**, set a limit to the number of query results. In this example, we'll limit the results to 2. This ensures that the bot displays a concise list of available classes for the user to choose from.
8. If you need to skip a few numbers of records from your retrieve operation, fill in the field under **Skip**. For this example we won’t allow to skip the first number of records from results, so no need to do anything there.
9. Under **Destination variable**, assign the retrieved results to a variable. For this example we'll name it `available_class`. This variable will keep retrieved classe(s) to use them inside the conversation.

<figure><img src="https://2786867680-files.gitbook.io/~/files/v0/b/gitbook-x-prod.appspot.com/o/spaces%2F-LLTwFwbOqJj4dDhg8Ju%2Fuploads%2F18TPxAFK9fjC8DDiTKaJ%2FScreenshot%202024-04-10%20at%2015.49.36.png?alt=media&amp;token=a293294f-859a-4a7c-811f-589b9a5e0fef" alt="" width="256"><figcaption><p>Configure your limit and destination variable when retrieving records.</p></figcaption></figure>

10. Click **Save**.

## Display the retrieved record(s)

Above, you've learned how to retrieve records from a table, which in this example are available gym classes. To display those retrieved records in the conversation:

1. Introduce a new [Message block](https://docs.chatlayer.ai/bot-answers/dialog-state/message-components) designed to let users pick from the available classes. This block serves as the juncture where users can visually see and select their preferred class timing.
2. For this example, let's call this block **Display classes**.
3. Add a **Buttons** step.
4. To concisely convey class availability, format your button titles to include the day and time of each class. Use the `{variableName[index].values.fieldName}` variable structure to embed the retrieved class information:

   * `{available_class[0].values.classDay} at {available_class[0].values.classTime}`.

   As a practical example, if the first returned class is on a Monday at 10 AM, your button might be titled "Monday at 10 AM".
5. Given that we've set the operation to return up to two classes, ensure your message includes a button for each available option. Duplicate the formatting approach for the second button, substituting `[0]` with `[1]` to access the second item in the array:

   * `{available_class[1].values.classDay} at {available_class[1].values.classTime}`

   This ensures both options are presented for user selection.

<figure><img src="https://2786867680-files.gitbook.io/~/files/v0/b/gitbook-x-prod.appspot.com/o/spaces%2F-LLTwFwbOqJj4dDhg8Ju%2Fuploads%2FgxywnxJqq7niaB0CV98T%2FScreenshot%202024-03-13%20at%2009.37.44.png?alt=media&amp;token=70205c40-b90d-4dbe-aed2-94ef3deb719e" alt="" width="375"><figcaption><p>Using variable to Retrieve record from the table in a buttons</p></figcaption></figure>

6. Click **Save**.
7. It's crucial to check the functionality of your Retrieve record operation to ensure data is retrieved and displayed correctly. Use the bot's emulator or a live test environment to simulate user queries for available classes.

<figure><img src="https://2786867680-files.gitbook.io/~/files/v0/b/gitbook-x-prod.appspot.com/o/spaces%2F-LLTwFwbOqJj4dDhg8Ju%2Fuploads%2FdTTfOsqroKs6KU8LZhIy%2FScreenshot%202024-04-09%20at%2021.40.34.png?alt=media&amp;token=8450ee81-ebaa-4bc3-893c-68c7343d789a" alt="" width="375"><figcaption><p>Test your Retrieve record flow</p></figcaption></figure>

8. Verify that the bot retrieves and displays the correct class information based on the availability in the table.

<figure><img src="https://2786867680-files.gitbook.io/~/files/v0/b/gitbook-x-prod.appspot.com/o/spaces%2F-LLTwFwbOqJj4dDhg8Ju%2Fuploads%2FOnxEggDkwyOzHecygCJb%2FScreenshot%202024-04-09%20at%2021.41.52.png?alt=media&amp;token=f38faddb-e851-4b52-b3a5-79372d2b71cf" alt=""><figcaption><p>The Retrieve record operation works on the table as expected.</p></figcaption></figure>

***

{% hint style="success" %}
Looking for a quick and easy bot template to play with Tables? The [Gym bot](/start-quickly/bot-templates/gym) is a representative use case.
{% endhint %}


# Delete record

Learn how to use the delete record operation on your table by using a opt-out flow example.

Deleting a record on your table means that you will delete a row on your table.

This means that you'll go from this:

| name   | email\_address    | is\_susbcribed |
| ------ | ----------------- | -------------- |
| Agatha | <agatha@test.com> | TRUE           |

To that:<br>

| name | email\_address | is\_susbcribed |
| ---- | -------------- | -------------- |
|      |                |                |

To delete a record from your table:

1. Make sure that you already have a filled a table. For this example, we will use an opt in/opt out table that captures:
   * **name**: Captures customer's name.
   * **email\_address**: Store customer's email address.
   * **is\_subscribed**: Store customer's consent to be subscribed to a campain.

<figure><img src="https://2786867680-files.gitbook.io/~/files/v0/b/gitbook-x-prod.appspot.com/o/spaces%2F-LLTwFwbOqJj4dDhg8Ju%2Fuploads%2Fr0GbeDuxJbVJs1Ag7A3j%2FScreenshot%202024-04-19%20at%2008.43.35.png?alt=media&amp;token=42bd6c8f-a028-4d88-b123-50f9f2743105" alt=""><figcaption><p>An example of table for Opt in/opt out.</p></figcaption></figure>

2. Make sure that you capture the relevant variables in your conversation. In our example, we capture `{userName}` in Collect input blocks. This is the variable that we will use as a filter to target certain row to be deleted.
3. [Add a Table operation](https://docs.chatlayer.ai/bot-answers/tables-beta/operate-on-your-records#add-a-table-operation-to-your-flow) to your flow.
4. Select **Delete record.**
5. Select the table that you'd like to work on. For this example, we called our table **Subscriptions.**
6. Click on **+ Add filter** to define a selection criteria. For this example, we filter out by looking at the 'name' column. If the name equals `{userName}`, it means that the row will be deleted once the opt out flow is triggered.

<figure><img src="https://2786867680-files.gitbook.io/~/files/v0/b/gitbook-x-prod.appspot.com/o/spaces%2F-LLTwFwbOqJj4dDhg8Ju%2Fuploads%2Fc4xSY8ZH5629hSNILtZX%2FScreenshot%202024-04-19%20at%2008.48.10.png?alt=media&amp;token=c9936b00-c9ec-483b-a3f7-71370262cb6b" alt=""><figcaption><p>Delete a record from your Table.</p></figcaption></figure>

7. Click **Save**.
8. Add a **Message** block as a Go to to let your customer know that they are successfully opted out.

<figure><img src="https://2786867680-files.gitbook.io/~/files/v0/b/gitbook-x-prod.appspot.com/o/spaces%2F-LLTwFwbOqJj4dDhg8Ju%2Fuploads%2FfzQmRJvPgAVKOD66oJIu%2FScreenshot%202024-04-19%20at%2008.58.21.png?alt=media&amp;token=27c63034-c35e-4884-8690-cad6a9176bdb" alt=""><figcaption><p>Example of opt out flow.</p></figcaption></figure>

9. It's crucial to check the functionality of your Delete record operation to ensure that the correct row is deleted. Test your bot in the emulator. Run through your bot flow within the emulator to simulate the user experience and trigger the **Delete record** action.

<figure><img src="https://2786867680-files.gitbook.io/~/files/v0/b/gitbook-x-prod.appspot.com/o/spaces%2F-LLTwFwbOqJj4dDhg8Ju%2Fuploads%2FEDRCriNwqhGVXnLfvLEP%2FScreenshot%202024-04-19%20at%2009.20.37.png?alt=media&amp;token=5b6863a4-3310-49f4-8572-63fd9f64ac1b" alt="" width="375"><figcaption><p>Test your flow.</p></figcaption></figure>

10. Open your table, and verify that the bot deleted the correct row.

<figure><img src="https://2786867680-files.gitbook.io/~/files/v0/b/gitbook-x-prod.appspot.com/o/spaces%2F-LLTwFwbOqJj4dDhg8Ju%2Fuploads%2F5LdSObBnVCihaCvSLx8M%2FScreenshot%202024-04-19%20at%2009.22.42.png?alt=media&amp;token=5d591242-7f0b-45fc-99d4-fafd310ef84f" alt=""><figcaption><p>Check that the bot deleted the correct flow.</p></figcaption></figure>

{% hint style="success" %}
Looking for a quick and easy bot template to play with Tables? The [Gym bot](https://docs.chatlayer.ai/tutorials/bot-templates/gym) is a representative use case.
{% endhint %}


# API

Connect your Table with your API.

Connect your Chatlayer [Table](/navigation/tables) with your API to your database.

{% hint style="warning" %}
For importing more than 100 records, using an API is recommended over manual data import.
{% endhint %}

{% hint style="danger" %}
Please note that Tables cannot be exported at[ bot export](/navigation/settings/import-export) yet.
{% endhint %}

{% hint style="info" %}
Please find the API documentation and authorization [here](https://gateway.prod.europe-west1.gc.chatlayer.ai/api/v1/docs/static/index.html).
{% endhint %}

## How to authenticate

The API requires basic authentication. Follow these guidelines to find the username and password when making an API request.

1. Go to **Settings.**
2. Click on **Access tokens.**
3. From the top-right corner, click on **Generate token.**
4. Enter a **Token name**.

<figure><img src="https://2786867680-files.gitbook.io/~/files/v0/b/gitbook-x-prod.appspot.com/o/spaces%2F-LLTwFwbOqJj4dDhg8Ju%2Fuploads%2FmVJYY9bcT11aWce2H7el%2FScreenshot%202024-07-01%20at%2022.19.53.png?alt=media&amp;token=b0671974-5016-46b1-86d4-d3f757a74ac2" alt=""><figcaption></figcaption></figure>

5. Click on **Create.**
6. **Copy** the token.

{% hint style="info" %}
A token consists of a username and a password. For example, the following is a generated token:

`66830fb161b3c29143f32705:78b3e20492db13584eE52C556F99a5d2`

The part before the colon (:) is the **username**, and the part after the colon is the **password**.

User name: `66830fb161b3c29143f32705`

`Password:78b3e20492db13584eE52C556F99a5d2`
{% endhint %}

{% hint style="info" %}
For the base URL, please use\
EU: <https://gateway.prod.europe-west1.gc.chatlayer.ai/api/v1>\
US: <https://gateway.prod.us-east4.gcp.chatlayer.ai/api/v1>\
SA: <https://gateway.prod.sa-east1.gcp.chatlayer.ai/api/v1>\
ASIA: <https://gateway.prod.asia-south1.gcp.chatlayer.ai>
{% endhint %}


# Settings

The Settings tab is about setting up your bot.

<figure><img src="https://2786867680-files.gitbook.io/~/files/v0/b/gitbook-x-prod.appspot.com/o/spaces%2F-LLTwFwbOqJj4dDhg8Ju%2Fuploads%2FZmy9rFlsfgcCHpzdyERo%2FScreenshot%202024-06-05%20at%2016.32.40.png?alt=media&amp;token=075dfa36-ae08-41b8-9295-98319c0b2046" alt=""><figcaption></figcaption></figure>

{% content-ref url="/pages/-LLTwJAKsGK7dqVPq0Hc" %}
[Bot settings](/navigation/settings/settings)
{% endcontent-ref %}

{% content-ref url="/pages/8k1JfvdI55R4NFOHKIOt" %}
[Offloading](/navigation/settings/offloading)
{% endcontent-ref %}

{% content-ref url="/pages/-LelDACW5ZN6atVCsskJ" %}
[Variables](/navigation/settings/secure-variables-gdpr)
{% endcontent-ref %}

{% content-ref url="/pages/cRYTU1aLdv7CXs58Nsyv" %}
[Voice](/navigation/settings/voice)
{% endcontent-ref %}

{% content-ref url="/pages/CTyA75vvrlCS3jYGKUT8" %}
[Import/Export](/navigation/settings/import-export)
{% endcontent-ref %}


# Bot settings

The Bot settings page is where you configure your bot behaviour outside of its logic and NLP.

## Bot details

In **Bot betails** you see:

* The **Name** of your of bot.
* The **Primary** and **Extra languages**.
* The **Bot access** configuration, where you can change the number of people who have access to your bot.

{% hint style="success" %}
Explore the offered possibilities for [role-based access control and identity management](/support/access-control) in our platform.
{% endhint %}

<figure><img src="https://2786867680-files.gitbook.io/~/files/v0/b/gitbook-x-prod.appspot.com/o/spaces%2F-LLTwFwbOqJj4dDhg8Ju%2Fuploads%2FdpAVvSpfRHxjuPp4mgbx%2FScreenshot%202024-06-06%20at%2010.23.34.png?alt=media&amp;token=83d996ca-f8a1-4917-9efd-e91d343f48f4" alt=""><figcaption><p>Manage your Bot details.</p></figcaption></figure>

## Generative AI

Under Generative AI, you can turn on the generative AI features for your bot by using the toggle.

These features are:

* [Expression generation](/navigation/natural-language-processing-nlp/expressions#generate-expressions) for your NLP.
* [Knowledge base AI](/navigation/knowledge-base-ai).
* [AI intent booster](/nlp/natural-language-processing-nlp/ai-intent-booster) for small bots with a limited number of intents.

<figure><img src="https://2786867680-files.gitbook.io/~/files/v0/b/gitbook-x-prod.appspot.com/o/spaces%2F-LLTwFwbOqJj4dDhg8Ju%2Fuploads%2FcbU1Eqn8D1Jbwq3vfpQF%2FScreenshot%202024-06-06%20at%2011.22.28.png?alt=media&amp;token=0cc6aafd-3445-4e3a-9155-f585f5855ca6" alt=""><figcaption><p>Manage your Generative AI features.</p></figcaption></figure>

## Bot status

Click the status slider to temporarily disable the bot. The message configured under the **Bot disabled** block will be shown.

<figure><img src="https://2786867680-files.gitbook.io/~/files/v0/b/gitbook-x-prod.appspot.com/o/spaces%2F-LLTwFwbOqJj4dDhg8Ju%2Fuploads%2FkdfqTVVuqpHTekdt3P6t%2FScreenshot%202024-06-06%20at%2011.36.28.png?alt=media&amp;token=19145df0-8a7b-4998-9ec5-58fe0d622509" alt=""><figcaption><p>Enable/disable your bot.</p></figcaption></figure>

## Maximum message length

To avoid that messages that are too long are not understood, an authorized **Maximum message length** send by customers can be configured.

To set up a Maximum message length:

1. Toggle on the feature toggle.
2. Define a maximum number of characters.
3. Define a block where the bot will **Go to** when a user sends a message above that number of characters.
4. Click **Save** at the top right corner of the screen.

{% hint style="info" %}
A nice fallback message in this case could be text like: *I am sorry, I work best with shorter messages. Could you please rephrase that?*
{% endhint %}

<figure><img src="https://2786867680-files.gitbook.io/~/files/v0/b/gitbook-x-prod.appspot.com/o/spaces%2F-LLTwFwbOqJj4dDhg8Ju%2Fuploads%2FIjXXisorIliFsEd7EOSD%2FScreenshot%202024-06-06%20at%2011.39.56.png?alt=media&amp;token=b65d97fc-b10a-497b-bdb7-54d4127c8c6a" alt=""><figcaption><p>Manage the Maximum message length.</p></figcaption></figure>

## Bot behaviour

#### Typing Duration

The typing duration, or typing speed, is how fast the bot answers to the user. The higher the typing speed, the longer the user will see that the bot is typing before they receive an answer. The right typing speed can create a positive, more humanlike experience for the user.

The default typing speed is 500ms, but try out different speeds to see what is best for your bot.

#### Expression Syntax

Expression syntax enables advanced expressions that you can use throughout your bot's dialogs and flows. For detailed information on how to use expressions, see the [Expression Syntax documentation](/integrateandcode/expression-syntax).

<figure><img src="https://2786867680-files.gitbook.io/~/files/v0/b/gitbook-x-prod.appspot.com/o/spaces%2F-LLTwFwbOqJj4dDhg8Ju%2Fuploads%2F2tHavVg7GKx0qycSsEag%2FScreenshot%202026-07-14%20at%2012.28.46.png?alt=media&amp;token=7b9490cb-9943-4080-abf5-6b18730ec8f3" alt=""><figcaption></figcaption></figure>

## Language detection

You can use **Language detection** option to check if the user's language is supported by your bot.

* If the user's language is supported, the user will be routed to the **Introduction** block.
* If the language is not supported by the bot, the user will be routed to a block of your choosing.

{% hint style="warning" %}
Language detection will only appear in your Settings if your bot is [multilingual](/nlp/languages/multilanguage-bots).
{% endhint %}

{% hint style="warning" %}
Whenever the user types an expression in a language other than the [`preferredLanguage`](/nlp/languages/change-language-within-the-conversation) activated, the bot will not automatically switch to that language. If the expression is in a language that the bot knows, the expression will be processed and the bot will answer in the original `preferredLanguage`.
{% endhint %}

<figure><img src="https://2786867680-files.gitbook.io/~/files/v0/b/gitbook-x-prod.appspot.com/o/spaces%2F-LLTwFwbOqJj4dDhg8Ju%2Fuploads%2FxDvyE3Xo0UnWoG1jLcwS%2FScreenshot%202024-06-06%20at%2011.49.27.png?alt=media&amp;token=30491022-771e-4d8c-b2a7-d87c5823ec51" alt=""><figcaption><p>Enable language detection.</p></figcaption></figure>

## Danger zone (delete your bot)

This is where you can delete your bot.

<figure><img src="https://2786867680-files.gitbook.io/~/files/v0/b/gitbook-x-prod.appspot.com/o/spaces%2F-LLTwFwbOqJj4dDhg8Ju%2Fuploads%2FEn0mHZeVExEuU4vi2LeL%2FScreenshot%202024-06-06%20at%2013.20.31.png?alt=media&amp;token=aff88330-c268-40a5-bbe8-98e661e3a26a" alt=""><figcaption></figcaption></figure>


# Offloading

The Offloading page is where you can set up your human handover.

<figure><img src="https://2786867680-files.gitbook.io/~/files/v0/b/gitbook-x-prod.appspot.com/o/spaces%2F-LLTwFwbOqJj4dDhg8Ju%2Fuploads%2Fp2QNYo0h5Cd9Bwf0AMdy%2FScreenshot%202024-05-31%20at%2019.48.18.png?alt=media&amp;token=7ae14b48-a033-452d-be7c-93e325ba20a1" alt=""><figcaption></figcaption></figure>

{% content-ref url="/pages/-LLTwJAZ0MV5XwGoxZ6t" %}
[Human handover & live chat](/integrateandcode/human-offloading-live-chat)
{% endcontent-ref %}


# Variables

The Variables page is where you have an overview of all your variables.

Variables are used to store any information the bot knows about a user. This can be their preferred language, or the channel they're using, but also information coming from external data sources like, for example, an API.

All variables used in a single conversation are stored in what is called a [user session](/bot-answers/session).

<figure><img src="https://2786867680-files.gitbook.io/~/files/v0/b/gitbook-x-prod.appspot.com/o/spaces%2F-LLTwFwbOqJj4dDhg8Ju%2Fuploads%2FXi1rr5qphUynDLWQQWJN%2FScreenshot%202024-06-06%20at%2013.24.43.png?alt=media&amp;token=a4a81084-70e9-4ead-94ff-279be329d45d" alt=""><figcaption><p>The Variables pageL</p></figcaption></figure>

## Create a variable

To create a variable from the **Variables** page:

1. Click on **Create variable** at the top right corner of the screen.

<figure><img src="https://2786867680-files.gitbook.io/~/files/v0/b/gitbook-x-prod.appspot.com/o/spaces%2F-LLTwFwbOqJj4dDhg8Ju%2Fuploads%2Fy0uezE5HMsF6xYF5XcQ2%2FScreenshot%202023-09-12%20at%2011.51.53.png?alt=media&amp;token=5572e47d-ac13-4120-9e33-db335964c978" alt="" width="375"><figcaption><p>Create a variable from the Variables page</p></figcaption></figure>

2. A window pops up. Fill in the **Name**, **Default value** and **Description**.

{% hint style="info" %}
For example, a default value can be used for URL path ensures the chatbot can always fetch data or interact with external services correctly.
{% endhint %}

{% hint style="danger" %}
Note that default values are:

* Limited to string data types.
* Exported with the bot export. It means that variables along with their default values will be overwritten at import.
* If a variable has a default value on the LIVE version, publishing won't change it. If not, the DRAFT version's default value will be copied to the LIVE version.
* If you use a [Clear session](/buildabot/flow-logic/dialog-state/action-bot-dialog#clear-session) action, the value for a variable will be reset to its default value if it had been modified during the session.
  {% endhint %}

<figure><img src="https://2786867680-files.gitbook.io/~/files/v0/b/gitbook-x-prod.appspot.com/o/spaces%2F-LLTwFwbOqJj4dDhg8Ju%2Fuploads%2F3JmTArjZfAckM968gHXy%2Fimage.png?alt=media&amp;token=cd7f0416-c2fe-4419-9fe2-13f7e4fe331e" alt=""><figcaption><p>Example of a variable with a default value to call an API endpoint.</p></figcaption></figure>

3. Click on **Create variable**.

## Set a variable as sensitive

Chatlayer allows you to make sure that some variables are processed differently. This is useful when the conversation between a bot and a user contains **sensitive information**, such as the user's bank account number or anything GDPR-sensitive.

{% hint style="danger" %}
If you set your variable as sensitive, its value will never be shown in Chatlayer. Instead, users will see a placeholder. The real variable value can only be retrieved through an [API request](https://api.chatlayer.ai/v1/docs/#operation/getAllMessagesInConversation).
{% endhint %}

To define a variable as sensitive:

1. [Create a variable](#create-a-variable) or edit it using the **Edit** button.
2. Toggle on the **Sensitive** switch if you don't want this variable to be saved in the conversation history.
3. Click on **Create variable**.

<figure><img src="https://2786867680-files.gitbook.io/~/files/v0/b/gitbook-x-prod.appspot.com/o/spaces%2F-LLTwFwbOqJj4dDhg8Ju%2Fuploads%2FMBOjwTf8Zl0PXska7RFS%2FScreenshot%202023-09-12%20at%2011.52.11.png?alt=media&amp;token=7676b787-f9a8-4943-8df7-2d3acdefa6ea" alt="" width="375"><figcaption><p>Create a sensitive variable from the Variables page.</p></figcaption></figure>

## Operations on variables

You can perfom operations on your variables.

### Increment

If you want to incrementally increase the value of a variable, you can use the following steps:

1. Define a variable, for example `variableName`, and give it a numeric value such as `0`
2. At the point in the flow where you want to increment the value of `variableName`, enter variableName as the variable and `{variableName|increment}` as the value

This method will increase the value of counter by 1 each time, for example when a specific block is passed or a button is clicked.

{% hint style="info" %}
Incrementing a variable can be typically useful when you want to count how many times the user wasn't understood by the bot. Learn how to build a **Not Understood Counter** [here](https://docs.chatlayer.ai/tips-and-best-practices/not-understood-bot-dialog/not-understood-counter).
{% endhint %}

### Change the case

Variables and values are case-sensitive.

For example, `capitalVariable` will be regarded as a separate variable from`CapitalVariable`.

The same goes for values. If you check in a [Condition](/buildabot/flow-logic/dialog-state/plugins) block if a value for `variableX` is equal to `valueY` it will not be triggered if the value for `variableX` is equal to `valuey`

You can transform a value from upper case to lower case and vice versa by adding these modifiers to the value name:

```
{name|toUpperCase}
{name|toLowerCase}
{name|capitalize}
```

{% hint style="warning" %}
Note that [Expression syntax \[Beta\]](/integrateandcode/expression-syntax) allows you to get the flexibility to use code syntax functions in your bot without the need of extensive coding skills.
{% endhint %}


# Voice

The Voice tab under Settings is where you can choose a voice for your voicebot.

<figure><img src="https://2786867680-files.gitbook.io/~/files/v0/b/gitbook-x-prod.appspot.com/o/spaces%2F-LLTwFwbOqJj4dDhg8Ju%2Fuploads%2F8zb9XPM3V3jAsw2gzKLv%2FScreenshot%202024-05-31%20at%2019.52.40.png?alt=media&amp;token=823418f0-0d78-477f-a17e-04df1bc267a0" alt=""><figcaption><p>The Voice page.</p></figcaption></figure>

Learn everything about voicebots here:

{% content-ref url="/pages/-M1UufcEW5Dli0NgTILc" %}
[Voicebots](/voice/phone-and-voice)
{% endcontent-ref %}


# Import/Export

The Import/Export tab under Settings is where you can download or upload a bot file.

Ont the **Import/Export** page, you export and import your bot as a JSON file.

Depending on the size of your bot, the export could take up to 30 minutes to finalize. As soon as the export is ready, you will be able to download it as a JSON file.

Importing a bot can take up to 30 minutes. The uploaded file will be imported to the DRAFT version of the bot.

{% hint style="danger" %}
Importing a bot will overwrite the current version of your bot. There is no way to recover a previous version of the bot.
{% endhint %}

<figure><img src="https://2786867680-files.gitbook.io/~/files/v0/b/gitbook-x-prod.appspot.com/o/spaces%2F-LLTwFwbOqJj4dDhg8Ju%2Fuploads%2FoxIYOO3oqHdXV9Obr4pi%2FScreenshot%202024-05-31%20at%2019.54.14.png?alt=media&amp;token=cc264163-eef2-4eb6-a53b-8ecfa0dd29d4" alt=""><figcaption><p>The Import/Export page.</p></figcaption></figure>

## What contains the Export

The **Export** of your bot will include:

* The NLP data (including translations), i.e:
  * Intents
  * Expressions
  * Entities
* The Blocks:
  * Flows
  * Messages and their translations
  * Variables

The **Export** will not include:

* Analytics data
* Conversation history
* Error logs
* Older bot versions
* Channel or offloading configuration
* Tables


# Conversation design

Conversation design is the action of creating and maintaining chatbots, or automated conversational agents. Chatlayer allows you to do that without any coding skills.

## Chatbot

A chatbot (or *bot*) is an automated conversational agent that uses artificial intelligence to understand and respond to customers' requests in human language. It can take the form of a bot that writes to customers over chat (*chatbot*) or one that talks to them over a phone call (*voicebot*), although chatbot is the commonly accepted term for both.

<figure><img src="https://2786867680-files.gitbook.io/~/files/v0/b/gitbook-x-prod.appspot.com/o/spaces%2F-LLTwFwbOqJj4dDhg8Ju%2Fuploads%2FSuQ1v0MxaumPD38FjHdI%2Fezgif.com-gif-maker.gif?alt=media&amp;token=05ddeba1-2813-4618-8de5-a4b0ed316018" alt="" width="236"><figcaption><p>A retail chatbot in action.</p></figcaption></figure>

Chatbots are a great tool that let your business automate simple tasks like answering frequently asked questions, getting a customer's contact details, or redirecting them to the right support agent. So with the chatbot's help, your team can focus on the important tasks!

Chatlayer allows you to build your bot without any programming knowledge, in a user-friendly and intuitive way. You can use a template that can help you get started faster or build a bot from scratch. Either way, setting up a basic chatbot will take just a few minutes.

## Conversation design

Designing the way a chatbot converses is called conversation design. It's a combination of technology, psychology, and language that takes into consideration both human and technological limitations and possibilities to create the most intuitive conversational user experience possible.

<figure><img src="https://2786867680-files.gitbook.io/~/files/v0/b/gitbook-x-prod.appspot.com/o/spaces%2F-LLTwFwbOqJj4dDhg8Ju%2Fuploads%2F2IiwCZdox5EXYyKvHNKO%2FScreenshot%202024-01-30%20at%2016.09.57.png?alt=media&amp;token=487ac85c-8705-47f9-9cf2-a67816ddf595" alt="" width="563"><figcaption><p>Example of a conversation design flowchart.</p></figcaption></figure>

In other words, conversation design is about creating conversations between human and machine that feel as natural as possible.

Designing a chatbot is a step-by-step workflow that conversation designers iterate on.

{% content-ref url="/pages/-MMLea9CIwmkkEGYYV4x" %}
[Plan your bot](/buildabot/conversation-design/getting-started)
{% endcontent-ref %}

{% content-ref url="/pages/RqpmkVvQSyeLg3uL4FF3" %}
[Conversation design workflow](/buildabot/conversation-design/conversation-design-workflow)
{% endcontent-ref %}

{% content-ref url="/pages/-MRJsYZcUG8JCkxBzP3r" %}
[Broken mention](broken://pages/-MRJsYZcUG8JCkxBzP3r)
{% endcontent-ref %}


# Plan your bot

Before you start building your bot on Chatlayer, there are a few strategic steps to consider. From defining the use cases to crafting a bot personality – here's how to get started.

Planning your bot is a crucial step in the[ conversation design workflow](/buildabot/conversation-design/conversation-design-workflow). Think of your bot as a product that needs a *why*, *what, who, where* and *how*. Bot planning unfolds in 3 main steps:

1. [Setting the requirements](#id-1.-set-the-requirements)
2. [Understanding the technology at hand](#id-2.-understand-your-tech)
3. [Making a flowchart](#id-3.-make-a-flowchart)

## 1. Set the requirements

Setting the bot requirements means establishing a design brief that details the core expectations and details of your bot project for your brand. The bot requirements define the *why*, *what* and *who* of your bot.

### Business goal

Before you can start building your bot, you need to know *why* you are building the bot. Implementing a chatbot usually means that you would like to automate an existing service so that you reach a certain business goal.

To define your business goal(s), ask yourself:

* *How is this bot going to benefit your customers?*
* *What is the current experience like, and how could a bot help improve it?*
* *Where does this happen in the user journey?*

{% hint style="info" %}
Problem statements can be helpful when defining business goals. It's a simple exercise that helps you to understand if the idea behind your concept is viable.

A problem statement goes like this:

* *As a \_\_\_\_\_ I need \_\_\_\_\_\_ because\_\_\_\_\_.*
* Example: *As a person who bought something online, I need a quick and easy way to know where my package is, because going through my emails takes too long*.
  {% endhint %}

Some examples of business goals:

* A service-oriented bot for clients to deal with technical issues of their bikes
* A bot to track orders
* An FAQ bot that generates leads
* A bot for a retail business to help customers with returning items so that customer satisfaction is increased

{% hint style="info" %}
Defining the bot goals and use cases should be done in collaboration with all stakeholders, including the bot builders, the teams the bot will support, management, and ideally even customers.
{% endhint %}

### Use cases

Now that you've figured the *why* of the bot, it's time for the *what*. This means translating your bot goals into concrete use cases, or end-user problems that your bot will handle.

To define your use cases, ask yourself:

* What is your bot going to help your customers with?
* What is your bot *not* going to help your customers with?

{% hint style="info" %}
It is crucial that you figure your bot use cases *before* you start building your bot, otherwise you’ll try and build a bunch of things at the same time, spreading yourself too thin, not creating a good user experience. Our advice? Prioritize your ideas, pick the two or three most important use cases to get started, and add more later.
{% endhint %}

Here are some good examples of use cases:

* Make a reservation
* Close an account
* Recommend new products
* Book a flight
* Show local promotions
* Process a return

{% hint style="success" %}
Based on our experience and customers, we already have a bunch of [template bots](https://docs.chatlayer.ai/tips-and-best-practices/bot-templates?q=templates) that you can easily download and modify. They target many industries, from E-Bikes, to Commerce and Restaurant, so you will surely get some inspiration there.
{% endhint %}

### User personas

In order to design an experience that feels natural and intuitive, you need to know who you’re designing your bot for. To help you in the conversation design process, keep in mind your user personas, i.e. descriptions of fictive prototypical end-users that represent a certain part of your audience.

{% hint style="info" %}
User personas shouldn't be invented, they are based on real user research. Check with UX or marketing department to find them.
{% endhint %}

<figure><img src="https://2786867680-files.gitbook.io/~/files/v0/b/gitbook-x-prod.appspot.com/o/spaces%2F-LLTwFwbOqJj4dDhg8Ju%2Fuploads%2FvnVz03l69YRMw7wyJOOu%2FScreenshot%202024-01-31%20at%2015.57.22.png?alt=media&amp;token=db63cdb1-518c-4fb7-8f25-80609c257966" alt=""><figcaption><p>Example of a user persona.</p></figcaption></figure>

When defining user personas, ask yourself:

* *Who is this user that will engage with your bot?*
* *What do they want?*
* *How are they feeling at each point of the conversation?*
* *What’s their backstory?*
* *Their challenges?*
* *Their motivations?*
* *How familiar are they with your business?*
* *How familiar are they using bots in general?*

{% hint style="info" %}
As human beings, we adapt our language and ways of communication to the people we talk to. Therefore, to make sure your chatbot interactions feel natural and nice, *always* define your user personas *before* your define your bot persona.
{% endhint %}

### Bot persona

So how can you make sure your users connect with your chatbot and that the conversation is engaging and representative of real human interaction? By giving your chatbot a clear personality.

<figure><img src="https://2786867680-files.gitbook.io/~/files/v0/b/gitbook-x-prod.appspot.com/o/spaces%2F-LLTwFwbOqJj4dDhg8Ju%2Fuploads%2FzFrmHfe2q2V2XuIlpA35%2FScreenshot%202024-01-31%20at%2012.23.24.png?alt=media&amp;token=cbb5ed3c-8601-4a78-a626-06fb3405e9b0" alt=""><figcaption><p>Your chatbot persona should lie at the intersection between your purpose, brand, and users. (c) <a href="https://tesstettelin.medium.com/how-to-design-your-chatbots-personality-free-download-dd9eeccffbb9">Tess Tettelin</a></p></figcaption></figure>

A good bot persona is based on insights of:

* Your user personas
* Your purpose or business goal
* Your brand: if you can, use your company branding as a starting point and build on it. Remember that your bot represents your brand for your users as they know it!

{% hint style="info" %}
As human beings, we adapt our language and ways of communication to the people we talk to. Therefore, your bot persona should *always* be based on your user personas. That way, you ensure that your users will feel like the conversation is natural.
{% endhint %}

<figure><img src="https://2786867680-files.gitbook.io/~/files/v0/b/gitbook-x-prod.appspot.com/o/spaces%2F-LLTwFwbOqJj4dDhg8Ju%2Fuploads%2FL9YKde02jZt1rxFUIzU5%2FScreenshot%202024-01-31%20at%2016.26.55.png?alt=media&amp;token=cbb2e42c-a4f9-4a79-a610-35a8b8fb36f3" alt=""><figcaption><p>Example of a bot persona.</p></figcaption></figure>

When defining a bot persona, ask yourself:

* *How is your bot going to speak and behave, taking into account your user group expectations?*
* *What’s the bot avatar like? Is it female, male, genderless, an animal? Human or abstract?*
* *Which register will it use, i.e. what's the bot-user relationship? Does your bot behave like an advisor? A coach? Something else?*
* *What's the bot chatting style? Does it use emojis? Punctuation? How long will it take your bot to type an answer?*

{% hint style="info" %}
The user persona will determine what kind of conversational partner your users are looking for. The risk of going without a bot persona is that you can bring your users to the uncanny valley (when very human-like but not so likeable). This will make your bot less consistent, likeable, and trustworthy.
{% endhint %}

## 2. Understand your tech

Now that you know the why and the what of your bot, it’s important to define the *where*: where will your users interact with your bot, and how will their data be stored?

### Get familiar with Chatlayer

You already chose a bot building platform, Chatlayer, congratulations! Get a bit familiar with it before you go further in the bot building process, so that you already have an introduction to its components.

{% content-ref url="/pages/hmqJy3fBdWwIavmO9DJk" %}
[Broken mention](broken://pages/hmqJy3fBdWwIavmO9DJk)
{% endcontent-ref %}

### Channel restrictions

Defining channels early in the bot development process is vital since they don't all offer the same features.

{% hint style="info" %}
Channels have different feature restrictions. A bot that talks to your users via SMS won’t be able to use as many characters as a bot that only communicates via web. Make sure you [compare channels](https://docs.chatlayer.ai/channels/multi-channel#channel-comparison) before choosing one.
{% endhint %}

### Handover

Since your bot will never be able to answer just *anything*, it's crucial that it has a way so that customers can be offloaded to a human when they need to.

When considering handover, ask yourself:

* *How is the user identified when talking to the bot?*
* *What are the different handover options, and when do we want each option?*
* *Who in the team is going to take action when customers are offloaded?*

### Operational context

Ask yourself the right question about who is going to do what in your chatbot team. Maybe a single conversation designer will manage everything, maybe you'd like to chunk the work in different people. Who do you need and what do you need them for?

### Technical requirements

Next, get a better understanding of the bot's technical and functional requirements and other.

For technical requirements, think about:

* *What data the bot will need?*
* *Where from?*
* *How it will access that data?*

For functional requirements, a valuable approach is to look at previous customer conversations in, for example, conversation history and social media interactions. These conversations will give further insight into your customers' needs and ways of communicating them which allow you to handle their requests successfully.

## 3. Make a flowchart

Now it's time to visualize what the conversation with your bot should look like. To do this, conversation designers typically make flowcharts.

A flowchart is a digital map that details for each use case, each step that is necessary for the conversation to flow from start to end. Flowcharts can be really long since they should represent all the possibilities in your conversation.

<figure><img src="https://2786867680-files.gitbook.io/~/files/v0/b/gitbook-x-prod.appspot.com/o/spaces%2F-LLTwFwbOqJj4dDhg8Ju%2Fuploads%2FrKmD85K0cxte44bYn9ho%2FScreenshot%202024-01-31%20at%2016.53.54.png?alt=media&amp;token=d33d9048-1380-46ac-86e4-1a3a238404a9" alt=""><figcaption><p>Example of a piece of a bot flowchart made in Figjam.</p></figcaption></figure>

{% hint style="info" %}
Tools like [Miro](https://miro.com/) or [Figjam](https://www.figma.com/fr/figjam/team-collaboration/) can be very helpful to draw flowcharts and share them with your team.
{% endhint %}

Yet, making a flowchart doesn't just start from anywhere. Fist you make a happy flow, then you add edge cases and ways to manage errors.

### Happy flow

A happy flow is a flow where everything runs the way it’s supposed to run. The conversation is natural and smooth, and the user reaches their goal in as little steps as possible. Many conversation designers start with the happy flow because it’s the flow of least resistance.

{% hint style="info" %}
Don't know where to start to draft your flows? Have two people sit back-to-back and improvise a conversation around a use case, with one person playing the user and the other playing the bot.
{% endhint %}

Before drawing anything on your chart, consider the following elements, including your bot and user personas:

* Setting the scene: physical, social, time, emotional, i.e. *when/how are the users going to interact with this bot?*
* User needs: *what’s the motivation behind the goal of the user? What are their expectations and anxieties?*
  * motivation: e.g. *calling on the phone takes more time.*
  * goal: e.g. *I want to book a flight.*
  * expectation: e.g. *this chatbot can book flights.*
* Bot needs: *what's the motivation of the bot to help users?*

<figure><img src="https://2786867680-files.gitbook.io/~/files/v0/b/gitbook-x-prod.appspot.com/o/spaces%2F-LLTwFwbOqJj4dDhg8Ju%2Fuploads%2F6cpSIVBaIWXwSInWgjVV%2FScreenshot%202024-01-31%20at%2016.47.38.png?alt=media&amp;token=31d1aaf1-7c60-4f61-b4a9-ad060d6e9320" alt=""><figcaption><p>Example of a happy flow for a restaurant bot?</p></figcaption></figure>

{% hint style="info" %}
Once you scripted your happy flow, do some Wizard of Oz (WOZ) testing. Take the script of all the blocks, and sit back to back to someone who pretends to be the user. The goal of this testing is to point out to what needs improvement.
{% endhint %}

### Edge cases

We humans are curious human beings and we say the darnest things. We have individual preferences and have endless ways of saying the same thing. We need to make sure that a chatbot can handle those quirks.

After writing the happy flows, write out the most likely ways a user might go off track and how you’re going to deal with that. Your wizard-of-oz testing will really help you pinpoint those pain points, as well as some basic user testing.

<figure><img src="https://2786867680-files.gitbook.io/~/files/v0/b/gitbook-x-prod.appspot.com/o/spaces%2F-LLTwFwbOqJj4dDhg8Ju%2Fuploads%2FDeSRmRk9rxIg4zR02PGV%2FScreenshot%202024-01-31%20at%2017.03.49.png?alt=media&amp;token=6b6cf1af-64d2-474a-990d-2e77fdb4bfbe" alt=""><figcaption><p>The happy flow with some edge cases for a restaurant bot.</p></figcaption></figure>

{% hint style="success" %}
You can find frequently asked questions as [prebuilt intents ](https://docs.chatlayer.ai/understanding-users/natural-language-processing-nlp#intent-pack)packs in our platform's NLP section. These intents are predefined and come with their own expressions, which means you can use them straight away!
{% endhint %}

Some examples of edge cases for restaurant bot:

* What if a user asks your bot how it’s doing?
* What if they as for a gluten-free option?
* What if they want to know if your packaging is recyclable?
* What happens if the user wants to book a table for nine and one person is in a wheelchair?

### Error management

AI is good, but still not as good as our human brains. The technology is not yet capable of understanding everything a person says well enough in order to reply in a correct way. No matter how well your chatbot is trained, it will most likely fail at one point and that’s okay. It’s all about how you deal with such errors that can make or break a user experience.


# Conversation design workflow

Go over the bot design process step by step, from planning to publishing.

Conversation design is about building and maintaining chatbots. Learn more here:

{% content-ref url="/pages/mpXraHKLeRYz6821AeNL" %}
[Conversation design](/buildabot/conversation-design)
{% endcontent-ref %}

<figure><img src="https://2786867680-files.gitbook.io/~/files/v0/b/gitbook-x-prod.appspot.com/o/spaces%2F-LLTwFwbOqJj4dDhg8Ju%2Fuploads%2FXmEJ5iS3nEvD98oSyHKF%2FScreenshot%202024-01-30%20at%2016.18.10.png?alt=media&amp;token=f763fdb8-8e4f-43a8-82b2-9b0962c557a3" alt=""><figcaption><p>The chatbot design workflow.</p></figcaption></figure>

## **1.** Plan

Planning your bot right is crucial to be efficient. This step encompasses:

* Defining your goals
* Exploring your tech
* Designing your flowchart

## 2. Build

Now it's time to actually build your bot in Chatlayer. This means:

* translating all of the steps you outlined in your design to the right blocks in Chatlayer
* writing the full text for all of the bot messages

At the end of this stage you should have a first version of your bot ready for testing.

{% content-ref url="/pages/hmqJy3fBdWwIavmO9DJk" %}
[Broken mention](broken://pages/hmqJy3fBdWwIavmO9DJk)
{% endcontent-ref %}

## 3. Test and improve

Test the first version of your bot thoroughly. Do not rely only on the bot builders themselves but also include people who were not involved. Advise testers to:

* Go through each of the flows multiple times
* Try all possible combinations of choices within the conversation
* Try to trigger all bot messages to detect any bugs, spelling mistakes, or points where users might get stuck.

Make sure any issues testers find are resolved before publishing the bot.

## 4. Publish

Once issues have been resolved, you are ready to put your bot live. In the first few weeks after going live, closely monitor the traffic on your bot. This will not only give you insight into how many people are using the bot and how often but also allow you to identify key areas for improvement. By monitoring and analyzing user conversations it is possible to:

* Identify if the bot is performing as intended: is it able to successfully help customers with the intended use cases, without any errors?
* Reveal if users have any requests the bot is not yet set up to handle. If many users have such requests, it might be a good idea to expand your bot's scope and add extra use cases in the future.

Remember that conversation design is an iterative processes and a chatbot always remains a work in progress to meet new customer demands. Therefore, it is important to continually monitor your customer conversations and periodically revisit these steps to improve the experience.

## 5. Iterate

You would like to add a new use case to your chatbot? Go through the same steps and iterate to make your bot even better!


# Flow logic

Any conversation flow on Chatlayer is made by components called blocks, linked together by connections called Go-to's.

{% content-ref url="/pages/-LLTwJAGSxQiMtCscw8-" %}
[Blocks](/buildabot/flow-logic/dialog-state)
{% endcontent-ref %}

{% content-ref url="/pages/TWIc45k5Q41VPyG4rOvP" %}
[Go-to connections](/buildabot/flow-logic/go-to-connections)
{% endcontent-ref %}


# Blocks

Blocks are the rectangles on your canvas that represent a certain place in the conversation.

Chatlayer offers multiple block types serving different functionalities. On your bot canvas, the blocks appearing are either:

* Build by yourself by choosing out of our available [block types](#block-types).
* [Default](#default-blocks) blocks existing for any bot on Chatlayer.

## Block types

There are 4 kinds of blocks that you can choose from to build your flows. Each block type comes with its own colour and functionalities.

The blocks menu is available on the left-hand side of your [bot canvas](/navigation/bot-builder/flows).

<figure><img src="https://2786867680-files.gitbook.io/~/files/v0/b/gitbook-x-prod.appspot.com/o/spaces%2F-LLTwFwbOqJj4dDhg8Ju%2Fuploads%2FZvp3x32CbEGFipeitaQh%2FScreenshot%202024-01-25%20at%2011.54.10.png?alt=media&amp;token=67a2bbf9-6db2-4edc-bcf5-cd2dd90c5923" alt="" width="96"><figcaption></figcaption></figure>

### Message

Any message a bot is sending to a user is what we call a bot message. This includes text messages, buttons, quick replies, etc.

{% content-ref url="/pages/-LLTwJAHL2ERL5kp1bHx" %}
[Message](/buildabot/flow-logic/dialog-state/message-components)
{% endcontent-ref %}

### Condition

If you want to add rules to determine where a user is guided to, based on the value of a variable, you can do it with this block type.

{% content-ref url="/pages/-LLTwJAIjPPN\_qaMXi5S" %}
[Condition](/buildabot/flow-logic/dialog-state/plugins)
{% endcontent-ref %}

### Collect input

Use Collect input blocks to gather input from your users.

{% content-ref url="/pages/-LV38yKP7fk4ExBsXHfF" %}
[Collect input](/buildabot/flow-logic/dialog-state/user-input-bot-dialog)
{% endcontent-ref %}

### Action

Action blocks are where 3rd-party, coding logic or special operations can be added to your bot.

{% content-ref url="/pages/-LV3979rV56-MLUQqpS0" %}
[Action](/buildabot/flow-logic/dialog-state/action-bot-dialog)
{% endcontent-ref %}

### Intent

Intent blocks represent an [intent](/navigation/natural-language-processing-nlp/intents) from the user.

{% content-ref url="/pages/AeMkT81FoAUHUZn3TRDA" %}
[Intents](/navigation/natural-language-processing-nlp/intents)
{% endcontent-ref %}

## Default blocks

When you create a bot from scratch on Chatlayer, a few predefined blocks appear in your General flow:

<figure><img src="https://2786867680-files.gitbook.io/~/files/v0/b/gitbook-x-prod.appspot.com/o/spaces%2F-LLTwFwbOqJj4dDhg8Ju%2Fuploads%2FSkuD96i0zu7pJ3ijCsP8%2FScreenshot%202024-06-24%20at%2015.56.02.png?alt=media&amp;token=9eebefb9-73c0-4ef7-8575-6cbfe1c1b5e7" alt=""><figcaption><p>Default blocks.</p></figcaption></figure>

* [Not understood](https://docs.chatlayer.ai/tips-and-best-practices/not-understood-bot-dialog)**:** a block show when your bot didn't understand the user.
* [Introduction](https://docs.chatlayer.ai/tips-and-best-practices/not-understood-bot-dialog)**:** the first message that is send to the user to open the conversation.
* **Error occurred**: a block triggered when an API integration fails to complete a certain request, or when Chatlayer considers your bot to be blocked in a loop.
* **Block disabled**: appears when you disable your bot in the [**Settings**](/navigation/settings/settings).

{% hint style="success" %}
Not sure where to go from there? We've got you covered with our [Leadzy](/start-quickly/leadzy-tutorial) tutorial.
{% endhint %}

## Blocks view

Chatlayer offers two different views of your block, where you can configure what the bot will answer to a user.

### Flows view

The [Flows](https://docs.chatlayer.ai/buildabot/bot-navigation/bot-builder/flows) view displays your flows on the bot canvas in a tree-like visual.

To access the Flow view:

1. Open your bot.
2. Under the **Bot builder** tab, click on [**Flows**](https://docs.chatlayer.ai/buildabot/bot-navigation/bot-builder/flows).

<figure><img src="https://2786867680-files.gitbook.io/~/files/v0/b/gitbook-x-prod.appspot.com/o/spaces%2F-LLTwFwbOqJj4dDhg8Ju%2Fuploads%2Fnr7YQgkbG2SSzRYOsQ1D%2FScreenshot%202024-06-24%20at%2015.57.31.png?alt=media&amp;token=5019e093-d0a6-4c66-9344-80abb8018927" alt=""><figcaption><p>Visualize your bot canvas under Flows.</p></figcaption></figure>

### Bot dialogs view

In the [Bot dialogs](https://docs.chatlayer.ai/buildabot/bot-navigation/bot-builder/bot-dialogs-view) view, you can visualize your blocks as a table, which is helpful for searching, filtering and sorting blocks.

{% hint style="info" %}
You can filter the Bot dialogs view based on many filters. Learn more [here](https://docs.chatlayer.ai/buildabot/bot-navigation/bot-builder/bot-dialogs-view).
{% endhint %}

<figure><img src="https://2786867680-files.gitbook.io/~/files/v0/b/gitbook-x-prod.appspot.com/o/spaces%2F-LLTwFwbOqJj4dDhg8Ju%2Fuploads%2FT6Ikj5llrb9YILbfOwzI%2FScreenshot%202024-06-24%20at%2016.02.19.png?alt=media&amp;token=e4a1b9db-869f-4e2d-8cd3-ae6f455af612" alt=""><figcaption><p>Bot dialogs view.</p></figcaption></figure>

## Block settings

You can modify your block when you open it, either under the **Settings** tab or the **NLP** tab.

### General settings

To access your block general settings:

1. Open your block.
2. At the top of the windown, click on the **Settings** tab. From there, you can access and modify different pieces of information.

<figure><img src="https://2786867680-files.gitbook.io/~/files/v0/b/gitbook-x-prod.appspot.com/o/spaces%2F-LLTwFwbOqJj4dDhg8Ju%2Fuploads%2Fbr5kI3Mz4b9auBJELw8X%2FScreenshot%202024-06-24%20at%2016.04.07.png?alt=media&amp;token=32dadf2a-d444-445a-948f-4baf8628046a" alt="" width="337"><figcaption><p>Modify your block's settings inside the block.</p></figcaption></figure>

#### Block name

Your block name.

#### Type

Your block type.

#### Flow

The specific [flow or subflow](/navigation/bot-builder/flows/manage-your-flows) where your block is stored.

#### Label

You may use the **Label** field as a custom identifier for your block when integrating solutions through the [Webhook](/channels/all-channels/webhook-api) Channel API .

For example: say you want to store the number of times some specific block ( eg. `Greeting Message` ) has been triggered. You have added a custom label to that block (eg. `messages_greeting`). Now if you delete the `Greeting Message` and recreate it, its unique identifier on the Chatlayer side will change, but you could still add `messages_greeting` as the custom label again.

If you use this custom label in your system to check if the block has been triggered then nothing on your side needs to be changed, just make sure the label of the recreated block is the same as the label of the block you deleted.

#### Parent

In this field, you can define a [Parent](https://docs.chatlayer.ai/buildabot/bot-navigation/bot-builder/bot-dialogs-view) block.

{% hint style="info" %}
The parent block and the child block should be in the same flow.
{% endhint %}

#### ID

This is the ID associated with the block. You can use this to debug your bot using the Emulator.

### NLP settings

To access your block NLP settings:

1. Open your block.
2. At the top of the windown, click on the **NLP** tab. From there, you can access and modify different pieces of information.

<figure><img src="https://2786867680-files.gitbook.io/~/files/v0/b/gitbook-x-prod.appspot.com/o/spaces%2F-LLTwFwbOqJj4dDhg8Ju%2Fuploads%2FtS2xS1oGtKBIIpRwEsJp%2FScreenshot%202024-06-24%20at%2016.09.06.png?alt=media&amp;token=b029353e-5446-4620-88db-ae2dc6d046a2" alt="" width="332"><figcaption><p>Modify the NLP settings of a block.</p></figcaption></figure>

#### Give output context & lifespan

Here, you can select an output context for your bot if you wish to re-use the same intent at different points in the conversation. Learn more about context and lifespan below:

{% content-ref url="/pages/-LLTwJAa6dAUSXOPdl1g" %}
[Context](/nlp/natural-language-processing-nlp/using-context)
{% endcontent-ref %}


# Message

The Message block displays text in basic form or with special components like buttons or carousels.

Add a Message block by [dragging and dropping it](https://docs.chatlayer.ai/buildabot/bot-navigation/bot-builder/flows/canvas-functionalities#drag-and-drop) to your flow.

<figure><img src="https://2786867680-files.gitbook.io/~/files/v0/b/gitbook-x-prod.appspot.com/o/spaces%2F-LLTwFwbOqJj4dDhg8Ju%2Fuploads%2FPJIl1HTZOSfhyWDDWqEu%2FScreenshot%202024-06-24%20at%2016.11.56.png?alt=media&amp;token=cf9ded9a-a4b2-4454-b8a8-6932e5ba0067" alt=""><figcaption><p>The Message block.</p></figcaption></figure>

## Character limits

Chatlayer indicates how many characters are still allowed on the bottom-right corner of any text field.

The only exception is for [**Carousels**](#carousel), which show the number of characters that you already enter and not the character limit.

<figure><img src="https://2786867680-files.gitbook.io/~/files/v0/b/gitbook-x-prod.appspot.com/o/spaces%2F-LLTwFwbOqJj4dDhg8Ju%2Fuploads%2F9nY5EjUU17esyjaJ0AOZ%2FScreenshot%202024-06-24%20at%2016.13.54.png?alt=media&amp;token=a5ddd1f6-e4f7-4649-b7b1-0e0290a16255" alt="" width="327"><figcaption><p>Write Message block by respecting the character limits indicaetd.</p></figcaption></figure>

{% hint style="warning" %}
Please note that for Facebook Messenger, limits are strict to 20 characters for a [button](#buttons) label. If your button label is bigger, it will be cut off and displayed with three dots. Learn more about our [channels limitations](https://developers.sinch.com/docs/conversation/message-types/).
{% endhint %}

{% hint style="info" %}
For all other channels, the character limit is based on best practices. We recommend using less characters than the limit, but it's not mandatory.
{% endhint %}

## Message steps <a href="#text" id="text"></a>

### Text message

Text messages are the most simple components. Most channels will show them as speech bubbles.

<figure><img src="https://2786867680-files.gitbook.io/~/files/v0/b/gitbook-x-prod.appspot.com/o/spaces%2F-LLTwFwbOqJj4dDhg8Ju%2Fuploads%2F9nY5EjUU17esyjaJ0AOZ%2FScreenshot%202024-06-24%20at%2016.13.54.png?alt=media&amp;token=a5ddd1f6-e4f7-4649-b7b1-0e0290a16255" alt="" width="327"><figcaption><p>Text message step.</p></figcaption></figure>

### Buttons

Buttons are a useful way to guide the conversation by giving the user a limited set of options. You can add a maximum of three buttons to a message, with different [button types](#button-types).

<figure><img src="https://2786867680-files.gitbook.io/~/files/v0/b/gitbook-x-prod.appspot.com/o/spaces%2F-LLTwFwbOqJj4dDhg8Ju%2Fuploads%2FEBvbVILwLnIPJgzJyH4B%2FScreenshot%202024-06-24%20at%2016.25.26.png?alt=media&amp;token=c9778e36-35d1-4930-ad26-79e18bcde291" alt="" width="328"><figcaption><p>Buttons step.</p></figcaption></figure>

<details>

<summary>Button types</summary>

There are 4 different types of buttons:

* **Go to**: When this button is clicked, the conversation goes to a new block. Optionally, you can add key-value combinations to a button. These will set variables depending on which button the user has clicked. These variables can then later be used to route blocks, do an API call or render specific text.
* **URL**: you can link a button to an external URL.
* **Call**: this button will initiate a call if the user is using a mobile device.
* **Webview**: this button will open a webview (or a new browser window depending on the channel) with the configured URL as target. The parameters you configure for this button will be JSON stringified and appended to the URL as a Base64 encoded string. It is possible to decode this string using the `atob` JavaScript function.

<img src="https://2786867680-files.gitbook.io/~/files/v0/b/gitbook-x-prod.appspot.com/o/spaces%2F-LLTwFwbOqJj4dDhg8Ju%2Fuploads%2FkrEjFvekEsCYqpLmbHA9%2FScreenshot%202024-02-06%20at%2013.03.11.png?alt=media&amp;token=6927b8a4-d82b-42cd-aa81-50260fe3ee72" alt="Button types on Chatlayer" data-size="original">

</details>

### Media

With the **Media** step, you can enable the bot to send files to your users.

<figure><img src="https://2786867680-files.gitbook.io/~/files/v0/b/gitbook-x-prod.appspot.com/o/spaces%2F-LLTwFwbOqJj4dDhg8Ju%2Fuploads%2F1aBSaS7YCTuNGt2jflRo%2FScreenshot%202024-12-03%20at%2015.02.29.png?alt=media&amp;token=2e511e9d-2528-4553-83b0-ea3880aa9ade" alt="" width="375"><figcaption><p>Media step.</p></figcaption></figure>

<details>

<summary>Media types</summary>

* **Images**: all typical image types, such as jpg, png and gif are supported on our platform.
* **Video**: videos are available in the [Emulator](/buildabot/emulator), [W](/channels/all-channels/web/web-v2)[eb ](/channels/all-channels/web/web-v2)and Facebook channel. Check [this article](https://docs.chatlayer.ai/support/solving-bot-issues/3.-media-upload-not-working) to add videos to your bot. The following video formats are supported:
  * mp4
  * ogv
  * webm
* **Audio**: the audio media is available in the [Emulator](/buildabot/emulator), the [Web](/channels/all-channels/web/web-v2) channel and [Facebook Messenger](/channels/all-channels/facebook). Currently we only support MP3 as an audio format.
* **Files**: file attachments are available in [Facebook Messenger](/channels/all-channels/facebook). Currently, only PDF is supported. If you upload the file directly in the platform, there is a file size limit of 10 MB. If you use a direct URL to the file, there is no file size limit.

</details>

{% hint style="warning" %}
Are you having trouble adding an external video to your bot? Check out [this ](https://docs.chatlayer.ai/tips-and-best-practices/solving-bot-issues/3.-media-upload-not-working)article.
{% endhint %}

{% hint style="warning" %}
Ensure that you remove space from media files that are uploaded, this could cause it not to be displayed correctly.
{% endhint %}

{% hint style="info" %}
We recommend media files shared on Facebook Messenger to be below 5 MB in size, as Facebook seems to have trouble in handling files larges with acceptable performance.
{% endhint %}

### Quick replies

Quick replies behave similarly to buttons. They are shown horizontally next to each other in a scrollable container. This means that you can add as many quick replies as you think necessary.

<figure><img src="https://2786867680-files.gitbook.io/~/files/v0/b/gitbook-x-prod.appspot.com/o/spaces%2F-LLTwFwbOqJj4dDhg8Ju%2Fuploads%2FhzftTG0WBHnKTB1Fk9Bo%2FScreenshot%202024-06-24%20at%2016.26.41.png?alt=media&amp;token=a3cb5ec0-5e38-484d-bff7-a6c6fe340642" alt="" width="330"><figcaption></figcaption></figure>

<details>

<summary>Quick replies settings</summary>

* **Icon**: optionally, you can add an icon to a quick reply by specifying its URL.
* **Go to**: for each Quick reply, you need to define a next block to visit in the flow. In other words, you'll create a [Go-to connection](/buildabot/flow-logic/go-to-connections).
* **Variables**: optionally, [variables](/navigation/settings/secure-variables-gdpr) can be set depending on which button the user has clicked. These variables can then later be used to route blocks, make an API call or render specific text.

</details>

{% hint style="info" %}
Note that **Quick replies** only link to another block. To link your button to anything else, use [**Buttons**](#buttons).
{% endhint %}

### Carousel

Carousels are a way to visualize options, with or without images and buttons.

Buttons in Carousels are the same as regular [**Buttons**](#buttons) and use the same properties like payloads and URL, with the addition of an extra share button.

<figure><img src="https://2786867680-files.gitbook.io/~/files/v0/b/gitbook-x-prod.appspot.com/o/spaces%2F-LLTwFwbOqJj4dDhg8Ju%2Fuploads%2F9Y010uSk2RzV9jNLMjqM%2FScreenshot%202024-06-24%20at%2016.32.24.png?alt=media&amp;token=53b33c17-f296-4cc3-ab63-27809538b80c" alt="" width="375"><figcaption><p>Carousel step.</p></figcaption></figure>

{% hint style="success" %}
You're using Carousels for your RCS channel? See how you can [make the most of them](/channels/sinch-conversation-api-beta/make-the-most-of-rcs-with-carousels).
{% endhint %}

<details>

<summary>Share button</summary>

The share button opens a sharing block in Facebook Messenger, enabling people to share message bubbles (aka carousel cards) with their friends.

When a new user receives a message bubble, he can share it with his friends by tapping the same share button. When tapping the postback button, the user is send to the start page of the bot.

You can only use share button in generic templates items (previously called carousels) and only items with maximum one url can be shared by Facebook. It is not possible to change the button title: Facebook Messenger will translate the button to the user's preferred language profile setting.

<img src="https://2786867680-files.gitbook.io/~/files/v0/b/gitbook-legacy-files/o/assets%2F-LLTwFwbOqJj4dDhg8Ju%2F-LLTwINdA-k01sAajhSX%2F-LLTwJKVzShk3Y7meASp%2Fcarousel.png?generation=1535969958196585&amp;alt=media" alt="" data-size="original">

</details>

### List

The List step is a step that allows you to present a list of items, shown vertically.

Each item may shown a button that can be used as a call-to-action (postback). You can also provide a URL that opens when an item is tapped.

Each list template message can also have up to one global button that will show below the item list.

<details>

<summary>List styles</summary>

Lists can be shown in 2 different syles:

* **Large** lists show the first item with a cover image and text overlay. This is useful if you want to make the first item stand out over the other items.

<img src="https://2786867680-files.gitbook.io/~/files/v0/b/gitbook-legacy-files/o/assets%2F-LLTwFwbOqJj4dDhg8Ju%2F-LLTwINdA-k01sAajhSX%2F-LLTwJKXmBQxe0crxOg7%2Flist%20template.png?generation=1535969958272193&amp;alt=media" alt="" data-size="original">

* **Compact** lists show each item in the same way. This is useful for presenting a list of items where no item is shown more prominently.
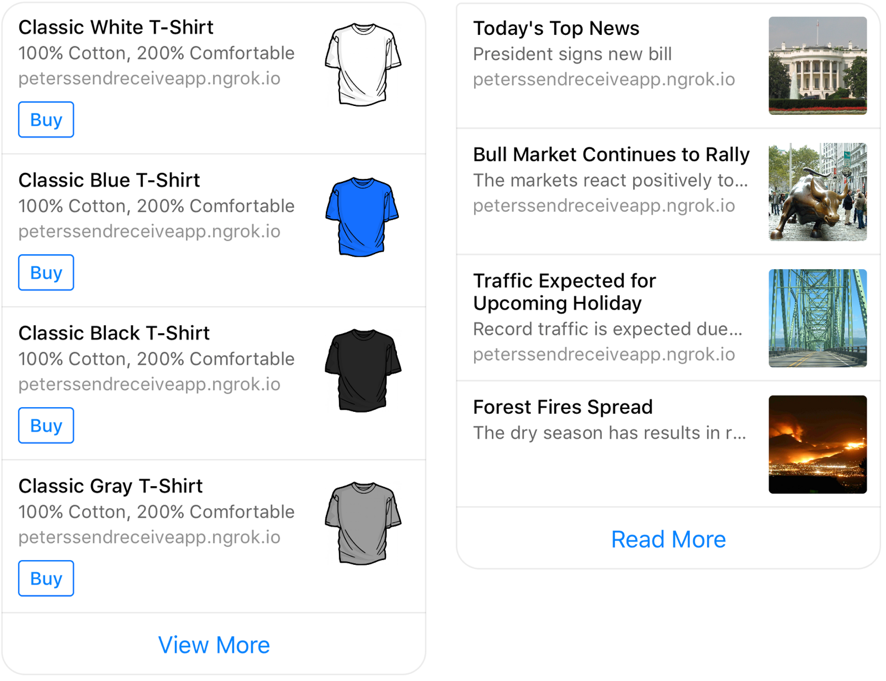
<img src="https://2786867680-files.gitbook.io/~/files/v0/b/gitbook-legacy-files/o/assets%2F-LLTwFwbOqJj4dDhg8Ju%2F-LLTwINdA-k01sAajhSX%2F-LLTwJKZWVwNUi1O0xTs%2Flist%20template%20compact.png?generation=1535969952924562&amp;alt=media" alt="" data-size="original">

</details>

### File upload

Use the file upload template to let users upload a file directly from their device to your bot.

{% hint style="info" %}
This template only works on the web widget V1 channel. For any other channel, you can use the 'image' format type in the [Collect input](/buildabot/flow-logic/dialog-state/user-input-bot-dialog) block.
{% endhint %}

<figure><img src="https://2786867680-files.gitbook.io/~/files/v0/b/gitbook-x-prod.appspot.com/o/spaces%2F-LLTwFwbOqJj4dDhg8Ju%2Fuploads%2FXHbVGUXeKFwmtLOg8hUT%2FScreenshot%202024-06-24%20at%2016.34.56.png?alt=media&amp;token=e1015596-132a-40ca-aff5-c6b53321e9e1" alt="" width="333"><figcaption><p>File upload Message step.</p></figcaption></figure>

Configuring the File Upload as shown above will show an Upload button in the conversation:

<img src="https://2786867680-files.gitbook.io/~/files/v0/b/gitbook-legacy-files/o/assets%2F-LLTwFwbOqJj4dDhg8Ju%2F-M3L63O1_lCPCmfdqyUK%2F-M3LukpL2-eh7WBMg5h1%2Fimage.png?alt=media&amp;token=d32aee90-41b1-44f6-863a-a8db92300237" alt="" width="375">

<details>

<summary>Notes on File upload</summary>

* If the upload failed because there was a problem with the connection, or the file the user chose was bigger than 10 MB, the bot will go to the "failed upload" block.
* The URL where the uploaded file is stored can be found under the `{uploadedFileUrl}` variable in the [user's session](https://docs.chatlayer.ai/quickstart/tutorials/leadzy-tutorial/3.-collect-and-display-user-input#check-the-variable-in-the-user-session). You can reuse this variable to show the file that the user uploaded by using the [Media](#attachments) step. Alternatively, you can retrieve the URL with an [API plugin](/integrateandcode/custom-back-end-integrations) to store the files on your servers.
* Uploaded files are kept on Chatlayer servers for 30 days, after which they will automatically become unaccessible.

</details>

### Rich text

Rich text allows you to go beyond text messages and style your text the way you want it. You can also add web links using the rich text editor.

{% hint style="warning" %}
Rich text is only visible in the [Web](/channels/all-channels/web/web-v2) channel. The other channels do not support this type of text.
{% endhint %}

<figure><img src="https://2786867680-files.gitbook.io/~/files/v0/b/gitbook-x-prod.appspot.com/o/spaces%2F-LLTwFwbOqJj4dDhg8Ju%2Fuploads%2FfnD45ZhUsVSHeVYs8Y5K%2FScreenshot%202024-06-24%20at%2016.37.39.png?alt=media&amp;token=d0a8fd5d-2dbf-4e26-a9bc-3084b1ec1c36" alt="" width="326"><figcaption><p>Rich text Message step.</p></figcaption></figure>

<details>

<summary>Rich text styles</summary>

The rich text editor allows you to use the following styles:

* Paragraph
* Heading 1
* Heading 2
* Heading 3
* Heading 4
* Bulleted list
* Ordered list (= numbered list)

And format the text in the following ways:

* **Bold**
* *Italic*
* Underline

You can also add hyperlinks (weblinks) that either go to an external page or to a specific place in your conversation.

To hyperlink a word or sentence, select it and then click the chain icon on the right below. A popup will appear where you can put in the link address. Then click 'save'.

</details>


# Condition

A Condition block steers the conversation in a way or another if variables meet certain condition(s).

Add a Condition block by [dragging and dropping it](https://docs.chatlayer.ai/buildabot/bot-navigation/bot-builder/flows/canvas-functionalities#drag-and-drop) to your flow.

<figure><img src="https://2786867680-files.gitbook.io/~/files/v0/b/gitbook-x-prod.appspot.com/o/spaces%2F-LLTwFwbOqJj4dDhg8Ju%2Fuploads%2FrJO6qz1um6v5RI7WlLGL%2FScreenshot%202024-07-31%20at%2016.33.58.png?alt=media&amp;token=3b2ecfd7-4e16-4c55-9792-4ca9de698301" alt="" width="145"><figcaption><p>Condition block tab.</p></figcaption></figure>

Condition blocks enable your bot to redirect the user to another block depending on the conditions of the session variables, following an if-then logic.

{% hint style="info" %}
**Condition** blocks shouldn't be confused with [**Go-to** connections](/buildabot/flow-logic/go-to-connections). Even if they work in a similar way, Go-to connections do not check any variables.
{% endhint %}

<figure><img src="https://2786867680-files.gitbook.io/~/files/v0/b/gitbook-x-prod.appspot.com/o/spaces%2F-LLTwFwbOqJj4dDhg8Ju%2Fuploads%2F2sFIBT7AZMdtdKQZAqa5%2FScreenshot%202024-01-25%20at%2016.57.00.png?alt=media&amp;token=cf2b6628-cadd-41cf-a00f-de77a396f087" alt="" width="563"><figcaption><p>What a Condition block (here: Class redirect) looks like on your canvas.</p></figcaption></figure>

## Set up your Condition block logic

Condition blocks follow an if-then logic, where each condition leads to a certain result. The bot will understand this logic by reading it from the top to the bottom.

In other words, this means that:

* If statement A is true,
  * then the bot will Go to block X
* Else if statement B is true,
  * then the bot will Go to block Y
* Else,
  * then the bot will Go to block Z.

{% hint style="warning" %}
The order of the conditional items determines their priority. If a conditional item is met, other conditional items will not be taken into account.
{% endhint %}

<figure><img src="https://2786867680-files.gitbook.io/~/files/v0/b/gitbook-x-prod.appspot.com/o/spaces%2F-LLTwFwbOqJj4dDhg8Ju%2Fuploads%2F49SX4LZzIQBtOqbClPt2%2FScreenshot%202024-01-25%20at%2016.54.10.png?alt=media&amp;token=8a1f89fb-ed0c-4165-9513-c1e5ee34a470" alt=""><figcaption></figcaption></figure>

{% hint style="info" %}
If you want to check variables without taking into account their case, please select a **'case insensitive**' condition in the dropdown.
{% endhint %}

## 🆕 Expression syntax (beta)

We launched expression syntax as a beta feature. You can use expression syntax inside Condition blocks as variables. Read more below 👇

{% content-ref url="/pages/vlrwV7ta0MuYFj8P0okC" %}
[Expression syntax](/integrateandcode/expression-syntax)
{% endcontent-ref %}


# Collect input

A Collect input block can be used to get information from the user. When the user gives information, the bot will first check if the info corresponds to an already known variable.

Add a **Collect input** block by [dragging and dropping it](https://docs.chatlayer.ai/buildabot/bot-navigation/bot-builder/flows/canvas-functionalities#drag-and-drop) to your flow.

<figure><img src="https://2786867680-files.gitbook.io/~/files/v0/b/gitbook-x-prod.appspot.com/o/spaces%2F-LLTwFwbOqJj4dDhg8Ju%2Fuploads%2Ftx7KHBrVRlA6RbiiptWk%2FScreenshot%202024-07-31%20at%2016.34.30.png?alt=media&amp;token=8b5e58cf-1ab3-4d3d-8e7e-afba69088cb7" alt="" width="144"><figcaption><p>Collect input tab.</p></figcaption></figure>

A **Collect input** gets info from the user, checks it, and saves it as a [variable](https://docs.chatlayer.ai/bot-answers/settings/secure-variables-gdpr).

<figure><img src="https://2786867680-files.gitbook.io/~/files/v0/b/gitbook-x-prod.appspot.com/o/spaces%2F-LLTwFwbOqJj4dDhg8Ju%2Fuploads%2FWoGfoyKOT2K9oBUAFDGQ%2FScreenshot%202024-02-06%20at%2014.11.32.png?alt=media&amp;token=e60c0260-45d4-4543-875e-760d296a3e32" alt=""><figcaption><p>What a Collect input block looks like on the canvas.</p></figcaption></figure>

A **Collect input** will typically do 3 things:

* defining [which input type](#input-types) you're looking at
* [checking if the user response matches](#check-if-a-response-matches)
* [configur](#configuration)[ing](#configuration) your bot behaviour after that

## Add a question step

A Collect input should clearly ask to the user for some input.

<figure><img src="https://2786867680-files.gitbook.io/~/files/v0/b/gitbook-x-prod.appspot.com/o/spaces%2F-LLTwFwbOqJj4dDhg8Ju%2Fuploads%2FLHgUDKdkNyTrdO8fs8Eu%2FScreenshot%202024-11-07%20at%2015.42.26.png?alt=media&amp;token=bb0d91f8-e85f-438a-8f03-a037496b18f5" alt="" width="375"><figcaption><p>Ask a question to the user.</p></figcaption></figure>

## Capture user response as

The **Collect input** first checks if the input is matching an [input type](#input-types).

<figure><img src="https://2786867680-files.gitbook.io/~/files/v0/b/gitbook-x-prod.appspot.com/o/spaces%2F-LLTwFwbOqJj4dDhg8Ju%2Fuploads%2FY4jP6GjJ2g9dLdbL6bfU%2FScreenshot%202024-11-07%20at%2015.44.47.png?alt=media&amp;token=7a8feadb-b679-47bf-afe8-8ad0bcfbda79" alt="" width="375"><figcaption><p>Check if the user input matches.</p></figcaption></figure>

{% hint style="info" %}
For [voicebots](/voice/phone-and-voice), make sure you use the **voiceMessage** input type.
{% endhint %}

If so, the **Collect input** saves that input under a [**destination variable**](#when-the-user-response-matches).

<figure><img src="https://2786867680-files.gitbook.io/~/files/v0/b/gitbook-x-prod.appspot.com/o/spaces%2F-LLTwFwbOqJj4dDhg8Ju%2Fuploads%2FGFGxmwFBaEzGB6GXML8h%2FScreenshot%202024-11-07%20at%2015.47.53.png?alt=media&amp;token=17bac5c8-43fd-4103-81ae-f801644843a9" alt="" width="375"><figcaption><p>Save the match input into a variable.</p></figcaption></figure>

## Input types

**Collect input** blocks have 3 types of input recognition:

* [**General**](#general-input-type) input types to check if the input follows a desired format.
* [**System**](#system-entities-input-type) input types to check if the input follows a certain Chatlayer built-in entity.
* [**Entity**](/nlp/natural-language-processing-nlp/detect-information-with-entities) input types to check the user input with a bot [entity](/navigation/natural-language-processing-nlp/synonym-entities).

{% hint style="warning" %}
Chatlayer extracts data from user inputs. For instance, if an input plugin has a type of **date** and the input is 'I need to be in Paris *in two days*,' the parser will identify 'in two days' as the date. It converts this into the DD-MM-YYYY format and stores the result in the user session.
{% endhint %}

{% hint style="danger" %}
Please note that the number of [system entities ](/nlp/natural-language-processing-nlp/detect-information-with-entities/system-entities)that you can use inside a **Collect input** block is limited. The system entities that you can use inside those blocks are: **sys.email**, **sys.phone\_number**, **sys.url**, **sys.number**, and **sys.time**.
{% endhint %}

### General input

The **General** input type checks if the input follows a desired format.

<details>

<summary>Any</summary>

The **Any** input type will accept all string values as an input.

It is important to know that intents and entities are processed before parsers. This can be useful for automatically extracting certain pieces of a sentence as an answer to a question. We've provided a great example of this in our [tutorial](/start-quickly/leadzy-tutorial/3.-collect-and-display-user-input).

</details>

<details>

<summary>Date</summary>

The **Date** input parser type will parse the response as a date. Sentences like 'next week Monday' are automatically converted to a DD-MM-YYYY date object. Supported formats (also in other supported NLP languages) are:

* *22-04-2018*
* *22-04*
* *22 apr*
* *22 april 18*
* *twenty two April 2018*
* *yesterday*
* *today*
* *now*
* *last night*
* *tomorrow, tmr*
* *in two weeks*
* *in 3 days*
* *next Monday*
* *next week Friday*
* *last/past Monday*
* *last/past week*
* *within/in 5/five days*
* *Friday/Fri*

</details>

<details>

<summary>Image</summary>

The **Image** format type allows you to check if a user has uploaded an image or other file (such as pdf).

The image will be saved as an array. If you chose `{img}` as variable, this means that you should use `{img[0]}` to retrieve the URL for the first saved image.

For the chat widget (web channel), we recommend using the [file upload](/buildabot/flow-logic/dialog-state/message-components#file-upload) step.

To save a user's attachment at any point in the flow, use the `defaultOnFileUpload` variable. This variable will store the URL of the attachment uploaded by the user, regardless of where they are in the conversation.

</details>

<details>

<summary>Location</summary>

The **Location** parser sendsthe user's input to a Google Geocoding API service. When a correct address or location is recognized, the Chatlayer platform will automatically create an object that contains all relevant geo-data.

<img src="https://2786867680-files.gitbook.io/~/files/v0/b/gitbook-x-prod.appspot.com/o/spaces%2F-LLTwFwbOqJj4dDhg8Ju%2Fuploads%2FeVXqAX2jWzKchaSzUWlL%2FScreenshot%202023-08-01%20at%2009.06.29.png?alt=media&amp;token=ae128404-72c0-47ee-b700-7563caaa68f3" alt="Check the user location." data-size="original">

Look at the block above. When the user answers the question "Where do you work?" with a valid location, this information will be stored as a `userLocationInformed` variable (you can rename this variable if needed).

Below is an example that shows how the `userLocationInformed` variable would be stored when the user responds with 'Chatlayer.ai':

```javascript
{
    fullAddress: "Oudeleeuwenrui 39, 2000 Antwerpen, Belgium",
    latitude: 51.227317,
    longitude: 4.409155999999999,
    streetNumber: "39",
    streetName: "Oudeleeuwenrui",
    city: "Antwerpen",
    country: "Belgium",
    zipcode: "2000",
}
```

To show the address as a full address (street, street number, zip code and city) you need to add some extra information to the variable: `.fullAddress`

So in the example above, the bot can display the entire location by using the following variable:`{userLocationInformed.fullAddress}`

A bot message containing the following info:

`Thank you, shall I send your package to {userLocationInformed.fullAddress}?`

Will display the following message to the user:

`Thank you, shall I send your package to Oudeleeuwenrui 39, 2000 Antwerpen, Belgium?`

</details>

<details>

<summary>Language</summary>

This input type will parse and validate NLP supported languages.

* English: (en-us): 'engels', 'English', 'en', 'anglais'
* Dutch (nl-nl): 'nederlands', 'Dutch', 'ned', 'nl', 'vlaams', 'hollands', 'be', 'ned', 'néerlandais', 'belgisch'
* French (fr-fr): 'French', 'français', 'frans', 'fr', 'francais'
* Chinese (zh-cn): 'Chinese', 'cn', 'zh', 'chinees'
* Spanish (es-es): 'Spanish', 'español', 'es', 'spaans'
* Italian (it-it): 'Italian', 'italiaans', 'italiano', 'it
* German (de-de): 'German', 'duits', 'de', 'deutsch
* Japanese (ja-jp): 'Japanese', 'japans', 'jp', '日本の
* Brazil Portugese (pt-br): 'Brazil Portugese', 'Portugese', 'portugees', 'braziliaans portugees', 'português'

</details>

<details>

<summary>voiceMessage</summary>

Use the **voiceMessage** input type to save voice channel messages as text. Configure the maximum duration and completion time for these messages.

<img src="https://2786867680-files.gitbook.io/~/files/v0/b/gitbook-x-prod.appspot.com/o/spaces%2F-LLTwFwbOqJj4dDhg8Ju%2Fuploads%2FpsWDXTDwDNeiiW0Z62cP%2FScreenshot%202023-08-01%20at%2009.08.41.png?alt=media&amp;token=575143d5-b4c7-4aad-bf35-fcc777dd0c72" alt="" data-size="original">

</details>

<details>

<summary>Hours</summary>

This input type will parse and validate timestamps.

</details>

### System entity input

The **Collect input** parser can check if the given input is consistent with the format for one of the following [system entities](/nlp/natural-language-processing-nlp/detect-information-with-entities/system-entities). Whenever a system entity is chosen in the 'Check if response matches' dropdown, you can give the variable a name that works for you.

<figure><img src="https://2786867680-files.gitbook.io/~/files/v0/b/gitbook-x-prod.appspot.com/o/spaces%2F-LLTwFwbOqJj4dDhg8Ju%2Fuploads%2FvmvORqmgKtTUaRpMo7YA%2FScreenshot%202023-08-01%20at%2009.11.56.png?alt=media&amp;token=286aa4bb-31a8-4dde-9fe6-cace2e93f73f" alt="" width="375"><figcaption><p>Rename the variable that matches the system entity parser.</p></figcaption></figure>

<details>

<summary>🆕 LLM-based system entity recognition</summary>

Your bot is now capable of recognizing system entities depending on the context of the conversation, using LLM technology.

For now, this feature is only available for [system entities](/nlp/natural-language-processing-nlp/detect-information-with-entities/system-entities).

For example:

1. Go to your bot [**Settings**](/navigation/settings).
2. Under **Generative AI**, click the toggle next to **Turn on generative AI features**.
3. Toggle on **LLM-based entity recognition**.

<img src="https://2786867680-files.gitbook.io/~/files/v0/b/gitbook-x-prod.appspot.com/o/spaces%2F-LLTwFwbOqJj4dDhg8Ju%2Fuploads%2F8oo0kAWYkdCj5chvlpi5%2FScreenshot%202024-11-12%20at%2011.09.04.png?alt=media&amp;token=5cd3e3ba-0478-48e0-abaf-2576980beb14" alt="" data-size="original">

4. Click **Save**.
5. Go back to your [**Flows**](/navigation/bot-builder/flows).
6. Create a **Collect input** that checks the number of passengers and check if it matches a @sys.number input.

![](https://2786867680-files.gitbook.io/~/files/v0/b/gitbook-x-prod.appspot.com/o/spaces%2F-LLTwFwbOqJj4dDhg8Ju%2Fuploads%2Fdlvtmo0hqT9YBbNg1Th9%2FScreenshot%202024-11-07%20at%2014.38.07.png?alt=media\&token=76f6707b-29d3-46b7-a1b4-6f6a27741c27)

7. Display that variable in the next block.
8. Test the bot: the bot now recognizes more complex sentences as the right number of people!

<img src="https://2786867680-files.gitbook.io/~/files/v0/b/gitbook-x-prod.appspot.com/o/spaces%2F-LLTwFwbOqJj4dDhg8Ju%2Fuploads%2FjBp0VdrvbraGyK6p1wo5%2FScreenshot%202024-11-12%20at%2010.14.41.png?alt=media&amp;token=f9c138b0-9be5-4a22-9fa5-ad1aca4915aa" alt="" data-size="original">

</details>

### Entity input

After you created an [entity](/navigation/natural-language-processing-nlp/synonym-entities), you can check that the user input matches it.

{% hint style="info" %}
Learn more about which [entity type](/nlp/natural-language-processing-nlp/detect-information-with-entities) suits your use case.
{% endhint %}

## Check if the input matches

A Collect input block checks whether the user response matches an already-known variable:

* If the variable does not have a value yet, the bot will ask the question written in the Collect input block. At this point, either:
  * [The value matches](#if-a-response-matches), and the variable is filled.
  * [The value doesn't match](#if-a-response-does-not-match), and the fallback questions are asked.
  * The user doesn't answer, and you decide to [detect this silence](#no-response).
* If the variable has a value already, the bot will automatically skip the Collect input block.

### When the user response matches

If the response is matched at the time where the Collect input gets triggered, it will be saved correctly under the specified variable name in the [debugger](/buildabot/emulator).

{% hint style="warning" %}
If the Collect input block is skipped, that is because the variable is already known. Variables can be known already for various reasons:

* The user has answered this question before.
* A previous entity was detected with the same variable name.
* The user is authenticated and the variable was automatically set.
  {% endhint %}

### 🆕 When the user response doesn't match

When the user provides an invalid response the bot should inform the user that their answer was invalid.

#### Retries

Set up how many times you want the bot to ask the question again. Typically, this would just ask to reformulate.

<figure><img src="https://2786867680-files.gitbook.io/~/files/v0/b/gitbook-x-prod.appspot.com/o/spaces%2F-LLTwFwbOqJj4dDhg8Ju%2Fuploads%2F0WeUN6UHNhm1DCgxX785%2FScreenshot%202024-11-07%20at%2015.35.56.png?alt=media&amp;token=009141f6-3674-446a-9260-4de8b0c4a301" alt="" width="375"><figcaption><p>Set up Retries inside Collect input blocks.</p></figcaption></figure>

#### Fallback

Set up a fallback message to where to redirect the user when the user used all their retries already. Typically, this would lead to help from customer support, for instance.

<figure><img src="https://2786867680-files.gitbook.io/~/files/v0/b/gitbook-x-prod.appspot.com/o/spaces%2F-LLTwFwbOqJj4dDhg8Ju%2Fuploads%2Ff51w2DBIklgRq5jx36cF%2FScreenshot%202024-11-07%20at%2015.37.56.png?alt=media&amp;token=46b072ef-72d6-4670-9ff1-d86637acbcc0" alt="" width="375"><figcaption><p>Set up a fallback after X retries.</p></figcaption></figure>

#### No response

You can configure the bot to detect when a user remains silent for a specified period. It triggers a specific block when no response is received within the set timeframe or by a predetermined time.

You can set how long it takes for the new block to trigger in the duration field (in minutes or at a specific time). The duration of silence can be from 1 minute up to 1440 minutes (24 hours).

<figure><img src="https://2786867680-files.gitbook.io/~/files/v0/b/gitbook-x-prod.appspot.com/o/spaces%2F-LLTwFwbOqJj4dDhg8Ju%2Fuploads%2FtLH5wFRYHXVIsdePfv9I%2FScreenshot%202023-08-01%20at%2008.48.51.png?alt=media&amp;token=570fd550-42b8-4f89-ac2c-fb5fe47a6f0f" alt="" width="375"><figcaption><p>You can select between 'wait for' or 'wait until' for user response before triggering a block</p></figcaption></figure>

## Capture user response as

The bottom of your Collect input block can be configured so that you're sure to detect the answer that you're looking for.

<figure><img src="https://2786867680-files.gitbook.io/~/files/v0/b/gitbook-x-prod.appspot.com/o/spaces%2F-LLTwFwbOqJj4dDhg8Ju%2Fuploads%2FRzyNxvMMf1SmPVx2a9ch%2FScreenshot%202023-08-01%20at%2009.04.28.png?alt=media&amp;token=4c953c7a-c7fe-4bce-9d74-f229cf2006df" alt="" width="375"><figcaption></figcaption></figure>

#### Disable NLP

Users are able to leave the Collect input if an intent is recognized. For bots with a very small NLP model, this might trigger a false positive. The 'disable NLP' checkbox allows you to disable the NLP model while in the Collect input, which makes sure that whatever the user says gets saved as input.

#### For date variable: Always past - always future

When you decide to check a `date` variable, Chatlayer parses the user expression to match a default date format. If the date you ask should always be in the present or future, you can use these options. A user saying “Thursday” for example will be either mapped to last or next Thursday.


# Action

Action blocks are where 3rd-party, coding logic or special operations can be added to your bot.

{% hint style="danger" %}
**From 1st October 2024, all Chatlayer customers will be migrated to the new web widget, Web V2.** To learn more about the differences between V1 and V2, check [this page.](/channels/all-channels/web/web-v2/from-web-v1-to-v2) For a technical deep dive, check [this page](/channels/all-channels/web/web-v2/web-v2-methods-and-options).
{% endhint %}

<figure><img src="https://2786867680-files.gitbook.io/~/files/v0/b/gitbook-x-prod.appspot.com/o/spaces%2F-LLTwFwbOqJj4dDhg8Ju%2Fuploads%2F4obf4jz17cTJuiYwiHm7%2FScreenshot%202024-07-31%20at%2011.20.51.png?alt=media&amp;token=9669a324-dc9e-48fa-a15e-a08ae836773b" alt="" width="336"><figcaption><p>JSON builder step.</p></figcaption></figure>

You can use the JSON builder in combination with the [Web channel](/channels/all-channels/webhook-api) to receive [window events](https://developer.mozilla.org/en-US/docs/Web/API/Window#events) on your webpage. These events will contain the data as configured in your JSON builder action.

To do this, you'll need to tick the **Send config to parent window** option. It will allow you to send data to the place where the widget is in a structured way.

Here's an example:

1. Configure your JSON builder action to send a **language** key, with a variable retrieved from the session.
2. Set the toggle **Send config to parent window** on.

<figure><img src="https://2786867680-files.gitbook.io/~/files/v0/b/gitbook-x-prod.appspot.com/o/spaces%2F-LLTwFwbOqJj4dDhg8Ju%2Fuploads%2FnssPyj7E7urkHmt2ECnR%2FScreenshot%202024-07-31%20at%2011.24.24.png?alt=media&amp;token=eaccfcd9-19f8-4daa-a949-a01e136901a7" alt=""><figcaption><p>JSON builder with a language field.</p></figcaption></figure>

Add an **Action** block by [dragging and dropping it](https://docs.chatlayer.ai/buildabot/bot-navigation/bot-builder/flows/canvas-functionalities#drag-and-drop) to your flow.

<figure><img src="https://2786867680-files.gitbook.io/~/files/v0/b/gitbook-x-prod.appspot.com/o/spaces%2F-LLTwFwbOqJj4dDhg8Ju%2Fuploads%2FNNYIgG6hsdnWfNSVghmD%2FScreenshot%202024-07-31%20at%2016.35.15.png?alt=media&amp;token=d3900b59-fd76-459c-998d-48f811d5aa6d" alt="" width="144"><figcaption><p>Action tab.</p></figcaption></figure>

**Action** blocks allow you to integrate third-party services, implement custom coding logic, or perform specialized operations within your bot

<figure><img src="https://2786867680-files.gitbook.io/~/files/v0/b/gitbook-x-prod.appspot.com/o/spaces%2F-LLTwFwbOqJj4dDhg8Ju%2Fuploads%2Fp2fQhCUI3pme8URDoTZi%2FScreenshot%202024-07-31%20at%2016.32.51.png?alt=media&amp;token=686b5eee-7ee0-47eb-99fe-34f5d3165b60" alt="" width="370"><figcaption><p>Example of an Action block.</p></figcaption></figure>

## Coding steps

### Code

The code editor allows developers to quickly build custom logic on top of the bot by writing their own Javascript code blocks. Typically, the code editor is used to perform requests to external systems, or to do operations with variables.

You can find more information about the code editor here:

{% content-ref url="/pages/-MIZrMhE\_zdsz5pX73a4" %}
[Code editor](/integrateandcode/code-action)
{% endcontent-ref %}

There are also two tutorials in which we show you how the code editor can be used:

{% content-ref url="/pages/-M6iT3K5T92iqUDeQpmg" %}
[\[Example\] Retrieving data from Airtable (GET)](/integrateandcode/code-action/retrieving-data-from-airtable-get)
{% endcontent-ref %}

{% content-ref url="/pages/-M-PzD6Vrqe1oeUuWmcn" %}
[\[Example\] Sending data to Airtable (POST)](/integrateandcode/code-action/airtable)
{% endcontent-ref %}

### API

The [API step ](/integrateandcode/custom-back-end-integrations)is an integration where you integrate Chatlayer with your back end or third party services in order to share data gathered in the conversation with the bot, or enrich the bot with data captured.

<figure><img src="https://2786867680-files.gitbook.io/~/files/v0/b/gitbook-x-prod.appspot.com/o/spaces%2F-LLTwFwbOqJj4dDhg8Ju%2Fuploads%2FYwlMzrQjzCxZGmoSIZ8g%2FScreenshot%202024-07-31%20at%2017.42.42.png?alt=media&amp;token=c2e88f41-c16d-4be2-aef4-9125e05587d2" alt=""><figcaption><p>API step.</p></figcaption></figure>

### JSON builder

If your bot is published on the [Webhook API](/channels/all-channels/webhook-api) channel, you can use the JSON Builder action to send messages to the conversation that don't need to result in an actual message to the user. Typically, it's used to send information about the user or bot conversation to the website the bot is published on.

![](https://2786867680-files.gitbook.io/~/files/v0/b/gitbook-legacy-files/o/assets%2F-LLTwFwbOqJj4dDhg8Ju%2F-M1dw5eMqNDrpjDngOe6%2F-M1dx9mzFppiXljhS6k-%2Fimage.png?alt=media\&token=3ef5dcd0-6d98-4e2d-9d95-631beacaa858)

#### Website window events

**You can use the JSON builder action** **in combination with the webwidget channel** to receive window events on your webpage. These events will contain the data as configured in your JSON builder action.

Here's an example:\
Configure your JSON builder action to send a **language** key, with a variable retrieved from the session, and the "Send config to parent window" toggled on.

![JSON builder action with a language field](https://2786867680-files.gitbook.io/~/files/v0/b/gitbook-legacy-files/o/assets%2F-LLTwFwbOqJj4dDhg8Ju%2F-MKa3vnvkdS2-AigosWt%2F-MKa57sjNNmEoWB6CO2l%2Fimage.png?alt=media\&token=c4e9711d-7541-4f47-8ff3-4db02a33cd6b)

Your widget will trigger an event for that configuration to its parent window as a MessageEvent. The MessageEvent will contain a \`data\` field which contains the stringified result of the JSON builder configuration. Here's an example on how to listen to these events:

```javascript
// Chatlayer JSON Builder Event Handler
window.addEventListener('message', (event) => {
    const data = event && event.data && JSON.parse(event.data) || {}
    const { type, payload } = data
    if (type !== 'CL_DISPATCH_EVENT') return;
    console.log('Chatlayer language received: ' + payload.language)
})
```

## Pausing steps

### Pause bot

The **Pause bot** step will pause your bot when it reaches this block.

<figure><img src="https://2786867680-files.gitbook.io/~/files/v0/b/gitbook-x-prod.appspot.com/o/spaces%2F-LLTwFwbOqJj4dDhg8Ju%2Fuploads%2Fmk0Q32CP2nloACqfI6dU%2FScreenshot%202024-07-31%20at%2016.59.05.png?alt=media&amp;token=c1d01bbd-f8e6-4344-ad36-515420928b2b" alt="" width="374"><figcaption><p>Pause bot step.</p></figcaption></figure>

### Delay

Sometimes you need a slight delay between bot messages, either to create a natural pause or to make an API call without the bot being silent. These pauses can significantly enhance the user experience.

<figure><img src="https://2786867680-files.gitbook.io/~/files/v0/b/gitbook-x-prod.appspot.com/o/spaces%2F-LLTwFwbOqJj4dDhg8Ju%2Fuploads%2FVN14d22TXOkZ1rOrKorI%2FScreenshot%202024-07-31%20at%2017.00.21.png?alt=media&amp;token=d77f1da5-84d4-47a0-9529-f4778983da6c" alt="" width="375"><figcaption><p>Delay step.</p></figcaption></figure>

You can [for example use Delay before a Close conversation](#example-delay-before-close-conversation) step.

## Variables steps

### Clear session data: variables and context

Use a **Clear session** step to clear out [variables](/navigation/settings/secure-variables-gdpr) <img src="https://2786867680-files.gitbook.io/~/files/v0/b/gitbook-x-prod.appspot.com/o/spaces%2F-LLTwFwbOqJj4dDhg8Ju%2Fuploads%2FvIWue76T1iG2IKRsbCt7%2Fbrackets.png?alt=media&amp;token=a39f7460-7e52-47cd-a9c8-fcc57f4d1eb6" alt="" data-size="line"> and/or [context](/nlp/natural-language-processing-nlp/using-context) <img src="https://2786867680-files.gitbook.io/~/files/v0/b/gitbook-x-prod.appspot.com/o/spaces%2F-LLTwFwbOqJj4dDhg8Ju%2Fuploads%2FiIUrvuRY4hRNy36TWOR4%2Fdownload%20(1).png?alt=media&amp;token=572d6e7c-4f3d-4700-8ee8-c7dfdb15fe51" alt="" data-size="line"> that you don't need anymore.

<figure><img src="https://2786867680-files.gitbook.io/~/files/v0/b/gitbook-x-prod.appspot.com/o/spaces%2F-LLTwFwbOqJj4dDhg8Ju%2Fuploads%2FZmuzaJfQcekqXWJ5cXiv%2FScreenshot%202025-10-21%20at%2017.33.28.png?alt=media&amp;token=043b2d53-7807-44f5-8f0e-ffbe7dbf3a78" alt=""><figcaption></figcaption></figure>

### Set variables

The **Set variable** step facilitates the creation, formatting, and assignment of values to [variables](https://docs.chatlayer.ai/bot-answers/settings/secure-variables-gdpr).

{% hint style="warning" %}
We've recently introduced a [new expression syntax](/integrateandcode/expression-syntax). To explore the full range of expressions and functions available, check out the comprehensive documentation provided [here](/integrateandcode/expression-syntax).
{% endhint %}

<figure><img src="https://2786867680-files.gitbook.io/~/files/v0/b/gitbook-x-prod.appspot.com/o/spaces%2F-LLTwFwbOqJj4dDhg8Ju%2Fuploads%2FzKeCLUKorTzRntUxnk3Z%2FScreenshot%202024-01-09%20at%2016.54.21.png?alt=media&amp;token=c8ae7804-a221-4df1-86ba-476dfa518f91" alt="" width="375"><figcaption><p>Add an operation inside your variable value.</p></figcaption></figure>

Operations allow you to perform calculations like addition, subtraction, multiplication, division, or finding the remainder of two numbers.

{% hint style="info" %}
For a comprehensive list of available operations such as addition (+), multiplication (\*), division (/), and more, please refer to the detailed documentation provided [here](/integrateandcode/expression-syntax).
{% endhint %}

### Go to variable bot dialog

Use the **Go to variable bot dialog** step to navigate to a block that is contained inside a variable.

<figure><img src="https://2786867680-files.gitbook.io/~/files/v0/b/gitbook-x-prod.appspot.com/o/spaces%2F-LLTwFwbOqJj4dDhg8Ju%2Fuploads%2Fw1cGbucKpkLK0QqMueRc%2FScreenshot%202024-07-31%20at%2016.42.48.png?alt=media&amp;token=50afceb7-93ef-4f15-9227-b3f05c5eefe9" alt="" width="375"><figcaption><p>Go to variable bot dialog step.</p></figcaption></figure>

## Email steps

### Send mail

The **Send mail** step sends an email with a message.

<figure><img src="https://2786867680-files.gitbook.io/~/files/v0/b/gitbook-x-prod.appspot.com/o/spaces%2F-LLTwFwbOqJj4dDhg8Ju%2Fuploads%2FxywQEl1uC74aI2MnsMy2%2FScreenshot%202024-07-31%20at%2017.03.35.png?alt=media&amp;token=3cf3e7cd-1a97-4d2a-b11f-cfd6d6bc5614" alt="" width="283"><figcaption><p>Send mail step.</p></figcaption></figure>

### Mail report

The **Mail report** step sends 2 things:

* an email with a message
* the bot conversation at the time where the message was send

All you need to do is to define the email title, recipients and body. Here you can also use variables between curly braces if you need to.

<figure><img src="https://2786867680-files.gitbook.io/~/files/v0/b/gitbook-x-prod.appspot.com/o/spaces%2F-LLTwFwbOqJj4dDhg8Ju%2Fuploads%2FPauc1vs0pKO3NYUoqRg5%2FScreenshot%202024-07-31%20at%2017.08.51.png?alt=media&amp;token=b4810605-6d15-411a-82e5-6599cd85cb5e" alt="" width="375"><figcaption><p>Mail report step.</p></figcaption></figure>

## Voicebot steps

### Start recording the call

From the **Start recording the call** step, the [conversation with your voicebot is being recorded](/voice/phone-and-voice).

<figure><img src="https://2786867680-files.gitbook.io/~/files/v0/b/gitbook-x-prod.appspot.com/o/spaces%2F-LLTwFwbOqJj4dDhg8Ju%2Fuploads%2FVAsCGay1s7VyFsK0qzpJ%2FScreenshot%202024-08-01%20at%2010.54.32.png?alt=media&amp;token=ec68b94f-1909-45eb-bbdc-d2e54d2e208f" alt="" width="375"><figcaption><p>Start recording the call step.</p></figcaption></figure>

### Stop recording the call

From the **Stop recording the call** step, the conversation with your [voicebot](/voice/send-bot-response-as-audio) will stop being recorded.

<figure><img src="https://2786867680-files.gitbook.io/~/files/v0/b/gitbook-x-prod.appspot.com/o/spaces%2F-LLTwFwbOqJj4dDhg8Ju%2Fuploads%2F1eEOWZT3G7LfTXvmIVMS%2FScreenshot%202024-08-01%20at%2010.56.42.png?alt=media&amp;token=b13ad6d4-0178-4a9e-a381-c2ea3a824223" alt="" width="375"><figcaption><p>Stop recording the call step.</p></figcaption></figure>

### Forward call

You can [forward the call from your voicebot to a phone number](https://docs.chatlayer.ai/voicebots/phone-and-voice#forwarding-and-closing-a-call) by using the **Forward call** step.

<figure><img src="https://2786867680-files.gitbook.io/~/files/v0/b/gitbook-x-prod.appspot.com/o/spaces%2F-LLTwFwbOqJj4dDhg8Ju%2Fuploads%2F7CUDjPN64z8ZmswBx1bq%2FScreenshot%202024-08-01%20at%2010.53.44.png?alt=media&amp;token=a1ced597-98e7-4504-8b04-eee0f2ea8e4b" alt="" width="375"><figcaption><p>Forward call step.</p></figcaption></figure>

{% hint style="info" %}
The phone number should contain a country code but no leading zeros, only the '+' sign.\
For example: 0800 55 800 becomes +32 800 55 80
{% endhint %}

After setting up the phone number you wish to forward your call to, the bot will automatically hang up upon transferring. To reach the bot again, hang up the call and call a second time.

## Other steps

### Track event

A **Track event** step can be used you to [create custom dashboards and funnels to improve the analysis of your bot performance](/bot-answers/track-events-for-analytics).

<figure><img src="https://2786867680-files.gitbook.io/~/files/v0/b/gitbook-x-prod.appspot.com/o/spaces%2F-LLTwFwbOqJj4dDhg8Ju%2Fuploads%2Fmj4IE2fNV7PKFqU1hAuG%2FScreenshot%202024-07-31%20at%2016.51.14.png?alt=media&amp;token=75dcf366-6ca8-4e59-8b99-b9a74d0d3eaf" alt="" width="375"><figcaption><p>Track event step.</p></figcaption></figure>

### iFrame

An iFrame is a custom element that can be used to show a different web page in the chat conversation. It can also be used to communicate with the parent window using the [postMessage API](https://developer.mozilla.org/en-US/docs/Web/API/Window/postMessage).

Have a look at this basic example:

```markup
<!DOCTYPE html>
<html lang="en">
	<head>
		<meta charset="UTF-8">
		</head>
		<body>
			<button onClick="window.parent.postMessage(JSON.stringify({target:'CL_API',type:'SEND_MESSAGE', payload:{text: 'You clicked the button'} }),'*')">
         SEND_MESSAGE
        </button>
		</body>
</html>
```

If this block of code is hosted and embedded within our iframe plugin, it will send the user a chat message when they click the button.

The postMessage API can also handle `UPDATE_SESSION` and `GO_TO_DIALOGSTATE` events.

### Get time

The [**Get time** step](#get-time) is about guiding your flow based on the current moment in time. You can reuse those [time variables](#get-time-variables) inside your conversation.

When you provide a **timezone offset**, the result of the plugin will contain time properties that are equal to UTC+`offset`.

<details>

<summary>Get time variables</summary>

If you do not provide a time zone offset, the current moment in time will be saved under the **Target variable** field. In our example, this variable will be called `time`. In this case, your **Target variable** will be accessible with the following variables:

* `(target).utc.year`
* `(target).utc.month`
* `(target).utc.dayOfMonth`
* `(target).utc.dayOfWeek`
* `(target).utc.hours`
* `(target).utc.minutes`
* `(target).utc.seconds`
* `(target).utc.ISO`

By default, the plugin result will contain properties related to the UTC time.

When you provide a `timezone offset`, the result will also contain time properties that are equal to UTC+\<OFFSET>.

* `(target).offset.year`
* `(target).offset.month`
* `(target).offset.dayOfMonth`
* `(target).offset.dayOfWeek`
* `(target).offset.hours`
* `(target).offset.minutes`
* `(target).offset.seconds`
* `(target).offset.ISO`

Inside a message, you can use those variables for instance like this:

*Today is `{time.offset.dayOfMonth}`/`{time.offset.month}`/`{time.offset.year}`*

</details>

<figure><img src="https://2786867680-files.gitbook.io/~/files/v0/b/gitbook-x-prod.appspot.com/o/spaces%2F-LLTwFwbOqJj4dDhg8Ju%2Fuploads%2FEpN6rpPefETGfhX8CFXh%2FScreenshot%202024-07-31%20at%2017.06.13.png?alt=media&amp;token=a21b9b7f-61e9-4af4-8598-01edd7fc4c6c" alt="" width="375"><figcaption><p>Get time step.</p></figcaption></figure>

{% content-ref url="/pages/bmiG6GuheyNrKWT6KSwe" %}
[Route your flow depending on the time](/buildabot/tips-and-best-practices/route-your-flow-depending-on-the-time)
{% endcontent-ref %}

### Close conversation

The bot will close the active conversation when the **Close conversation** step is reached.

This means that the session variables are erased.

<figure><img src="https://2786867680-files.gitbook.io/~/files/v0/b/gitbook-x-prod.appspot.com/o/spaces%2F-LLTwFwbOqJj4dDhg8Ju%2Fuploads%2F886CrUQlRgWJhpvXbvvb%2FScreenshot%202024-08-01%20at%2010.50.39.png?alt=media&amp;token=73e1611f-e267-4543-9fc1-c6df66c1a872" alt="" width="375"><figcaption><p>Close conversations step.</p></figcaption></figure>

<details>

<summary>Example: Delay before Close conversation</summary>

You can for example use the **Close conversation** step together with a [**Delay**](#delay) step. This is useful in a situation where the user is not responding for a few minutes and you want to close the conversation from there.

![](https://2786867680-files.gitbook.io/~/files/v0/b/gitbook-x-prod.appspot.com/o/spaces%2F-LLTwFwbOqJj4dDhg8Ju%2Fuploads%2FIq8QY3yGhUdrrCY0j0YN%2FScreenshot%202024-09-24%20at%2010.40.14.png?alt=media\&token=9b049378-6830-4561-8045-055c0d111272)

</details>

{% hint style="success" %}
**Close conversation** is now available on the [Web](https://docs.chatlayer.ai/channels/channels/web-v2) channel, [Voice](https://docs.chatlayer.ai/voicebots/phone-and-voice#set-up-voice-channel) channel, and [Sinch Conversation API](https://docs.chatlayer.ai/channels/sinch-conversation-api-beta) channel.
{% endhint %}

### Table operation

The **Table operation** step is about using your built-in Chatlayer [Tables](/navigation/tables).

<figure><img src="https://2786867680-files.gitbook.io/~/files/v0/b/gitbook-x-prod.appspot.com/o/spaces%2F-LLTwFwbOqJj4dDhg8Ju%2Fuploads%2FHq89TXGf1jbd8fdiDo0A%2FScreenshot%202024-08-01%20at%2010.59.48.png?alt=media&amp;token=c7d4a3ef-7670-4f60-a573-952b4e7466c6" alt="" width="375"><figcaption><p>Table operation step</p></figcaption></figure>

### Knowledge base AI

The **Knowledge base AI** step is about using your [Knowledge base AI](#knowledge-base-ai).

<figure><img src="https://2786867680-files.gitbook.io/~/files/v0/b/gitbook-x-prod.appspot.com/o/spaces%2F-LLTwFwbOqJj4dDhg8Ju%2Fuploads%2FsoeAPS1nd7iK8nXyqbWq%2FScreenshot%202024-08-01%20at%2011.00.26.png?alt=media&amp;token=1adc6c0e-49a7-4d30-84a0-e4bb6d3740dd" alt="" width="375"><figcaption><p>Knowledge base AI step.</p></figcaption></figure>

### Send to offload provider <a href="#send-to-offload-provider" id="send-to-offload-provider"></a>

A user that reaches this action will be offloaded to a human customer support agent.

{% hint style="warning" %}
To be able to see this step in your bot, you will need to [configure an offload provider.](/integrateandcode/human-offloading-live-chat)
{% endhint %}

Depending on your selected offloading provider, additional configuration may be required.


# Go-to connections

On Chatlayer, a Go-to connection means that one block will happen in the conversation just after the other. Go-to connections can be established in multiple ways.

Your conversation logic is made so that you can go from any [block](/buildabot/flow-logic/dialog-state) type to any other block type in your flows.

On your [bot canvas](/navigation/bot-builder/flows), Go-to connections are represented as plain arrows.

<figure><img src="https://2786867680-files.gitbook.io/~/files/v0/b/gitbook-x-prod.appspot.com/o/spaces%2F-LLTwFwbOqJj4dDhg8Ju%2Fuploads%2FNiLpU39YNi8GYNU5vGtT%2FScreenshot%202024-08-07%20at%2016.01.58.png?alt=media&amp;token=583c808c-6bfc-4138-b17d-fd4d1374737d" alt=""><figcaption><p>What a Go-to connection looks like inside your canvas.</p></figcaption></figure>

{% hint style="info" %}
**Go to** connections shouldn't be confused with [**Parent-child** connections](https://docs.chatlayer.ai/navigate-the-platform/bot-builder/flows/canvas-functionalities#parent-child-connections).
{% endhint %}

### Go to another block

At the end of any [block](/buildabot/flow-logic/dialog-state), you can choose to redirect the user to any other block.

To do that, find the **Go to** ribbon at the bottom of your block and expand it to fill it in.

<figure><img src="https://2786867680-files.gitbook.io/~/files/v0/b/gitbook-x-prod.appspot.com/o/spaces%2F-LLTwFwbOqJj4dDhg8Ju%2Fuploads%2FJEySuHulUcjyxCFyuoGP%2FScreenshot%202024-08-07%20at%2016.05.55.png?alt=media&amp;token=5361f4fb-031e-4c2e-8f22-087e8ed7124d" alt="" width="278"><figcaption><p>Go to any other block by filling the Go to section at the bottom of the block.</p></figcaption></figure>

### Go-to's in buttons

When you create a [Bot Message](/buildabot/flow-logic/dialog-state/message-components), you can redirect the user to another block by clicking something.

A clicking action can happen with:

* [buttons](https://docs.chatlayer.ai/bot-answers/dialog-state/message-components#buttons)
* [carousels](https://docs.chatlayer.ai/bot-answers/dialog-state/message-components#carousel)
* [lists](https://docs.chatlayer.ai/bot-answers/dialog-state/message-components#list)
* [quick replies](https://docs.chatlayer.ai/bot-answers/dialog-state/message-components#quick-replies)

{% hint style="info" %}
Not sure if a Go-to is the right button type for you? Check the different button types [here](https://docs.chatlayer.ai/bot-answers/dialog-state/message-components#button-types).
{% endhint %}

<figure><img src="https://2786867680-files.gitbook.io/~/files/v0/b/gitbook-x-prod.appspot.com/o/spaces%2F-LLTwFwbOqJj4dDhg8Ju%2Fuploads%2FmHF1v5qNNVxnMxEgTqAZ%2FScreenshot%202024-08-07%20at%2016.15.06.png?alt=media&amp;token=cb45adc7-d10a-4020-a1a2-021ac279b802" alt=""><figcaption><p>Go to another block when clicking a button.</p></figcaption></figure>

### Go-to's to pass a variable

At the end of blocks, you have the option to transfer the user to another block, and pass a variable that's saved in the user session.

To pass a variable:

1. Open your [block](/buildabot/flow-logic/dialog-state).
2. Define a **Go to** at the bottom.
3. Click on **+Add variable**.
4. Define your variable name and value.
5. Click **Save**.

<figure><img src="https://2786867680-files.gitbook.io/~/files/v0/b/gitbook-x-prod.appspot.com/o/spaces%2F-LLTwFwbOqJj4dDhg8Ju%2Fuploads%2FkkAmTKfixDWGRfZcxwn4%2FScreenshot%202024-08-07%20at%2016.09.36.png?alt=media&amp;token=7e43d0f8-cb45-4855-88fa-bd9a10e743e6" alt="" width="274"><figcaption><p>Link two blocks and pass a variable by using the Go to section at the end of a block.</p></figcaption></figure>


# Emulator

Test your bot from your canvas to make sure it works as expected.

When your bot does not behave as expected, you need to investigate and identify the issue—also known as debugging. But where should you start? How can you determine the cause of the problem? This article covers the basics of debugging inside the Chatlayer Emulator.

## Test your bot in the Emulator

To open your Emulator:

1. Under the [**Bot builder**](/navigation/bot-builder) tab, click on [**Flows**](/navigation/bot-builder/flows).
2. Find the **play** button in the upper right corner of the screen and click on it.

<figure><img src="https://2786867680-files.gitbook.io/~/files/v0/b/gitbook-x-prod.appspot.com/o/spaces%2F-LLTwFwbOqJj4dDhg8Ju%2Fuploads%2FiTCdNkCH45UBuszMpW1H%2FScreenshot%202024-07-11%20at%2009.49.59.png?alt=media&amp;token=28999dd9-349a-40e8-b54f-582ebfbaf1a1" alt="" width="339"><figcaption><p>Open the Emulator by clicking on the play button in the upper-right corner of your canvas.</p></figcaption></figure>

3. Test your bot by typing in the input field.

<figure><img src="https://2786867680-files.gitbook.io/~/files/v0/b/gitbook-x-prod.appspot.com/o/spaces%2F-LLTwFwbOqJj4dDhg8Ju%2Fuploads%2FUfqZ0AHgZhZgaNlNyH79%2FScreenshot%202024-07-11%20at%2011.44.42.png?alt=media&amp;token=a618c244-fa7b-4fe9-88ec-97be488abe48" alt="" width="375"><figcaption><p>Test your bot in the Emulator.</p></figcaption></figure>

4. To restart the test conversation, click on the **restart** button at the top right corner of the window.

<figure><img src="https://2786867680-files.gitbook.io/~/files/v0/b/gitbook-x-prod.appspot.com/o/spaces%2F-LLTwFwbOqJj4dDhg8Ju%2Fuploads%2Fe2quFpmgFl43XbQoPss9%2FScreenshot%202024-07-11%20at%2015.31.38.png?alt=media&amp;token=9c9c9f49-c64e-46e3-83f7-50986faea377" alt="" width="375"><figcaption></figcaption></figure>

## Test modes

Your Emulator has 3 different modes of testing that can be set from the upper part of the window.

<figure><img src="https://2786867680-files.gitbook.io/~/files/v0/b/gitbook-x-prod.appspot.com/o/spaces%2F-LLTwFwbOqJj4dDhg8Ju%2Fuploads%2FwxXwtt5rbJhPIp5GLF6w%2FScreenshot%202024-07-11%20at%2015.22.23.png?alt=media&amp;token=0f153e95-a812-4a5e-b796-1cae37a49067" alt="" width="375"><figcaption><p>3 available modes of testing inside your Emulator.</p></figcaption></figure>

### Debugger

This is useful if you would like to debug your chatbot. For a most comprehensive guide to debugging, check this page:

{% content-ref url="/pages/-LbwglccNy56zkITA7QE" %}
[Debug your bot](/support/solving-bot-issues)
{% endcontent-ref %}

### Voice

This is the mode to test your voicebot if you have one.

{% content-ref url="/pages/bTkWmYB7tYjzfCt3QXjK" %}
[Test your voicebot](/voice/phone-and-voice/test-your-voicebot)
{% endcontent-ref %}

### WhatsApp Sandbox

This is a test window to [test your bot on a WhatsApp channel](https://docs.chatlayer.ai/start-quickly/leadzy-tutorial/1.-new-bot-new-block#run-tests-in-the-whatsapp-sandbox).

## Debug your bot

To debug your bot conversation:

1. Click on **Debugger** next the bubble chat.

<figure><img src="https://2786867680-files.gitbook.io/~/files/v0/b/gitbook-x-prod.appspot.com/o/spaces%2F-LLTwFwbOqJj4dDhg8Ju%2Fuploads%2FD6GaeVVo1JyAwWZmu7Iz%2Fdebug.png?alt=media&amp;token=41eb3e17-4a19-475d-8be5-c6c5f5a78a41" alt="" width="375"><figcaption><p>Click 'debug' icon to open the debugger modal</p></figcaption></figure>

2. An **Inspector** window opens. In this Inspector, you can check the user [**Session data**](/bot-answers/session).

<figure><img src="https://2786867680-files.gitbook.io/~/files/v0/b/gitbook-x-prod.appspot.com/o/spaces%2F-LLTwFwbOqJj4dDhg8Ju%2Fuploads%2FcUoOmH98ziOXaJcGQLNr%2FScreenshot%202024-07-16%20at%2009.56.05.png?alt=media&amp;token=04207ad4-ed25-48f3-9a81-c27db79184a3" alt="" width="563"><figcaption><p>Test emulator with debugger side modal</p></figcaption></figure>


# Tips & best practices

Creating an effective chatbot requires attention and best practices. By following these tips and best practices, you can create a robust and user-friendly chatbot.

Improve the **Not understood** block to handle unrecognized inputs gracefully.

{% content-ref url="/pages/gq4LI2rk9llIOsj8ED0B" %}
[Improve the Not understood block](/buildabot/tips-and-best-practices/improve-the-not-understood-block)
{% endcontent-ref %}

Go to the previous block for a more natural conversation.

{% content-ref url="/pages/-MX2OwZPCwidFI85F94D" %}
[Go to previous block](/buildabot/tips-and-best-practices/go-to-previous-bot-dialog)
{% endcontent-ref %}

Recognize returning users to provide a personalized experience.

{% content-ref url="/pages/-LRkkpUz5YrrlKHljw5W" %}
[Recognizing a returning user](/buildabot/tips-and-best-practices/how-to-recognize-a-returning-bot-user)
{% endcontent-ref %}

Consider skipping the introduction message for returning users to streamline interactions.

{% content-ref url="/pages/-Mkl5HtttYTNcsjqidDN" %}
[Skip introduction message](/buildabot/tips-and-best-practices/skip-introduction-message)
{% endcontent-ref %}

Adapt your flow based on the specific channel to enhance user experience, and reuse flows to maintain consistency and efficiency.

{% content-ref url="/pages/q6CE5ZzdCkvo4yltO2pL" %}
[Route your flow depending on the channel](/buildabot/tips-and-best-practices/route-your-flow-depending-on-the-channel)
{% endcontent-ref %}

Connect multiple bots to each other when necessary to expand functionality and provide seamless user interactions.

{% content-ref url="/pages/-MNgoDUOjjkufkFZn8Pp" %}
[Connect two bots to each other](/buildabot/tips-and-best-practices/frequently-asked-questions)
{% endcontent-ref %}


# Route your flow depending on the time

Some examples on how to use Get time step in your bot.

This page presents two tutorials that use [Get time](/buildabot/flow-logic/dialog-state/action-bot-dialog#get-time): to route your greeting based on the time, and to route your offloading based on the time.

### Greeting

You can use the Get Time plugin to greet users in customized way, so 'good morning' and 'good afternoon'!

First, change your introduction to a 'Go To'. Then, in that Go To, link to an Action block with the Get Time plugin. In that Action block, in the Go To section, link to a new Go To 'Check Time'. This Go To will look like this:

![](https://2786867680-files.gitbook.io/~/files/v0/b/gitbook-legacy-files/o/assets%2F-LLTwFwbOqJj4dDhg8Ju%2F-MlEXbD5db7oQAUlywec%2F-MlEYKVC8YPrJ4aDH8pL%2Fimage.png?alt=media\&token=638e5de7-9d5a-47aa-b693-d2e4234c6203)

In this Go To, the current hour is checked and divided into the evening, afternoon or morning through the different conditions. Depending on the current time, the variable {greetingTime} is dynamic, so you can have one introduction for the entire day.

![](https://2786867680-files.gitbook.io/~/files/v0/b/gitbook-legacy-files/o/assets%2F-LLTwFwbOqJj4dDhg8Ju%2F-MlEXbD5db7oQAUlywec%2F-MlEcQHtGf2IE3420aNh%2Fimage.png?alt=media\&token=38e3e339-bc33-4266-ba9e-aa592aac4a11)

Where the complete flow will look like this:

![](https://2786867680-files.gitbook.io/~/files/v0/b/gitbook-legacy-files/o/assets%2F-LLTwFwbOqJj4dDhg8Ju%2F-Mkw2GWG8OziiaxOoAkk%2F-Mkw8eZBKqIvE1dfRN4u%2Fimage.png?alt=media\&token=9a10e935-f298-4739-8db6-6a00c44b9766)

### Offloading

The Get Time plugin can also be used to check whether or not you would like to start offloading to a human agent. Create a similar flow as the one above, but instead of the routing to the introduction in the Go To, route to the Offloading Open or Offloading Closed block based on the time:

![](https://2786867680-files.gitbook.io/~/files/v0/b/gitbook-legacy-files/o/assets%2F-LLTwFwbOqJj4dDhg8Ju%2F-MlEXbD5db7oQAUlywec%2F-MlEd6XKD2roN7fGBted%2Fimage.png?alt=media\&token=21aa6f75-43fd-45de-bcda-b732616d6169)

In this case, the human agents are available from 9:00 (if the hour is greater than 8) until 16:00 (if the hour is lower than 16), and the Go To checks the time based on the previous Get Time plugin and will route the users correctly!


# Improve the Not understood block

## Improve your Not understood user experience

A nice and bot-persona fitted message explaining something like 'Sorry I did not understand that' is the least your bot could do for repair.

Yet, there are several ways to make your Not understood experience even better.

### Use AI to find and generate an answer

* Use GPT to generate an answer.
* Use Knowledge base AI to retrieve an answer from your database.

### Use workarounds to continue the conversation

* Create a [counter ](https://docs.chatlayer.ai/tips-and-best-practices/not-understood-bot-dialog/not-understood-counter)where, after a certain amount of times the user sees a different 'not understood' message than the first message.
* Show the [previous](https://docs.chatlayer.ai/tips-and-best-practices/not-understood-bot-dialog/go-to-previous-bot-dialog) block after the 'not understood' message is shown.
* A specific 'not understood' message per [intent below the NLP threshold.](https://docs.chatlayer.ai/tips-and-best-practices/not-understood-bot-dialog/intent-recognition-below-threshold)
* Create a [google search](https://docs.chatlayer.ai/tips-and-best-practices/not-understood-bot-dialog/not-understood-google-search) for 'not understood' messages.


# How to create better not understood messages

By creating specific not understood messages, the bot seems smarter and gives users a much better experience.

There are a few ways to make your bot respond in a smarter way when it is unable to understand the user. What if the bot could name the topic the user was asking about, so the user at least knows the bot kinda understood, but is unable to reply? This type of bot reply can be built by tweaking the NLP Threshold score and using specific variables.

## Option 1: using the NLP Threshold

In the tutorial below, you will learn how to configure a specific 'not understood' message for whenever an expression doesn't meet the NLP threshold. In this block, the bot will try and figure out what the user meant, making the bot look smarter and helping the user find their answer faster.

See the example below: the expression "Can you check where my ordered parcel is?" both triggers a recognition rate for the intent 'lost package' and the intent 'general.no'. Since neither of those meet the 80% NLP confidence score, the bot shows a 'not understood' block.

![The confidence score is too low for the bot to recognise this expression correctly](https://2786867680-files.gitbook.io/~/files/v0/b/gitbook-legacy-files/o/assets%2F-LLTwFwbOqJj4dDhg8Ju%2F-MY4mQG5FILYONS1j6nV%2F-MY4nMsAh-wE0Erfo-Ka%2Fimage.png?alt=media\&token=11e964bc-1df8-4b4d-9e6d-e923822cfd4b)

### Step 1: Check your NLP Threshold score

In the left column, under `NLP`, click on `NLP Threshold`. There you can check what the current confidence score is of your NLP [threshold](https://docs.chatlayer.ai/understanding-users/natural-language-processing-nlp/settings). In this example, let's say we have a threshold for intents at 80%, and we would like to give a specific error message for all intent recognition between 60% and 80%.

### Step 2: Get intent variables

In the bot's debugger, we need to get the right variable so we can use it for intent recognition. To do so, open the debugger after using an expression of your choice. Underneath the title *READ-ONLY SESSION DATE*, click on `nlp` . You should see something like this:

![](https://2786867680-files.gitbook.io/~/files/v0/b/gitbook-legacy-files/o/assets%2F-LLTwFwbOqJj4dDhg8Ju%2F-MY4mQG5FILYONS1j6nV%2F-MY4pMDXV8YnaF-ALrf3%2Fimage.png?alt=media\&token=341b6322-33ad-4ee0-8324-c5b040e54c46)

The variables we need for a confidence score over 60% and for the name are:

`internal.nlp.intent.score`

`internal.nlp.intent.name`

### Step 3: Configure the 'Not Understood' block

Now we need to change the 'not understood' block into a Condition block:

![Click on Go To to convert this block into a Condition block.](https://2786867680-files.gitbook.io/~/files/v0/b/gitbook-legacy-files/o/assets%2F-LLTwFwbOqJj4dDhg8Ju%2F-MY4mQG5FILYONS1j6nV%2F-MY4omM3i1Cc6P0UfPNZ%2Fimage.png?alt=media\&token=cda8a3c8-10d1-40c1-b72f-50badb022897)

Then we need to create a rule for the specific intent. Let's create a rule for the 'lost package' intent:

![](https://2786867680-files.gitbook.io/~/files/v0/b/gitbook-legacy-files/o/assets%2F-LLTwFwbOqJj4dDhg8Ju%2F-MY4mQG5FILYONS1j6nV%2F-MY4qOHyE1DDHjgHu5e7%2Fimage.png?alt=media\&token=2a516542-b888-4a89-8022-de5de40b884c)

Here, we will create two new bot messages: One specifically for expressions related to lost packages, and a general one, for all other intents that were not understood correctly.

### Step 4: Fill in the bot messages

Write some text in the bot messages, such as:

* Specific not understood message:\
  "Do I understand correctly that you have a question about your lost package?"
* General not understood message:\
  "Sorry, I did not understand. Can you please rephrase?"

### Step 5: Test your bot

Let's try again the sentence we used at the beginning of this tutorial:

![](https://2786867680-files.gitbook.io/~/files/v0/b/gitbook-legacy-files/o/assets%2F-LLTwFwbOqJj4dDhg8Ju%2F-MY4mQG5FILYONS1j6nV%2F-MY4rCAdf8Vdwupt8Lwk%2Fimage.png?alt=media\&token=1692a54c-8561-456c-80dd-38b53a792dae)

It works! As you can see, the intent is still not recognised correctly (above 80% confidence score) but the user feels better understood this way. When they reply 'yes' to this message (use context!) they can immediately start the 'lost package' flow, without having to rephrase their question.

This creates a much better user experience than before you applied the steps in this tutorial!

### How to scale this set-up

This tutorial is a great alternative for when you don't want to lower your overall NLP confidence score, or for when bots don't have a lot of expressions (yet). Be aware that these steps need to be implemented separately for each intent in order to create specific 'not understood' blocks.

To check which intent is recognized under what score, check out the `Train tab` under the `NLP` section. There you can see which intents are used most by users, which gives you an indication which intents need extra expressions, or a specific 'not understood' message.

## Option 2: Using variables

Another option to create specific 'not understood' messages is to use variables. Many bots have a set-up like below, where you can add variables to buttons or Go-Tos to save the route users have taken in the bot:

![In the example above, the variable 'topic' saves the route the user has taken in the bot](https://2786867680-files.gitbook.io/~/files/v0/b/gitbook-x-prod.appspot.com/o/spaces%2F-LLTwFwbOqJj4dDhg8Ju%2Fuploads%2FtWKhSviN29KvbTthZmHW%2Fimage.png?alt=media\&token=9cf352bf-87b1-4731-ae8b-f74b82183f19)

Then, change your 'not understood' in a 'Go To' (see step 3 in the tutorial above) and create a logic as such:

![](https://2786867680-files.gitbook.io/~/files/v0/b/gitbook-x-prod.appspot.com/o/spaces%2F-LLTwFwbOqJj4dDhg8Ju%2Fuploads%2FABXI5RHIUdqdFA7EMLBY%2Fimage.png?alt=media\&token=6ec3da97-9588-4c07-8303-6035265f6567)

Make sure to fill in your specific not understood bot messages, just like in Step 4 of the previous tutorial. After that, you are all set to give users a smarter 'not understood' experience!


# Not understood counter

A good 'not understood' handling is key to a good bot experience. Learn how to set up this counter in the article below.

Instead of always showing the same `not understood` message, you can create a counter to show different messages, depending on how often the not understood block is triggered. For example, when the bot doesn't understand the user for the first time, it will display the first not understood message:

"Sorry, I didn't get that. Can you please rephrase?"

After the user has sent another message and the bot didn't understand a second time, it will display the second not understood message, offering an external way out:

"Sorry, I still don't understand. Perhaps you'd like to talk to my colleague instead?"

Or "Sorry, I still don't understand. Perhaps you'd like to email us instead?"

This counter set-up creates a better user experience and makes the bot appear much smarter. Ready to get started? Let's go! 👏

## 1. Change the block type

Step 1: Click on the 'not understood' Message block and in the list under 'Type', select 'Go To'

![](https://2786867680-files.gitbook.io/~/files/v0/b/gitbook-legacy-files/o/assets%2F-LLTwFwbOqJj4dDhg8Ju%2F-MlGS7YFbudxeurSOFrh%2F-MlGS9wzyTmsqJzeLUCl%2Fimage.png?alt=media\&token=8b5efaa6-41c7-4610-b4e2-466e3b2367d8)

## 2. Set the first condition in the Condition block

For the next step, we are going to set the counter conditions so the bot knows how often this block was triggered already.

For the first condition, we want to check if the 'not understood message' block was triggered already once. To do so, copy and paste the variable ***not\_understood\_counter*** in the left field. Click on 'create' to create the variable.

Then in the middle field, select `equals` in the drop down menu.

In the field on the right, we'll put **1** – This tells the bot that the first not understood block was displayed already and that it's time to display the second not understood block.

![](https://2786867680-files.gitbook.io/~/files/v0/b/gitbook-x-prod.appspot.com/o/spaces%2F-LLTwFwbOqJj4dDhg8Ju%2Fuploads%2F0nMJ8R5CV9Q3GYjM0rjh%2Fimage.png?alt=media\&token=77781aaa-6648-4315-af86-f5ba6ee70357)

## 3. Set the final condition in the Condition block

For the second and final condition, we're creating the actual counter.

Under Else, type ***Not understood x 1*** and click 'create' to create the variable.

Next, click `+ Add Variable` to add a variable and value. In the middle field, add the variable ***not\_understood\_counter***. In the field on the right, add the [increment value](https://docs.chatlayer.ai/bot-answers/settings/secure-variables-gdpr#incrementing-variable-counter) ***{not\_understood\_counter|increment}***

![](https://2786867680-files.gitbook.io/~/files/v0/b/gitbook-x-prod.appspot.com/o/spaces%2F-LLTwFwbOqJj4dDhg8Ju%2Fuploads%2FuQLZaFOQRPVG24p6QpH4%2Fimage.png?alt=media\&token=127c1e09-c09a-4200-a26d-188b1d5a6174)

Save your set-up by clicking the `Save` button on the bottom right.

The entire Condition block should look like this:

![](https://2786867680-files.gitbook.io/~/files/v0/b/gitbook-x-prod.appspot.com/o/spaces%2F-LLTwFwbOqJj4dDhg8Ju%2Fuploads%2FVsmo7GYhiL580T748ifJ%2Fimage.png?alt=media\&token=25f39e33-2025-4ac9-a4a5-a7a33085ba4a)

## 4. Write the bot messages

After saving your Condition block and closing it, the flow should look like this:

<img src="https://2786867680-files.gitbook.io/~/files/v0/b/gitbook-x-prod.appspot.com/o/spaces%2F-LLTwFwbOqJj4dDhg8Ju%2Fuploads%2FFJ1KJDsPNiFMGH1QJk0q%2Fimage.png?alt=media&amp;token=68ed500e-4a37-4505-bd1f-addf4cf28df7" alt="" data-size="original">

Now it's time to write the copy for both blocks. Here's some inspiration for the first message that will be displayed – the 'Not understood x 1' block:

* Sorry, I didn't get that. Can you please rephrase?
* Hmm, I can't understand. Can you use different words? Perhaps I'll get it then!
* I didn't understand, please try once more

For the second and final message, the 'Not understood x 2' block, you can write something like this:

* Sorry, I still can't understand. Perhaps you'd like to talk to my human colleague instead?
* Sorry, I can't seem to understand. Would you like to call us instead?
* Sorry, I can't seem to understand. Perhaps it's better if you email us your question

That's it, all done! You just created a user-friendly way of telling the user the bot didn't understand 👏


# Not understood Google search

What if a user asks a question that is outside of the bot's scope? Or what if your bot can't understand the user input? One of the things you can do is show a 'not understood' block message, which usually leads to an offloading action. It works well, but what if there's a more user-friendly way for the user to still get the answer to their question without offloading or leaving the bot?

This tutorial will show you how to create a **search engine lookup** on your own website using the user input from your chatbot! We will walk you through the steps of creating a lookup search on your website, using Google's 'Programmable Search'.

For example, the user asks about 'opening hours' in the chatbot. However, this is not recognized because there isn't such an intent in the bot. So, the bot will go to 'not understood'. Then, a search will be done on your website using the input. Google will search for '{your website} + opening hours' and show the first five results in a carousel in the chatbot.

![An example of the 'Not understood' lookup functionality using the Chatlayer docs.](https://2786867680-files.gitbook.io/~/files/v0/b/gitbook-legacy-files/o/assets%2F-LLTwFwbOqJj4dDhg8Ju%2F-MPhQV5mxalhaL6KYMiC%2F-MPhUlIT_sqRzKAtIwfE%2Fimage.png?alt=media\&token=281be87d-6a0a-4b47-bc96-b71c7e5ff4f8)

## Google Programmable Search

With Google Programmable Search you can include a search engine on a website you specified. We will use this (free) feature of Google for this tutorial. First, create a new search engine [here ](https://programmablesearchengine.google.com/cse/create/new)for your website. Simply add your website or the webpages where you want to search and click save.

For this tutorial, you need the [GoogleAPI key ](https://developers.google.com/custom-search/v1/introduction)and your search engine ID.

![](https://2786867680-files.gitbook.io/~/files/v0/b/gitbook-legacy-files/o/assets%2F-LLTwFwbOqJj4dDhg8Ju%2F-MPhQV5mxalhaL6KYMiC%2F-MPhU8qvQOYMrH12dJte%2Fimage.png?alt=media\&token=0ff5224b-ccc5-4f18-984e-20a37efca819)

## Action block Expression Lookup

Now we can put the *Lookup* with the information of the Google Engine in an *Action* block in the chatbot:

Add the following arguments to your Action block:

* NLP: this is the variable what we are looking for, so the input the user has given and resulted in a 'not understood'
* googleAPIKey: this you retrieved using the link mentioned above
* googleEngine: The 'Search engine ID' on the search engine page above

![](https://2786867680-files.gitbook.io/~/files/v0/b/gitbook-legacy-files/o/assets%2F-LLTwFwbOqJj4dDhg8Ju%2F-MPhQV5mxalhaL6KYMiC%2F-MPhWqHsC0n7nPsAbOPJ%2Fimage.png?alt=media\&token=7b6ea9a0-e89c-4eb5-ba7d-4ba58793250c)

Once that's done, add the following code in the same Action block. In line 15, paste a fallback image there, for example your company logo. This image will be shown in the carousel if the search does not retrieve an image.

```javascript
const { nlp, googleEngine, googleAPIKey } = args;

const { expression } = nlp;

const url = `https://www.googleapis.com/customsearch/v1?key=${googleAPIKey}&cx=${googleEngine}&q=${expression}`;

const searchResult = await fetch(url).then(res => res.json());

const elements = _.get(searchResult, 'items', [])
  .slice(0, 5)
  .map(result => {
    const imageUrl = _.get(
      result,
      'pagemap.cse_thumbnail[0].src',
      'https:// {your image here} .png'
    );
    return {
      title: result.title,
      subTitle: result.snippet,
      ...(imageUrl ? { imageUrl } : {}),
      buttons: [
        {
          title: result.title,
          type: 'web_url',
          url: result.link,
          payload: {},
        },
      ],
    };
  });

const builder = ChatlayerResponseBuilder();

if (elements.length) {
  builder.addCarousel(elements);
} else {
  builder.addMessage('Nothing found!');
}

builder.send();

```

This code block already takes care of the carousel, so there's no need to add an extra Message block. Now the final thing to do is link this to the 'Not understood' bot message:

* Change the text message with {internal.nlp.expression}, so the user input is shown in the 'not understood' message
* Add a 'Go to' to link the Lookup Action block to 'Not understood'

![](https://2786867680-files.gitbook.io/~/files/v0/b/gitbook-legacy-files/o/assets%2F-LLTwFwbOqJj4dDhg8Ju%2F-MPhXAB6xbyU6GYc-EUk%2F-MPhY37MW9AKsPN-OuVp%2Fimage.png?alt=media\&token=62428774-a435-4f2c-aaae-1eff2ce14830)

You can also add the offloading message after the lookup, to make sure the user can get the answer from a human agent if the answer is not sufficient.

And that's it! You just created a more user-friendly 'not understood' message!


# Go to previous block

Usually, when a user asks a question, and this is not understood, they see a message like 'I did not understand'. To refresh the user's memory, you can repeat the last block again to the user, as shown below:

![](https://2786867680-files.gitbook.io/~/files/v0/b/gitbook-legacy-files/o/assets%2F-LLTwFwbOqJj4dDhg8Ju%2F-MX1uvBXpHgAPXxjW-Li%2F-MX2PScKajnYaSgwAVAE%2Fimage.png?alt=media\&token=7b593cb6-038d-496e-8f85-844ef9ce018f)

What we see here is that the introduction has been created, and then the bot does not understand the user input 'test'. Then, after the 'not understood' message, the same message from before is shown again. This creates a full user experience and conversation flow. How to set this up is explained below:

## 1. Add variable to 'not understood'

In the 'not understood' bot message, create a new variable as shown below:

![](https://2786867680-files.gitbook.io/~/files/v0/b/gitbook-legacy-files/o/assets%2F-LLTwFwbOqJj4dDhg8Ju%2F-MX1uvBXpHgAPXxjW-Li%2F-MX2PwV-U1Bfu4lym7xE%2Fimage.png?alt=media\&token=03338377-a9f1-4d3e-83f9-4312ec50d043)

Also make sure that the 'Go to' section of this block goes to a new Action block, called 'Go to previous block' in this case.

## 2. Create an Action block

In the 'Go to previous block' action, create the following:

![](https://2786867680-files.gitbook.io/~/files/v0/b/gitbook-legacy-files/o/assets%2F-LLTwFwbOqJj4dDhg8Ju%2F-MX1uvBXpHgAPXxjW-Li%2F-MX2QEhKU8uI3RoDGtw2%2Fimage.png?alt=media\&token=f1e650c8-4f5f-4a26-890d-b52202e57853)

This makes sure that the bot goes to the previous block, using the variable that is set in the 'not understood' bot message. The code can be copied from below:

```javascript
const { prevDialog } = args;

ChatlayerResponseBuilder()
.setNextDialogState(args.prevDialog)
.send() 
```

Make sure to test out your new configuration in the emulator.

And that's it! With just two simple steps you have created a better 'not understood experience'. Make sure to also check out the other [articles ](https://docs.chatlayer.ai/tips-and-best-practices/not-understood-bot-dialog)written about the 'not understood' block.


# Recognizing a returning user

A good bot makes users feel as if they're talking to another human. So when a user already talked to the bot, and your bot starts the next conversation as if it never met that same user before, the conversation feels a lot less natural and the bot appears dumb for not remembering this user.

That is why our platform allows you to recognise and greet returning users differently, by using saved variables from previous sessions.

{% hint style="info" %}
Not all channels save variables the same way.

Facebook Messenger saves them indefinitely, but by default, the Web Widget only saves variables for the duration of the session (unless authentication of unique users is built in).
{% endhint %}

## Step 1: How to convert your introduction into a Condition block

By now you should know that every conversation starts with the introduction block:

![The introduction block kicks off every conversation](https://2786867680-files.gitbook.io/~/files/v0/b/gitbook-legacy-files/o/assets%2F-LLTwFwbOqJj4dDhg8Ju%2F-Ma4L_lluGmkPVJDRD-j%2F-Ma4NcirVDbnjVzW_QcI%2Fimage.png?alt=media\&token=1d5d960c-67d5-46ed-bd33-d74b88381e3a)

By default, the introduction block is a `Bot message` where you can greet the user and start the conversation:

![](https://2786867680-files.gitbook.io/~/files/v0/b/gitbook-legacy-files/o/assets%2F-LLTwFwbOqJj4dDhg8Ju%2F-LWzhdWq15Pq0myyGeUj%2F-LWzjXu7IwIMMTlyLlR1%2FSchermafbeelding%202019-01-24%20om%2010.56.17%20kopie.png?alt=media\&token=b609982a-e907-4e14-bf49-493aea5aa258)

However, instead of greeting the user right away, you can use this block to first check if the bot has talked to this specific user before. To do so, you can the introduction bot message into a go-to message:

![Under 'Type', select 'go to' to convert the block into a Condition](https://2786867680-files.gitbook.io/~/files/v0/b/gitbook-legacy-files/o/assets%2F-LLTwFwbOqJj4dDhg8Ju%2F-LWzhdWq15Pq0myyGeUj%2F-LWzjbNO0kjxfGfha6hW%2FSchermafbeelding%202019-01-24%20om%2011.17.12.png?alt=media\&token=19c7fa29-af3d-4df3-b83d-1d90ab83586e)

{% hint style="info" %}
If you already wrote some text in the introduction block, you will lose it when converting the message into a go-to. We recommend creating a new bot message where you copy the text into, so you don't lose it.
{% endhint %}

## Step 2: How to identify a returning user

By using the variable `known_user_flag`, the bot can check whether it has talked to this specific user before, and redirect them to a personalised introduction.

To do so, you'll need to create an 'if-statement':

* If `known_user_flag` equals `1`, the bot knows that there has been a conversation with this user before, otherwise this variable would be empty. Now the user can be redirected to an introduction message for returning users.
* Else if `known_user_flag` does not exist, the user is a new user and should be redirected to an introduction for new users. At the same time, you should set the `known_user_flag` to `1` because now, the user is not new anymore.

![Setting the 'known\_user\_flag' variables to recognise a returning user](https://2786867680-files.gitbook.io/~/files/v0/b/gitbook-legacy-files/o/assets%2F-LLTwFwbOqJj4dDhg8Ju%2F-Ma4L_lluGmkPVJDRD-j%2F-Ma4MelYW03KclQR6E0K%2Fimage.png?alt=media\&token=7280198e-1f68-483b-ba44-cc364fb40fd7)

![Creating 2 different introductions: one for new, and one for returning users](https://2786867680-files.gitbook.io/~/files/v0/b/gitbook-legacy-files/o/assets%2F-LLTwFwbOqJj4dDhg8Ju%2F-LWzhdWq15Pq0myyGeUj%2F-LWzkCjYLrAGNK3QnSLq%2FSchermafbeelding%202019-01-24%20om%2011.39.38.png?alt=media\&token=583991d1-5673-4c9b-bce6-a6043f7fcab1)

## Step 3: How to create a personalised flow, using known variables

Using a personalised introduction for returning users already creates a great user experience:

![The bot seems smart because it recognises the user](https://2786867680-files.gitbook.io/~/files/v0/b/gitbook-legacy-files/o/assets%2F-LLTwFwbOqJj4dDhg8Ju%2F-LWzhdWq15Pq0myyGeUj%2F-LWzkH9qK3-hcPylyzRn%2FSchermafbeelding%202019-01-24%20om%2011.49.51.png?alt=media\&token=14bdfce1-468e-4ea6-8251-cb49318989a1)

However, you can take the conversation to the next level by using other known variables from previous sessions.

For example, the Choo Choo bot can reuse the values 'origin' and 'destination' from previous user conversations to suggest a new and personalised journey.

Before you can use any values, you'll first need to check whether any have been saved already:

![Setting up a go-to to recognise previously saved values](https://2786867680-files.gitbook.io/~/files/v0/b/gitbook-legacy-files/o/assets%2F-LLTwFwbOqJj4dDhg8Ju%2F-LWzhdWq15Pq0myyGeUj%2F-LWzkMLLcmx06yDjwsq9%2FSchermafbeelding%202019-01-24%20om%2012.06.50.png?alt=media\&token=749ef939-db17-49ee-af3b-20f0daf85b0f)

...and if these values indeed exist, the bot needs to redirect to a specific dialog, using these known variables:

![What a great experience, this bot knows what I did last time!](https://2786867680-files.gitbook.io/~/files/v0/b/gitbook-legacy-files/o/assets%2F-LLTwFwbOqJj4dDhg8Ju%2F-LWzhdWq15Pq0myyGeUj%2F-LWzkJR9bPy2FtvtWoQ-%2FSchermafbeelding%202019-01-24%20om%2012.03.20.png?alt=media\&token=4d97b7f1-5c4a-46f2-81c0-c07696b3ff44)

This way, previously saved variables can create a truly personalised experience for returning users and make your bot look super duper smart 🤓


# Skip introduction message

Let's say, you have created your amazing Taco bot on Facebook. To make sure that users have the best experience possible, you are optimizing the first introduction that users see in the bot.

![At the moment, users see the 'Get started' button, and after clicking the introduction message shows.](https://2786867680-files.gitbook.io/~/files/v0/b/gitbook-legacy-files/o/assets%2F-LLTwFwbOqJj4dDhg8Ju%2F-Mkl5DQEHkpw33kwIgUr%2F-Mkl7G9BYBMnC-XQPsF4%2Fimage.png?alt=media\&token=423c7afd-4be2-45aa-acc9-a63fba55cdd5)

Wouldn't it be great if the user can immediately start typing their question, without having to click the button and wait for the introduction?

![With the new situation, where the user gets the information they need quicker!](https://2786867680-files.gitbook.io/~/files/v0/b/gitbook-legacy-files/o/assets%2F-LLTwFwbOqJj4dDhg8Ju%2F-MkrxlKrXI5BpfX9K3n7%2F-MkrxuyuT8nDAIJRteTp%2Ftaco2.png?alt=media\&token=89bf7f9b-804c-4634-89e2-c2e7b218b8a8)

That is now possible! This article will explain the ins and outs of this feature.

## How does it work

Chatlayer will check in the first message that is sent to the bot to see if the platform can recognize an intent above the NLP threshold.

* If an intent is recognized above the NLP threshold > that linked block will trigger
* If an intent is not recognized above the NLP threshold > the bot will show the introduction message

{% hint style="warning" %}
Please note that this only works for newly created bots. Have you followed all steps and this does not work for your bot? It could be that your bot is an 'older' bot. [Contact Support](mailto:support@chatlayer.ai) and we are happy to help!
{% endhint %}

### For which channels

Some channels, such as the web widget, are initiated by the bot. Chatlayer will send the introduction message to the user when the user opens the widget or when it auto-opens, and the user will state they question and the correct flow is triggered.

However, with channels such as Whatsapp or Instagram, the conversation is initiated by the user. The user will send a question to the bot, and that is how the conversation starts. This difference in conversation initialisation is important for this functionality, seeing it cannot be used for all channels.

The following channels have conversations that are initiated by the user:

* Whatsapp
* Facebook Messenger
* Facebook Workplace
* Webhook
* Sparkcentral
* SMS
* Instagram
* Telegram

Is your channel not listed here? All channels expect voice and web are usually able to be initiated by the user. If you are not sure, do not hesitate to contact Support.

### Optimize your introduction further

Want to give your users an even better first experience with your bot? Or are you not able to use this feature because you are using the web widget?

You can personalize the introduction by [greeting the user with their name](https://docs.chatlayer.ai/tutorials-1/how-to-recognize-a-returning-bot-user), [creating a greeting based on the time of the day](https://docs.chatlayer.ai/tutorials-1/using-time-in-your-chatbot#examples) or[ set the right expectations for the user](https://docs.chatlayer.ai/tips-and-best-practices/what-makes-a-good-chatbot#2-set-the-right-expectations).


# Route your flow depending on the channel

Use a Condition block to route your flow depending on the channel that your customer is using.

## Multi-channel

Chatlayer.ai allows you to connect one bot to multiple channels at the same time.

If you want your users to follow a different flow based on the channel they are using, you can use our multi-channel functionality. To do this, add a [Go To](/buildabot/flow-logic/dialog-state/plugins) to the point in your flow where you wish to diverge, based on the channel.

Within this 'Go To', guide the user based on the `internal.channel` variable, which contains the channel variable. In the image below you can see a bot that is connected to Facebook Messenger and Web chat; in order to offer the best experience in each channel, it diverts the users to the channel-specific flow by creating a condition: if internal.channel variable equals "facebook", create a 'Go To' to the Facebook flow; if not (else if), create a 'Go To' to the Web flow:

![](https://2786867680-files.gitbook.io/~/files/v0/b/gitbook-x-prod.appspot.com/o/spaces%2F-LLTwFwbOqJj4dDhg8Ju%2Fuploads%2FCwDZ0mI7WYDET0XLZNdw%2Fimage.png?alt=media\&token=f7f02654-9ba9-447c-9cd7-ad46a53f5f72)

The values for `internal.channel` correspond to the channel names:

| Channel name                                                                                                   | values for internal.channel |
| -------------------------------------------------------------------------------------------------------------- | --------------------------- |
| All channels managed through the Sinch Conversation API (SMS, RCS, WhatsApp, Viber, Instagram, Telegram, LINE) | sinchConversationAPI        |
| Amazon                                                                                                         | amazon                      |
| App integration channel (at the moment: Freshdesk Messaging webchat)                                           | AppIntegrationChannel       |
| Chat widget                                                                                                    | web                         |
| Facebook Messenger                                                                                             | facebook                    |
| Facebook Workplace                                                                                             | facebookWorkplace           |
| Google Home                                                                                                    | googleHome                  |
| Intercom                                                                                                       | intercom                    |
| Phone (through legacy CM.com)                                                                                  | cmPhone                     |
| Sinch Contact Pro                                                                                              | SinchInboxBotChannel        |
| Sinch Voice                                                                                                    | SinchVoiceBotChannel        |
| Sparkcentral                                                                                                   | SparkcentralBotChannel      |
| Voice (through legacy CM.com)                                                                                  | voice                       |
| Webhook                                                                                                        | webHook                     |
| Whatsapp (through legacy CM WhatsApp)                                                                          | whatsapp                    |
| WhatsApp through ACL                                                                                           | ACLWhatsappBotChannel       |
| WhatsApp through Wavy                                                                                          | WavyWhatsappBotChannel      |
| Zendesk                                                                                                        | ZendeskChatBotChannel       |


# Reuse flows

For a lot of bots built on our platform, the answer to a user's question depends on the information you know about that user. This information, such as which type of customer they are, which sort of subscription they have and so on, can be gathered through an API, but also directly in the flow itself.

For example:

![](https://2786867680-files.gitbook.io/~/files/v0/b/gitbook-legacy-files/o/assets%2F-LLTwFwbOqJj4dDhg8Ju%2F-M-PNa6rOLEe5yFVi-fF%2F-M-PYFB2IB3unvAYCRut%2Fimage.png?alt=media\&token=e3915aaf-7a62-4e81-92fa-2441787cddf0)

In the flow above, the answer to the user's question depends on the type of customer they are. However, the customer type is important for the answer to a lot of different questions a user might have. We don't want to show the same question every time our user asks a question like this. Instead we want to store that in one place.

In this tutorial, you will learn how to create a reusable flow, how to trigger it, and how to return to the original point in the flow.

1. Create a block that links to an intent that needs a specific answer. Link this block with a 'Go To' to the flow you want to reuse. Add a variable of the type block and give it a name, like "reuseFlow." and link to a block to return to once the flow is finished.

{% hint style="info" %}
You can create two types of variables on our platform: text variables, which allow you to store data in the session of the user, and block variables, that allow you to store a variable.\
Read more about variables [here](broken://pages/-LLTwJA9WiK4ksc3r6ZI).
{% endhint %}

![](https://2786867680-files.gitbook.io/~/files/v0/b/gitbook-legacy-files/o/assets%2F-LLTwFwbOqJj4dDhg8Ju%2F-M-PNa6rOLEe5yFVi-fF%2F-M-PjFY_o5Sm_fFPmZK_%2Fimage.png?alt=media\&token=5dbbb43b-b75c-40ef-85d9-7677cb438ef6)

2\. Create the flow you want to reuse and gather the variables you need from the customer

3\. Add the end of this flow, add a new 'Action' block, and add a 'Go to variable block' plugin. Fill in the block variable to return to in this flow

![](https://2786867680-files.gitbook.io/~/files/v0/b/gitbook-x-prod.appspot.com/o/spaces%2F-LLTwFwbOqJj4dDhg8Ju%2Fuploads%2Fgit-blob-e5beea48b0d785496a614e58731ff2673899c5ce%2Fscreen-recording-2020-02-06-at-14.53.00.gif?alt=media)

4\. When a user reaches this part of the flow, they will return to the original block that was defined in the reuseFlow variable.

The flow used in the example above looks like this:

![](https://2786867680-files.gitbook.io/~/files/v0/b/gitbook-legacy-files/o/assets%2F-LLTwFwbOqJj4dDhg8Ju%2F-M-PNa6rOLEe5yFVi-fF%2F-M-PonJLTxK3F7fnfTK4%2Fimage.png?alt=media\&token=9a3a695f-b339-437f-8e4e-27e2337be8b8)


# Connect two bots to each other

## Is it possible to connect two bots to each other?

In general, our advice is to try to centralize as much information within one bot, as long as the target audience & broad use case for that bot remains the same.

However, if for whichever reason, it is important of having two bots talking to the user within the same conversation, there are a few possibilities for achieving this.

* If you use the chatlayer web widget you could send an 'event' to the web application to indicate that the user should be connected to another bot. This is only possible with the Web & Webhook channel.
* Option 2 is to use the Webhook channel, however this requires some custom implementation. In this case you could host a proxy service that feeds messages from the different channels to Chatlayer.ai. In this proxy service you can decide per incoming message at which bot you want to ask for an answer. Option 2 is a more advanced use case, and therefore not very common, but there are some bots within our platform that work this way. There is currently no out of the box solution that allows cross-channel switching between bots.


# Natural language processing (NLP)

These docs give an insightful tour guide on what is Natural Language Processing and how you can make the most of it on Chatlayer.

<figure><img src="https://2786867680-files.gitbook.io/~/files/v0/b/gitbook-x-prod.appspot.com/o/spaces%2F-LLTwFwbOqJj4dDhg8Ju%2Fuploads%2FPtoq4GHDgA240eWo7d9D%2FScreenshot%202024-08-14%20at%2014.41.09.png?alt=media&amp;token=309e87fe-09e5-42c0-a992-19c6eac8a846" alt=""><figcaption></figcaption></figure>

## Start with NLP

<table data-view="cards"><thead><tr><th></th><th></th><th></th><th data-hidden data-card-target data-type="content-ref"></th><th data-hidden data-card-cover data-type="files"></th></tr></thead><tbody><tr><td><strong>NLP navigation</strong></td><td>Get familiar with all tabs under your NLP menu.</td><td></td><td><a href="/navigation/natural-language-processing-nlp">NLP</a></td><td><a href="https://2786867680-files.gitbook.io/~/files/v0/b/gitbook-x-prod.appspot.com/o/spaces%2F-LLTwFwbOqJj4dDhg8Ju%2Fuploads%2FRib1s0kfxFzF0kv6BIRE%2FScreenshot%202024-08-28%20at%2011.04.30.png?alt=media&amp;token=b1d4b18e-c299-409a-ac21-daeafcd45e27">Screenshot 2024-08-28 at 11.04.30.png</a></td></tr><tr><td><strong>Concepts</strong></td><td>All the basics to get started.</td><td></td><td><a href="/nlp/natural-language-processing-nlp/basic-nlp-concepts">Basic NLP concepts</a></td><td><a href="https://2786867680-files.gitbook.io/~/files/v0/b/gitbook-x-prod.appspot.com/o/spaces%2F-LLTwFwbOqJj4dDhg8Ju%2Fuploads%2FJL2f5vWkrhjMBrco9HCu%2FScreenshot%202024-08-28%20at%2010.30.51.png?alt=media&amp;token=5d7e662d-b9d8-46cf-8d43-7516e47d1007">Screenshot 2024-08-28 at 10.30.51.png</a></td></tr><tr><td><strong>Entities</strong></td><td>Detect precious info in the conversation.</td><td></td><td><a href="/nlp/natural-language-processing-nlp/detect-information-with-entities">Detect information with entities</a></td><td><a href="https://2786867680-files.gitbook.io/~/files/v0/b/gitbook-x-prod.appspot.com/o/spaces%2F-LLTwFwbOqJj4dDhg8Ju%2Fuploads%2F2GS1rEfMdRnjySsUHVgT%2FScreenshot%202024-08-28%20at%2010.31.27.png?alt=media&amp;token=490f0bf0-2ffb-4b53-9c4a-95840bd81284">Screenshot 2024-08-28 at 10.31.27.png</a></td></tr><tr><td><strong>Best practices</strong></td><td>Tips to make a strong NLP model.</td><td></td><td><a href="/nlp/natural-language-processing-nlp/how-to-nlp">NLP best practices</a></td><td><a href="https://2786867680-files.gitbook.io/~/files/v0/b/gitbook-x-prod.appspot.com/o/spaces%2F-LLTwFwbOqJj4dDhg8Ju%2Fuploads%2FhWdGk6mG6kQc2z0QFLg7%2FScreenshot%202024-08-26%20at%2014.38.32.png?alt=media&amp;token=36e3a7bd-76a7-4a91-920b-347e18a3d82f">Screenshot 2024-08-26 at 14.38.32.png</a></td></tr><tr><td><strong>Train your NLP</strong></td><td>Teach your model to recognize new expressions.</td><td></td><td><a href="/nlp/natural-language-processing-nlp/train-your-nlp">Train your NLP</a></td><td><a href="https://2786867680-files.gitbook.io/~/files/v0/b/gitbook-x-prod.appspot.com/o/spaces%2F-LLTwFwbOqJj4dDhg8Ju%2Fuploads%2FNJU7dynxvsiLYHYwtMIY%2FScreenshot%202024-08-28%20at%2010.33.31.png?alt=media&amp;token=8126a58c-cbe2-453a-a942-4fd47fd3c8a0">Screenshot 2024-08-28 at 10.33.31.png</a></td></tr></tbody></table>

## Go further

<table data-view="cards"><thead><tr><th></th><th></th><th></th><th data-hidden data-card-target data-type="content-ref"></th><th data-hidden data-card-cover data-type="files"></th></tr></thead><tbody><tr><td><strong>AI intent booster</strong></td><td>Your best way to make a small bot smarter.</td><td></td><td><a href="/nlp/natural-language-processing-nlp/ai-intent-booster">AI intent booster</a></td><td><a href="https://2786867680-files.gitbook.io/~/files/v0/b/gitbook-x-prod.appspot.com/o/spaces%2F-LLTwFwbOqJj4dDhg8Ju%2Fuploads%2FIGdG91Y4Fz6MQhTz0CG6%2FScreenshot%202024-08-28%20at%2010.36.13.png?alt=media&amp;token=519f2edc-1b19-4459-8512-a18352763d89">Screenshot 2024-08-28 at 10.36.13.png</a></td></tr><tr><td><strong>Context</strong></td><td>To use the same intent in different situations.</td><td></td><td><a href="/nlp/natural-language-processing-nlp/using-context">Context</a></td><td><a href="https://2786867680-files.gitbook.io/~/files/v0/b/gitbook-x-prod.appspot.com/o/spaces%2F-LLTwFwbOqJj4dDhg8Ju%2Fuploads%2FTz2AQTwTSxnrhzSu5ZuR%2FScreenshot%202024-08-28%20at%2010.36.54.png?alt=media&amp;token=169f82c4-8317-4ea7-985a-fe84839b43a3">Screenshot 2024-08-28 at 10.36.54.png</a></td></tr><tr><td><strong>NLP import/export</strong></td><td>To work on your NLP outside of Chatlayer.</td><td></td><td><a href="/nlp/natural-language-processing-nlp/nlp-import-and-export">NLP import &amp; export</a></td><td><a href="https://2786867680-files.gitbook.io/~/files/v0/b/gitbook-x-prod.appspot.com/o/spaces%2F-LLTwFwbOqJj4dDhg8Ju%2Fuploads%2FikwMwF13xGM4qp7CEFMP%2FScreenshot%202024-08-28%20at%2010.09.47.png?alt=media&amp;token=b3790eb6-b7fa-4f62-b9a8-89c452ff9deb">Screenshot 2024-08-28 at 10.09.47.png</a></td></tr><tr><td><strong>Sentiment analysis</strong></td><td>To redirect the conversation based on the user's sentiment.</td><td></td><td><a href="/nlp/natural-language-processing-nlp/sentiment-analysis">Sentiment analysis</a></td><td><a href="https://2786867680-files.gitbook.io/~/files/v0/b/gitbook-x-prod.appspot.com/o/spaces%2F-LLTwFwbOqJj4dDhg8Ju%2Fuploads%2FhYB5uvHneq4BJcvghRZJ%2FScreenshot%202024-08-28%20at%2010.38.50.png?alt=media&amp;token=dd70b508-03c0-49fc-9ab1-4e28a3573f8f">Screenshot 2024-08-28 at 10.38.50.png</a></td></tr></tbody></table>


---

[Next Page](/llms-full.txt/1)